That tiny star-shaped crack in your windshield might seem harmless now, but every bump in the road and temperature swing is working against you. What starts as a quarter-sized chip can spiderweb across your entire field of vision in a heartbeat, turning a $50 DIY fix into a $500 professional replacement. The good news? Modern windshield repair kits have evolved from glorified super glue tubes to sophisticated systems that can restore structural integrity and optical clarity—if you know what you’re looking for. The resin versus epoxy debate sits at the heart of this decision, and understanding the chemistry, application methods, and real-world performance differences will save you both money and frustration.
Whether you’re a weekend warrior who tackles every car maintenance challenge or someone simply looking to stop damage from spreading before your next inspection, choosing the right repair kit requires more than comparing price tags. The market is flooded with options promising professional results, but the difference between a repair that lasts for years and one that yellows and leaks within months comes down to material science, tool precision, and technique. Let’s dissect what actually matters when you’re standing in the automotive aisle or scrolling through endless online listings.
Top 10 Windshield Repair Kit
Detailed Product Reviews
1. Rain-X 600001 Windshield Repair Kit - Quick and Easy Durable Resin Based Windshield Repair Kit for Chips and Cracks, Good for Round Damage Below 1" in Diameter and Cracks Smaller Than 12" in Length

Overview: The Rain-X 600001 Windshield Repair Kit offers a budget-friendly solution for minor windshield damage. Designed to address chips under 1 inch and cracks shorter than 12 inches, this kit provides a straightforward approach to preventing damage spread using a durable resin formula that cures naturally in sunlight.
What Makes It Stand Out: This kit leverages Rain-X’s trusted automotive brand reputation with a uniquely simplified process requiring no specialized UV light. The universal fit design works on all laminated windshields, and the kit includes enough resin for multiple repairs, making it practical for households with several vehicles or recurring minor damage.
Value for Money: At $11.49, this represents exceptional value for drivers seeking immediate intervention. Professional windshield repairs typically cost $60-100, so a successful DIY repair yields substantial savings. While it lacks advanced features of pricier competitors, its effectiveness for small bullseye damage delivers impressive ROI for budget-conscious consumers.
Strengths and Weaknesses: Strengths include the trusted brand name, straightforward sunlight-curing process, durable resin formulation, and capacity for multiple repairs. The kit is genuinely user-friendly with minimal steps. However, weaknesses include reliance on direct sunlight (problematic in overcast conditions), smaller maximum repair diameter (1 inch versus 1.25 inches on some competitors), and the absence of vacuum technology that could reduce air pocket formation. The warning about contamination sensitivity also suggests less forgiveness than professional systems.
Bottom Line: The Rain-X kit excels as an entry-level emergency solution for minor windshield damage. It’s ideal for proactive drivers who notice chips immediately and want affordable prevention. For larger damage or those wanting professional-grade tools, consider UV-equipped alternatives, but for basic repairs, this delivers reliable results.
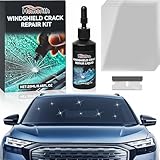
2. Permatex 09103 Automotive Windshield Repair Kit For Chipped And Cracked Windshields. Permanent Air-Tight Repairs, With Repair Syringe & Plunger, 9-piece Kit

Overview: The Permatex 09103 Automotive Windshield Repair Kit positions itself as a professional-grade solution for bullseye damage up to 1.25 inches. This 9-piece system employs a sophisticated syringe and plunger mechanism to deliver permanent air-tight repairs on laminated windshield glass without requiring mixing or external power sources.
What Makes It Stand Out: The state-of-the-art spring-lock delivery system distinguishes this kit from basic squeeze-tube alternatives, providing controlled resin injection that mimics professional equipment. The daylight-curing process eliminates need for UV lamps, while the comprehensive photographic instructions make complex repairs accessible to novices seeking dealership-quality results.
Value for Money: At $13.99, this kit occupies the sweet spot between budget options and premium UV-equipped systems. It repairs larger damage than entry-level kits while costing 70% less than professional services. The permanent air-tight seal claims and professional-grade components justify the modest premium over basic kits, delivering excellent ROI for moderately damaged windshields.
Strengths and Weaknesses: Strengths include the advanced spring-lock plunger system ensuring consistent pressure, ability to repair larger bullseye damage (1.25 inches), trusted Permatex brand heritage, mess-free application, and clear instructional photography. Weaknesses involve dependence on natural daylight for curing, potentially limiting use during cloudy weather or indoor storage. The nine components may overwhelm absolute beginners despite instructions, and it lacks the vacuum technology of newer competitors that prevents air bubble formation.
Bottom Line: Permatex offers the best balance of professional capability and user accessibility for those preferring daylight-curing convenience. It’s perfect for confident DIYers wanting superior control over resin application without investing in UV equipment. For immediate repairs in variable weather, consider UV-curing alternatives.
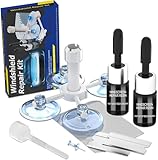
3. BLUTOKS Windshield Repair Kit, 2 PCS Windshield Crack Repair Kit with Suction Cup Curing Light, Automotive Nano Fluid Vehicle Windscreen Tool, Glass Repair Kit for Chips and Cracks (Navy)

Overview: The BLUTOKS Windshield Repair Kit represents the premium tier of DIY windshield repair with its navy-colored dual-kit package. Engineered for comprehensive damage repair up to 12 inches, this system combines powerful vacuum technology with UV curing to address everything from bullseyes to spiderweb cracks on laminated auto glass.
What Makes It Stand Out: The proprietary 20PA vacuum holder creates an airtight seal that forces resin deep into damage while eliminating air bubbles—a feature typically reserved for professional equipment. The included UV curing light with multiple timer settings enables consistent results regardless of weather conditions, completing repairs in just 5-10 minutes without mixing requirements.
Value for Money: At $16.99 for a two-kit package, this offers compelling value despite being the priciest single purchase. Each repair costs approximately $8.50—still 85% less than professional services. The UV lamp’s reusability across both kits and future purchases makes this a long-term investment for households with multiple vehicles or those in cloudy climates where sunlight curing proves unreliable.
Strengths and Weaknesses: Strengths include professional-grade vacuum technology ensuring bubble-free repairs, weather-independent UV curing system, ability to handle diverse crack types (star-shaped, half-moon, spiderwebs), rapid 5-10 minute cure time, and the two-kit package providing backup or multi-vehicle use. The high-shear-strength resin restores structural integrity effectively. Weaknesses center on the higher upfront cost and requirement for power access to operate the UV lamp. The advanced features may intimidate absolute beginners despite user-friendly claims.
Bottom Line: This is the premier choice for serious DIY enthusiasts seeking professional-grade results regardless of weather. The vacuum technology and UV curing justify the premium price, making it ideal for those in variable climates or with multiple vehicles requiring repair.
4. Windshield Repair Kit, Windshield Crack Repair Kit with Suction Cup Curing Light, 4 Pcs Car Glass Repair Kit Quick Fix for Chips & Cracks, Windshield Chip Repair Kit, Automotive Nano Fluid(Yellow)

Overview: This yellow Windshield Repair Kit delivers professional-grade results through an all-in-one system designed for chips and cracks up to 12 inches. The comprehensive package includes a powerful UV curing light and vacuum holder, enabling rapid 5-10 minute repairs on laminated auto glass without mixing or complex preparation.
What Makes It Stand Out: The intelligent UV curing lamp features adjustable timer and exposure settings, allowing customization based on damage severity—a level of control rare in DIY kits. The upgraded 20PA vacuum holder ensures deep resin penetration while eliminating air bubbles, and the four-piece configuration suggests multiple repair capability or comprehensive tool coverage for complex damage scenarios.
Value for Money: At $16.97, this kit matches premium competitors while potentially offering greater component quantity. Professional repairs cost $60-100, making each use a significant saving. The reusable UV lamp and vacuum system provide ongoing value for households with multiple vehicles or frequent minor damage. The four-piece designation implies extended utility compared to single-use kits, maximizing long-term ROI.
Strengths and Weaknesses: Strengths include the adjustable UV lamp with multiple modes for precision curing, powerful vacuum technology preventing bubble formation, versatility across crack types (bullseyes, stars, spiderwebs), quick 5-10 minute process, and comprehensive four-piece toolset. The universal application on laminated glass covers most vehicles. Weaknesses include potential confusion about the “4 Pcs” designation—whether it means four complete kits or four tools for one repair. The similar price point to two-kit alternatives may indicate smaller resin quantities per unit. Lack of brand recognition could concern quality-focused buyers.
Bottom Line: This kit excels for DIYers wanting maximum control over the curing process through adjustable UV settings. The four-piece configuration offers excellent value if interpreted as multiple repair capability. It’s ideal for detail-oriented users who appreciate customization options and comprehensive toolsets for professional-quality results.
5. Windshield Crack Repair Kit,2025 Latest Upgraded Glass Crack Repair Kit,5MinQuick-Glass Repair Liquid,Long-Lasting for Windshields, Windows, Mirrors,All Crack Types Windshield Repair Kit (Black).

Overview: Marketed as the 2025 latest upgraded model, this black Windshield Repair Kit is the most affordable option at $9.99, promising comprehensive repair capabilities across windshields, windows, mirrors, and even headlight covers. The kit uses high-transparency imported resin with nano-scale penetration technology to address various crack types in just five minutes.
What Makes It Stand Out: Unmatched versatility sets this kit apart—it claims to repair not just laminated windshields but also side windows, sunroofs, rearview mirrors, and headlight covers, breaking traditional limitations. The advanced multi-layer curing technology and nano-fluid formulation promise deep, traceless restoration at a fraction of competitor pricing.
Value for Money: At $9.99, this offers the lowest barrier to entry in the DIY windshield repair market. The multi-surface capability theoretically replaces multiple specialized products, delivering extraordinary value if claims hold true. Professional services cost $60-100 per incident, making this a potential money-saving powerhouse for budget-conscious drivers or those with damage across various glass components.
Strengths and Weaknesses: Strengths include the aggressive pricing, rapid five-minute repair claim, impressive versatility across multiple glass surfaces, imported high-transparency resin, and user-friendly application requiring no glass removal. The 2025 upgraded designation suggests modern formulation. However, weaknesses are significant: no mention of UV curing equipment or vacuum technology, reliance on unspecified curing methods, unknown brand reputation, and potentially exaggerated claims about repairing all glass types. The lack of detailed specifications raises durability concerns, and sunlight dependence may limit effectiveness.
Bottom Line: This budget kit suits experimental DIYers or those with minor damage on non-windshield glass surfaces where replacement costs are prohibitive. While the price is irresistible, manage expectations regarding long-term durability. For critical windshield repairs, invest in UV-equipped alternatives with proven track records.
6. NASILOOP Windshield Repair kit, Quick and Efficiency Glass Repair Fluid, Car Windshield Crack Repair Resin Kit for Fixing Chips, Bulls-Eye, Cracks and Star-Shape Cack-2 Pack

Overview: The NASILOOP Windshield Repair Kit delivers a budget-conscious two-pack solution for DIY glass repair. Designed to address chips, bulls-eyes, and star-shaped cracks up to 12 inches, this kit promises rapid curing through its advanced resin formula. The package includes everything needed for multiple repairs across one or several vehicles, making it an attractive option for proactive car owners.
What Makes It Stand Out: This kit’s high-speed curing formula claims to spring into action immediately, creating molecular-level bonds that restore structural integrity within minutes. Its versatility spans multiple damage types, and the two-bottle configuration provides excellent backup value. The straightforward step-by-step instructions target users seeking professional results without professional costs.
Value for Money: At $9.95 for two complete kits, this offers exceptional per-unit value at roughly $5 per repair attempt. This dramatically undercuts professional services ($50-$100) and competes favorably with single-kit alternatives. For households with multiple vehicles or those wanting a spare, the two-pack structure maximizes return on investment.
Strengths and Weaknesses: Pros include the affordable dual-pack configuration, rapid curing claims, comprehensive damage coverage, and user-friendly design. Cons involve hyperbolic marketing language that may oversimplify the process, temperature-dependent results, and the one-inch diameter limitation for round damages. Deep cracks may prove challenging despite length claims.
Bottom Line: NASILOOP provides outstanding value for minor windshield damage. While professional-grade results aren’t guaranteed, it’s a smart, low-risk investment for car owners willing to tackle small chips before they spider into costly replacements.
7. popalula Windshield Chip Repair Kit - 2025 Upgrade Car Windshield Crack Repair Kit, Glass Repair Liquid for Cracks and Chips, Rock Chip Repair Kit for Fix Windows, Mirrors, Glasses, All Crack Types
Overview: The popalula Windshield Chip Repair Kit markets itself as a 2025-upgraded solution for rapid glass restoration. Promising five-minute repairs, this kit aims to halt damage progression from bumps and temperature fluctuations using cutting-edge resin technology. Its comprehensive approach targets everything from bullseyes to reticular cracks.
What Makes It Stand Out: Multi-surface versatility is this kit’s crown jewel—it repairs windshields, side windows, sunroofs, mirrors, headlight covers, and even industrial equipment. The imported high-transparency resin penetrates nano-scale cracks for near-invisible results, while the advanced multi-layer curing technology ensures deep bonding that withstands vibrations and temperature shifts.
Value for Money: At $12.99, this mid-range kit justifies its price through universal application across multiple glass surfaces. Rather than buying specialized products for mirrors and headlights, this single solution handles diverse needs. The professional-grade resin quality offsets the slight premium over basic windshield-only kits.
Strengths and Weaknesses: Pros include five-minute rapid action, exceptional multi-surface versatility, high-transparency resin, comprehensive crack coverage, and circuit-safe application without glass removal. Cons feature questionable “2025 upgrade” marketing, variable results on deep damage, sensitivity to application technique, and unsuitability for tempered glass.
Bottom Line: The popalula kit excels for drivers wanting one solution for all vehicle glass. While the five-minute claim requires ideal conditions, its versatility makes it a worthwhile purchase for comprehensive vehicle maintenance and repair preparedness.
8. J-B Weld 2100 Windshield Saver Repair Kit, 0.025 fl. oz

Overview: The J-B Weld 2100 Windshield Saver leverages the brand’s legendary adhesive reputation for straightforward DIY windshield repair. This minimalist kit focuses on practical solutions for laminated windshields, targeting small chips and star patterns before they propagate into larger, costlier damage.
What Makes It Stand Out: J-B Weld’s trusted name in industrial-strength adhesives provides immediate credibility. The kit’s streamlined design eliminates complexity—no elaborate syringe systems or multiple components. It delivers a focused solution for the most common minor windshield damages with proven resin chemistry that minimizes appearance while preventing spread.
Value for Money: At $12.95 for a single-use 0.025 fl. oz application, this kit commands a brand premium. While effective for one-time repairs, it lacks the quantity and versatility of multi-pack competitors. The value lies in reliability rather than volume, making it ideal for addressing a single specific chip rather than maintaining a repair arsenal.
Strengths and Weaknesses: Pros include trusted brand heritage, genuine ease of use, effectiveness on small chips and stars, damage spread prevention, and compatibility with all laminated windshields. Cons comprise limited single-use quantity, restrictive 1.25-inch diameter capacity, basic component set, lack of multi-surface versatility, and premium pricing for minimal hardware.
Bottom Line: Select J-B Weld for dependable, no-nonsense repair of a minor chip. It’s perfect for brand-loyal consumers needing a quick fix, but explore alternatives if you anticipate multiple repairs or want professional-grade tools for larger damage.
9. Brennenstuhl Windshield Repair Kit, Windshield Crack Repair Kit, 2 Bottles Car Windshield Chip Repair Kit Quick Fix for Rock Chip Repair Kit Windshield Chips, Cracks, Star-Shaped Crack (Blue)
Overview: The Brennenstuhl Windshield Repair Kit provides a professional-style repair system in a consumer package. With two resin bottles and a complete syringe applicator device, this kit targets cracks up to 12 inches and various chip types. The comprehensive component set aims to deliver near-professional results for DIY enthusiasts.
What Makes It Stand Out: This kit includes a proper repair device with syringe thrusters, mimicking professional technician tools. The two-bottle package ensures adequate resin for multiple repairs or extensive damage. Its explicit user-friendly design emphasis, while awkwardly worded, highlights the detailed instructions that enable quality results across all skill levels.
Value for Money: At $13.33, the kit includes two resin bottles, five curing strips, two blades, and a syringe applicator—excellent component density for the price. The professional-style tooling justifies the modest premium over basic kits, offering cost-effective capability for serious DIY users planning several repairs.
Strengths and Weaknesses: Pros feature the complete professional-style toolset, dual resin bottles, 20-minute realistic repair window, extensive damage type coverage, long-lasting protection formula, and multi-repair capacity. Cons include questionable gendered marketing language, syringe system learning curve, bulkier storage requirements, and potential over-complexity for single small-chip repairs.
Bottom Line: Brennenstuhl suits DIYers wanting professional tools without technician pricing. The comprehensive package handles diverse damage effectively, making it ideal for multi-vehicle households or those preferring thorough instructions and proper applicator equipment.
10. tuncate Windshield Repair Kit for Chips and Cracks– 4 Pack Glass Repair Kit with Enhanced Injection Head for Chips, Cracks & Star-Shaped Cracks, Quick & Easy DIY Fix for Windshields, Black

Overview: The tuncate Windshield Repair Kit delivers unprecedented quantity with a four-pack configuration at a budget price point. Featuring an enhanced injection head and nano-enhanced resin, this kit claims exceptional 120MPa compressive strength—130% stronger than ordinary glass—while emphasizing safety and environmental responsibility.
What Makes It Stand Out: Environmental versatility is remarkable, functioning from -4°F to 104°F and curing in 10 minutes under any conditions. Safety certifications confirm child/pet-friendly operation with no pungent odors and naturally degradable residual resin. The 97% light transmittance claim ensures minimal visual distortion after repair.
Value for Money: At $8.91 for four complete kits, the per-unit cost under $2.25 is unmatched. This bulk approach provides exceptional value for fleet vehicles, families with multiple cars, or those wanting extensive backup supplies. Even with modest individual kit quality, the sheer quantity makes this a practical emergency preparedness investment.
Strengths and Weaknesses: Pros include unbeatable four-pack value, high-strength nano-enhanced resin, extreme temperature operation range, safety-certified non-toxic formula, superior light transmittance, and versatile crack coverage. Cons involve potentially compromised quality at lowest price point, ambitious performance claims requiring verification, likely basic instructions, and unnecessary over-purchase for single-vehicle owners.
Bottom Line: tuncate dominates for value-conscious buyers needing multiple repairs. While premium kits may yield superior single-use results, this four-pack provides safe, practical solutions for minor damage across several vehicles at an irresistible bulk price point.
Understanding Windshield Damage: When DIY Repair Makes Sense
The Science Behind Windshield Glass
Your windshield isn’t just thick glass—it’s a laminated safety assembly consisting of two layers of annealed glass bonded to a polyvinyl butyral (PVB) interlayer. This sandwich design prevents shattering and maintains visibility during impacts. When a rock strikes, it typically penetrates only the outer glass layer, creating a cone-shaped damage point. The PVB layer remains intact, which is precisely why repairs are possible. DIY kits work by filling this void with optically matched resin that bonds to the glass and restores structural continuity. Understanding this architecture helps you recognize which damages are surface-level candidates for repair versus those that have compromised the entire assembly.
Types of Repairable Damage
Bullseyes, stars, and combination breaks under one inch in diameter represent the sweet spot for DIY intervention. These damages haven’t reached the PVB layer and maintain clean entry points. However, cracks longer than three inches, damage directly in the driver’s line of sight, or chips with crushed glass at the impact point exceed the capabilities of most consumer-grade kits. Edge cracks are particularly problematic—they spread unpredictably due to the high stress concentrations at the windshield’s perimeter. The rule of thumb: if you can cover the damage with a quarter and it’s not within the critical viewing area, you’ve got a viable candidate.
When to Call a Professional
Deep damage that penetrates both glass layers requires professional equipment that can inject resin under higher pressure and vacuum cycles. Similarly, repairs near sensors for advanced driver-assistance systems (ADAS) demand recalibration that DIY kits can’t address. Temperature extremes complicate repairs too—attempting a fix below 50°F or above 90°F often results in improper curing. If your windshield has pre-existing repairs or the damage includes multiple impact points, professional assessment prevents wasting money on a kit that can’t deliver results.
Resin vs. Epoxy: The Core Material Debate
What is Windshield Repair Resin?
Professional-grade windshield repair resin is a specialized acrylic compound engineered with a specific refractive index (typically 1.51-1.52) that matches laminated glass. This optical matching is crucial—misalignment as small as 0.01 creates visible distortion. Quality resins are low-viscosity liquids that penetrate microscopic fissures through capillary action, then cure to a hardness that flexes similarly to glass under stress. The best formulations include UV inhibitors to prevent yellowing and maintain clarity for 5-10 years. They’re single-component systems activated by UV light, eliminating mixing errors that plague two-part adhesives.
What is Epoxy?
Epoxy-based windshield repair materials are two-part thermosetting polymers that cure through chemical reaction rather than UV exposure. While exceptionally strong and chemically resistant, epoxies present significant challenges for glass repair. Their refractive index rarely matches glass perfectly, creating subtle but permanent “ghosting” effects. The mixing ratio is critical—deviations as small as 5% compromise cure strength. Epoxies also cure rigid and brittle, making them prone to cracking when the windshield flexes during normal driving. Some budget kits use epoxy because it’s cheaper and doesn’t require UV curing equipment, but this cost-saving comes at the expense of optical quality and longevity.
Key Performance Differences
The curing mechanism fundamentally separates these materials. UV resin allows infinite working time until you apply light, letting you perfect the fill and remove air bubbles. Epoxy starts curing the moment you mix it, creating a race against the clock. In head-to-head testing, properly applied resin repairs achieve 90-95% of original glass strength, while epoxy typically reaches only 70-80%. More critically, resin maintains flexibility and won’t yellow under UV exposure, whereas epoxy becomes brittle and discolored within 2-3 years. For chips in the driver’s sightline, resin’s superior optical clarity isn’t just preferable—it’s essential for safety.
The Chemistry of Clarity: How Repair Materials Work
Curing Processes Explained
UV resin curing is a photoinitiator-driven polymerization reaction. When exposed to 365nm UV light, molecules in the resin form long polymer chains, transforming from liquid to solid in 2-5 minutes. This process generates minimal heat, preventing thermal stress that could crack the glass further. The depth of cure matters—quality resins cure completely through 1/4 inch of material, ensuring full penetration. Epoxy curing involves exothermic chemical reaction between resin and hardener, generating heat that can actually damage the PVB layer if not carefully controlled. This heat also accelerates cure time unpredictably based on ambient temperature.
Refractive Index Matching
Light travels through glass at a specific speed, and when it hits air pockets in a chip, it bends and scatters, creating visible defects. Repair resin’s refractive index is engineered to match glass so precisely that light passes through the repaired area as if the damage never existed. This requires not just the right number, but consistency across temperatures. Premium resins maintain index stability from -40°F to 200°F. Epoxy formulations struggle here—their refractive index changes as they cure and continues shifting slightly over time, which is why epoxy repairs often develop a subtle “halo” effect months after application.
Essential Features to Look for in Quality Repair Kits
Injection System Design
The bridge or pedestal that holds the injector to the glass is your foundation for success. Look for systems with multiple suction cups (three or more) that distribute pressure evenly and prevent rocking. The injector itself should offer precise pressure control—spring-loaded or screw-driven mechanisms outperform simple squeeze-bulb designs. Professional-style kits include vacuum cycles that actively pull air out of the chip before resin injection, critical for eliminating bubbles that cause visible defects. Cheap kits rely on gravity and capillary action alone, resulting in incomplete fills.
Curing Mechanisms
A proper UV curing light is non-negotiable for resin kits. The included lamp should emit at least 4-5mW/cm² at 365nm wavelength—less powerful lights extend cure times and may not penetrate deeply enough. LED curing lights outperform tube-style bulbs in consistency and longevity. For epoxies, check that the kit includes precise mixing tools and a working time that matches your skill level. Some advanced kits now hybridize both materials, offering UV-curable resin with epoxy-like structural additives, but these require careful technique.
Bridge or Pedestal Stability
The device that secures your injector must create a perfect seal against the windshield. Metal bridges with adjustable arms provide superior stability compared to plastic pedestals, especially on curved glass. The seal should be replaceable rubber O-rings, not fixed foam pads that compress permanently. Look for kits where the bridge can be repositioned without losing suction—this allows you to approach complex star breaks from multiple angles. The distance between injector tip and glass should be micro-adjustable; even 0.5mm variations affect resin flow dynamics.
Advanced Kit Components That Separate Pros from Hobbyists
Pressure and Vacuum Cycling
Premium kits employ dual-action injectors that alternate between vacuum and pressure phases. The vacuum phase (typically 5-10 minutes) evacuates trapped air and moisture from the deepest fissures. Pressure injection then forces resin into these evacuated spaces, achieving penetration that single-phase systems can’t match. This cycling may repeat 3-5 times for complex damage. Kits with built-in pressure gauges let you monitor the process—optimal injection occurs at 15-25 PSI. Without this capability, you’re essentially hoping capillary action does the work, which fails on tight cracks.
Pit Filler Quality
After repairing the internal damage, the surface impact point (the pit) needs filling to prevent water intrusion and complete the cosmetic fix. Quality kits include specialized pit filler resin that’s thicker and cures harder than injection resin. This filler should be optically clear and level with the glass surface when cured. Some kits skip this step or include generic super glue, which shrinks and cracks. Professional-grade pit fillers include their own curing tabs and polish to achieve a glass-smooth finish that wiper blades won’t catch.
Finishing Tools and Polish
The repair isn’t complete until the surface is perfectly smooth and clear. Look for kits with razor blades designed for glass work—thinner, more flexible blades that scrape excess resin without scratching. The polishing compound should be cerium oxide based, the same material professional glass shops use. It should include a felt polishing pad that attaches to a drill for final buffing. Kits lacking these finishing tools leave you with a functional but cosmetically inferior repair that collects dirt and degrades over time.
Skill Level Considerations: Matching Kits to Your Experience
Beginner-Friendly Features
If you’ve never repaired glass before, prioritize kits with detailed video instructions over printed pamphlets. Spring-loaded injectors that automatically regulate pressure prevent over-injection, a common rookie mistake that creates resin “blobs” inside the laminate. Kits with pre-mixed, single-use resin capsules eliminate measuring errors. Look for “practice glass” included—usually a small laminated pane for testing technique. The best beginner kits also offer customer support hotlines with technicians who can diagnose problems via photo submission.
Professional-Grade Complexity
Experienced users should seek kits with variable pressure control, multiple resin viscosities for different damage types, and reusable metal components. These systems often require separate purchase of UV lamps and include bulk resin for dozens of repairs. They assume you understand concepts like dwell time, crack propagation, and stress patterns. The learning curve is steep, but the results rival commercial repairs. Professional kits also include calibration tools to verify your UV lamp’s output strength, ensuring consistent cures batch after batch.
Cost vs. Value: Understanding Price Tiers
Budget Kits ($10-$25)
These kits use basic epoxy or low-grade UV resin with simple plastic pedestals. They work adequately on small bullseyes in non-critical areas but lack vacuum capability and precision controls. The included UV lights are often underpowered, leading to incomplete cures. Expect cosmetic imperfections and a lifespan of 1-2 years before yellowing appears. They’re essentially disposable—single-use systems that get you through an inspection but don’t represent long-term value. The real cost includes your time and the risk of needing a professional redo.
Mid-Range Options ($25-$50)
This is the sweet spot for most DIYers. You’ll find quality UV resins with proper refractive indices, dual-suction bridges, and moderate-pressure injectors. Vacuum assist becomes standard, though not always automated. Curing lights are sufficient for proper polymerization. These kits often include enough resin for 3-5 repairs, making them economical for households with multiple vehicles. The difference between $30 and $50 usually reflects tooling quality—metal vs. plastic bridges, replaceable seals, and inclusion of pit filler and polish.
Professional Kits ($50+)
At this level, you’re purchasing durability and repeatability. Components are rebuildable and designed for dozens of repairs. Resin quality reaches optical-grade standards used by mobile repair technicians. These kits include pressure/vacuum cycling, multiple resin viscosities, and industrial-strength UV curing systems. The value proposition shifts from “save money on one repair” to “start a side business.” For the serious enthusiast who handles fleet maintenance or restores vehicles, the upfront cost amortizes quickly. Performance-wise, these deliver repairs that last the remaining life of the windshield.
Common Mistakes That Ruin Windshield Repairs
Temperature and Humidity Factors
Attempting repairs below 50°F prevents resin from flowing properly and slows curing to the point where contamination occurs. Above 90°F, resin becomes too thin, flowing out of the damage before curing. The glass itself must be within this range—using a hairdryer to warm the surface creates thermal gradients that crack the repair. Humidity above 60% introduces moisture into the damage, which reacts with resin and creates cloudy, weak bonds. The best kits include temperature strips and desiccant packs to verify conditions.
Improper Cleaning Protocols
Never use household glass cleaners containing ammonia before repairs—they leave residues that prevent resin bonding. Professional kits include specialized cleaning solutions that evaporate completely. The cleaning process must remove all glass dust from the impact point; even microscopic particles block resin penetration. Use a probe or pick included in quality kits to gently lift crushed glass, but stop at the PVB layer. Cleaning should happen after creating a seal but before injection—a step many novices reverse, trapping debris inside the repair.
Rushing the Curing Process
Every minute you spend on vacuum and injection phases pays dividends in final quality. A proper vacuum cycle needs 5-10 minutes to pull air from the deepest cracks. Injection should be slow—rapid pressure forces resin through the PVB layer, creating a permanent blemish visible from inside the car. After UV curing, the resin continues hardening for 24 hours. Driving immediately or washing the car subjects the repair to stress before full strength develops. Professional technicians let repairs cure overnight before returning vehicles to customers.
Step-by-Step Repair Philosophy: Best Practices
Preparation is 90% of Success
The actual resin injection takes minutes; preparation determines the outcome. Park the vehicle so the damage faces direct sunlight for 30 minutes before starting—this warms the glass naturally and evaporates moisture. Cover the dashboard with plastic to prevent resin drips. Use painter’s tape to mask a two-inch radius around the damage, making cleanup easier. Have all tools within reach before breaking any seals. The best kits include a checklist—use it. One dropped tool or misplaced curing tab mid-repair can ruin the entire process.
The Art of Material Application
Resin injection is about patience, not force. Apply pressure gradually, watching the damage fill from the bottom up. When resin emerges at the surface, stop immediately—overfilling creates internal pressure that cracks the repair during curing. For star breaks, inject at the center and allow capillary action to pull resin into legs. Some pros inject each leg separately using a fine needle tip. After curing, remove the bridge and fill the pit with thicker resin, slightly overfilling. Cure again, then level with a razor blade held at a 45-degree angle. Polish with cerium oxide using a drill at low speed to avoid heat buildup.
Longevity and Warranty: What to Expect
How Long Should a Repair Last?
A properly executed resin repair using quality materials should last the remaining life of the windshield—typically 5-10 years without yellowing or cracking. The repair doesn’t weaken over time; in fact, it continues to strengthen slightly as residual curing completes. Epoxy repairs, by contrast, begin degrading after 18-24 months, becoming brittle and developing micro-cracks that allow moisture intrusion. Budget kit repairs might need redoing in 1-3 years, not because the resin fails, but because incomplete initial penetration leaves air pockets that expand and contract with temperature changes.
Understanding Kit Warranties
Most manufacturers warranty the kit components—not the repair results. A broken injector or failed UV light gets replaced, but a botched repair is your responsibility. Some premium brands offer “repair guarantees” that refund the kit cost if you follow instructions and the repair fails within a year. Read the fine print: these usually require photo documentation of each step and specific environmental condition verification. The warranty on the resin itself is more telling—manufacturers offering 5+ year anti-yellowing guarantees are confident in their chemistry. Keep your receipt; many warranties require registration within 30 days.
Environmental and Safety Considerations
VOCs and Chemical Safety
Quality UV resins are low-VOC and skin-safe once cured, but uncured resin can cause sensitization with repeated exposure. Always wear nitrile gloves—latex allows resin penetration. Work in ventilated areas; while fumes are minimal, the curing light produces ozone. Epoxy hardeners often contain amines that are respiratory irritants and skin sensitizers. Never sand uncured resin or epoxy—inhaling dust risks lung irritation. Keep materials away from children and pets; the sweet smell attracts animals but ingestion is toxic.
Proper Disposal Methods
Uncured resin is hazardous waste—don’t pour it down drains. Mix small amounts of leftover resin and hardener (for epoxies) to fully cure it, then dispose as solid waste. UV resin can be cured by leaving it in direct sunlight, rendering it inert. Isopropyl alcohol used for cleaning contains dissolved resin and must be evaporated in a ventilated area, not poured out. The glass dust collected during cleaning is sharp silica—seal it in a bag before trash disposal to protect sanitation workers. Many auto parts stores accept leftover chemicals through their recycling programs.
The Future of DIY Windshield Repair Technology
Smartphone integration is emerging—apps that analyze damage photos and recommend specific repair protocols. LED UV curing is becoming more powerful and portable, with some kits now using 405nm LEDs that cure faster and deeper than traditional 365nm. Nanotechnology additives in premium resins promise self-healing micro-cracks and enhanced UV resistance. We’re also seeing hybrid materials that combine resin’s optical clarity with epoxy’s chemical resistance, though these remain expensive. The trend is toward foolproof systems that guide users through each step with sensors that confirm proper pressure and cure completion.
Frequently Asked Questions
Can I repair a windshield crack longer than three inches with a DIY kit?
Technically possible, but not recommended. Cracks exceeding three inches have likely reached the PVB layer or developed secondary stress fractures. DIY kits lack the pressure control and resin viscosity options needed for long cracks. The success rate drops below 50%, and failed repairs make professional fixes impossible. For cracks 6+ inches, replacement is usually required by law anyway.
Why do my repairs keep turning yellow after a year?
This indicates low-quality resin lacking UV stabilizers or incomplete curing. Budget kits often use generic acrylics not engineered for automotive glass. Ensure your UV light is strong enough and you cure for the full recommended time—rushing this step leaves uncured resin that oxidizes. Store unused resin in opaque containers; light exposure before use degrades it.
Is epoxy ever better than resin for windshield repair?
Only in specific industrial applications where chemical resistance trumps optical clarity. For automotive windshields, epoxy’s brittleness, refractive index mismatch, and yellowing make it inferior in every way that matters for safety and visibility. Some “epoxy” kits actually contain UV-curable resins mislabeled for marketing; true epoxy should be avoided.
Can I use my kit in direct sunlight?
Yes, but with caution. Sunlight provides excellent UV for curing but makes resin too fluid to control. Perform the injection in shade, then move to sun for curing. Direct sun during injection causes resin to run out before it can fill the damage. Some pros use sunlight deliberately for final curing after initial LED curing, as it ensures complete polymerization.
How do I know if I’ve damaged the PVB layer during repair?
You’ll see a milky white appearance when looking from inside the vehicle, or resin will leak through and create a permanent stain on the interior side. If your probe goes through the inner glass layer, you’ve gone too deep. Stop immediately—PVB damage requires professional assessment. The repair may still hold, but optical clarity is permanently compromised.
What’s the difference between pit filler and injection resin?
Injection resin is low-viscosity (thin) to penetrate cracks, while pit filler is high-viscosity (thick) to rebuild the surface impact point. Using injection resin for the pit results in shrinkage and a concave surface. Pit filler contains additives that reduce shrinkage and polish to optical clarity. Never skip this step—it’s what makes the repair weatherproof and cosmetically acceptable.
Can temperature affect the cure even after the repair looks done?
Absolutely. Resin continues post-curing for 24-48 hours. If temperatures drop below freezing during this period, the polymerization chain reaction halts prematurely, leaving the repair weaker and prone to cracking. Keep the vehicle in a climate-controlled area for at least 12 hours post-repair. Extreme heat during curing can cause resin to boil, creating micro-bubbles that weaken the bond.
Are dual-suction bridges really better than single-cup designs?
Yes, dramatically. Single-cup systems concentrate stress at one point and rock easily, breaking the seal mid-repair. Dual or triple suction distributes force, maintains alignment during injection, and accommodates windshield curvature better. The seal quality is also superior—metal bridges with O-rings can be repositioned multiple times, while single-cup foam seals are one-use and unreliable.
How much pressure should I apply during resin injection?
Target 15-25 PSI for most damages. Too little pressure leaves air pockets; too much forces resin through the PVB layer or creates internal stress. Quality kits with screw-driven injectors naturally regulate pressure. If using a squeeze-bulb system, apply gentle, steady pressure for 2-3 minutes rather than one hard squeeze. Watch the damage fill—when resin reaches the surface, stop immediately.
Can I repair the same spot twice if the first attempt fails?
Sometimes, but each attempt reduces success probability. The first repair leaves cured resin in the crack that blocks second attempts. You must completely remove the old resin with a drill bit or pick, risking glass damage. If the first repair used epoxy, the residue prevents new resin from bonding. Professional technicians can sometimes salvage botched DIY jobs, but the odds drop significantly after multiple attempts. It’s better to get it right the first time.