That first frosty morning when you start your car and notice a spiderweb crack spreading across your windshield is a moment every driver dreads. Frost cracks aren’t just cosmetic annoyances—they’re structural compromises that can worsen with every temperature swing, turning a small imperfection into a full-blown safety hazard. Unlike impact chips from road debris, these thermal stress fractures require specialized repair approaches that account for the unique way glass contracts and expands in winter conditions.
Understanding how to select and use the right windshield repair kit for frost damage isn’t just about saving money on a replacement; it’s about preserving your vehicle’s structural integrity and maintaining clear visibility during the most challenging driving months. This comprehensive guide walks you through everything you need to know about evaluating, purchasing, and applying frost crack repair solutions—empowering you to make informed decisions that keep your windshield safe and sound through the harshest winters.
Top 10 Windshield Repair Kits
Detailed Product Reviews
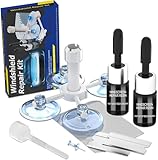
1. Rain-X 600001 Windshield Repair Kit - Quick and Easy Durable Resin Based Windshield Repair Kit for Chips and Cracks, Good for Round Damage Below 1" in Diameter and Cracks Smaller Than 12" in Length

Overview: The Rain-X 600001 Windshield Repair Kit offers a practical solution for drivers dealing with minor windshield damage. This universal-fit kit from a trusted automotive brand addresses round chips under one inch and cracks shorter than 12 inches. Designed for DIY application, it provides a cost-effective alternative to professional repairs or full windshield replacement.
What Makes It Stand Out: Rain-X leverages its reputation for automotive glass care with a durable resin formula that penetrates laminated windshields up to the first glass layer. The kit’s simplicity shines through its minimal-step process, requiring only sunlight for curing. It’s specifically engineered for multiple repairs, making it economical for households with several vehicles. The included professional tips help avoid common pitfalls like air pockets and contamination.
Value for Money: At $11.49, this kit sits in the sweet spot between budget options and professional systems. Considering it can handle several repairs, the per-use cost drops significantly. Compared to $100+ professional services, it pays for itself after one successful application. The Rain-X brand backing adds confidence that generic competitors lack.
Strengths and Weaknesses: Strengths include trusted brand reputation, reusable components for multiple repairs, clear instructions, and a proven resin formula. Weaknesses involve size limitations (1" rounds, 12" cracks), weather-dependent sunlight curing, and sensitivity to application speed that can trap air bubbles. Results degrade if cracks become contaminated before repair.
Bottom Line: For minor, fresh windshield damage, the Rain-X kit delivers reliable results without breaking the bank. It’s ideal for proactive car owners comfortable with careful DIY work. While not suited for major damage, it effectively prevents small chips from becoming costly replacements.
2. Permatex 09103 Automotive Windshield Repair Kit For Chipped And Cracked Windshields. Permanent Air-Tight Repairs, With Repair Syringe & Plunger, 9-piece Kit

Overview: The Permatex 09103 Automotive Windshield Repair Kit brings professional-grade repair capabilities to your driveway. This nine-piece system targets bullseye damage up to 1.25 inches on most laminated windshields, offering a permanent air-tight solution. Known for automotive chemical solutions, Permatex delivers a mixing-free system that cures naturally in daylight.
What Makes It Stand Out: The kit’s state-of-the-art spring-lock syringe and plunger system provides controlled resin delivery, minimizing mess and maximizing penetration. Its advanced application method creates stronger bonds than gravity-fed systems. The comprehensive package includes photographic instructions, making complex repairs accessible to novices. The ability to fix larger bullseyes (1.25") gives it an edge over standard kits.
Value for Money: Priced at $14.18, it’s slightly premium but justified by professional tooling. The precision syringe system reduces waste and improves success rates, potentially saving a $200+ windshield replacement. For those prioritizing repair quality over absolute lowest cost, the investment delivers tangible returns in durability and clarity.
Strengths and Weaknesses: Strengths include the professional syringe mechanism, larger repair capacity, airtight sealing technology, clear photographic guide, and no-mixing convenience. Weaknesses are the single-use limitation, moderate price point, and daylight curing requirement that may delay repairs. The system demands careful alignment to avoid resin waste.
Bottom Line: The Permatex kit suits DIY enthusiasts seeking professional results without shop prices. Its superior application system and larger damage capacity make it worth the modest premium. Perfect for those who value precision and durability in their automotive maintenance.
3. NASILOOP Windshield Repair kit, Quick and Efficiency Glass Repair Fluid, Car Windshield Crack Repair Resin Kit for Fixing Chips, Bulls-Eye, Cracks and Star-Shape Cack-2 Pack

Overview: The NASILOOP Windshield Repair Kit offers a two-pack solution featuring advanced polymer technology for quick and efficient glass repair. This kit handles chips, bullseyes, star-shaped cracks, and cracks up to 12 inches or one inch in diameter. Designed for user-friendly application, it promises professional results with minimal effort.
What Makes It Stand Out: The kit’s high-speed curing formula uses specially-engineered polymers that create molecular-level bonds within minutes. Its versatility covers virtually all common windshield damage types, including half-moon crescents. The two-pack configuration provides exceptional value for multi-vehicle families or future incidents. The nano glass repair fluid restores both structural integrity and optical clarity.
Value for Money: At $9.99 for two complete kits, this represents the best per-unit value in the market. Each kit costs under $5, making it cheaper than most single-use alternatives. For the price of one professional repair, you get multiple DIY opportunities. The advanced polymer technology typically found in pricier kits makes this budget option surprisingly capable.
Strengths and Weaknesses: Strengths include unbeatable price-per-kit, advanced polymer resin, comprehensive damage coverage, and two-pack convenience. Weaknesses involve a lesser-known brand with unproven long-term track record, potentially less robust tools than premium kits, and marketing language that may oversimplify the repair process. Success requires meticulous cleaning and ideal conditions.
Bottom Line: For budget-conscious drivers wanting advanced technology, NASILOOP delivers remarkable value. The two-pack ensures you’re prepared for future damage. While brand recognition lags behind competitors, the polymer formula and comprehensive coverage make it a smart choice for proactive vehicle maintenance.
4. Windshield Crack Repair Kit,2025 Latest Upgraded Glass Crack Repair Kit,5MinQuick-Glass Repair Liquid,Long-Lasting for Windshields, Windows, Mirrors,All Crack Types Windshield Repair Kit (Black).

Overview: Marketed as a 2025 upgraded solution, this Windshield Crack Repair Kit promises five-minute repairs using high-transparency resin. Designed for comprehensive damage types including bull’s eyes, star-shaped cracks, and radial fractures, it extends beyond windshields to windows, mirrors, and even headlight covers. The kit uses imported nano-scale resin for deep penetration.
What Makes It Stand Out: The five-minute cure time is among the fastest available, minimizing downtime and reducing contamination risk. Its multi-surface versatility breaks traditional limitations, handling laminated glass across your entire vehicle. The advanced multi-layer curing technology claims absolute prevention of secondary cracking. High-transparency resin ensures near-invisible repairs.
Value for Money: At $9.68, it’s the most affordable single kit, undercutting even budget brands. The promise of repairing multiple glass surfaces multiplies its value proposition. For drivers seeking quick, cheap fixes across various vehicle glass components, the price is compelling. However, the “2025” designation appears more marketing than proven innovation.
Strengths and Weaknesses: Strengths include fastest advertised cure time, lowest price point, multi-surface application, and advanced resin technology claims. Weaknesses involve unverified brand credibility, potentially exaggerated marketing claims, and no specialized tools like UV lights or vacuum systems. The broad application range may compromise windshield-specific optimization.
Bottom Line: This kit suits experimental DIYers wanting maximum versatility at minimum cost. While the marketing hype requires skepticism, the core resin technology appears legitimate for minor repairs. Best for those comfortable with trial-and-error on less-critical glass surfaces before attempting windshield repairs.
5. BLUTOKS Windshield Repair Kit, 2 PCS Windshield Crack Repair Kit with Suction Cup Curing Light, Automotive Nano Fluid Vehicle Windscreen Tool, Glass Repair Kit for Chips and Cracks (Navy)

Overview: The BLUTOKS Windshield Repair Kit represents the premium DIY option, featuring professional-grade vacuum technology and a UV curing light. This two-piece set repairs damage up to 12 inches including star-shaped chips, spider webs, and half-moon cracks. The 20PA vacuum holder creates an airtight seal for superior resin penetration, while the UV light enables controlled 5-10 minute curing regardless of weather.
What Makes It Stand Out: The vacuum system forcibly removes air and injects resin deep into micro-fissures, preventing bubble formation—a common DIY failure point. The included UV curing light with timer settings eliminates weather dependency, allowing indoor or nighttime repairs. Professional-grade resin with high shear strength restores structural integrity to near-factory conditions. The two-pack configuration provides backup for future damage.
Value for Money: At $16.99, it’s the most expensive but includes $30+ worth of specialized equipment. The vacuum and UV technology dramatically improve success rates, justifying the premium over basic kits. For drivers with expensive windshields or those wanting guaranteed results, the cost savings versus professional repair ($200+) remain substantial. The two-pack further enhances long-term value.
Strengths and Weaknesses: Strengths include professional vacuum technology, UV curing light with timer, high-shear strength resin, comprehensive damage coverage, and two-pack convenience. Weaknesses involve highest price point, more complex operation requiring careful vacuum sealing, and potential overkill for single small chips. The kit demands more skill but rewards with superior results.
Bottom Line: For serious DIY enthusiasts or those with costly windshields, BLUTOKS delivers professional-quality results at a fraction of shop prices. The vacuum and UV technology solve the two biggest DIY challenges. While pricier, the success rate and durability make it the smartest long-term investment for windshield maintenance.
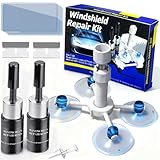
6. Brennenstuhl Windshield Repair Kit, Windshield Crack Repair Kit, 2 Bottles Car Windshield Chip Repair Kit Quick Fix for Rock Chip Repair Kit Windshield Chips, Cracks, Star-Shaped Crack (Blue)
Overview: The Brennenstuhl kit offers a comprehensive DIY solution for windshield damage up to 12 inches in length and one-inch round chips. Designed for bulls-eye, star-shaped, and half-moon cracks, this blue-accented kit promises professional-grade results in 20 minutes with its dual-bottle resin system and syringe-based application device.
What Makes It Stand Out: This kit includes two bottles of repair resin—double what most competitors provide—along with five curing strips and two blades for finishing. The manufacturer explicitly targets all skill levels, even beginners, with straightforward instructions. The formula claims long-lasting protection by filling and reinforcing damaged areas to prevent crack spreading.
Value for Money: At $12.99, this kit delivers exceptional value compared to $100+ professional repairs. The inclusion of two resin bottles effectively halves the per-repair cost for multiple chips, making it economical for families with several vehicles or those prone to frequent road debris damage.
Strengths and Weaknesses:
- Strengths: Complete package with abundant accessories; repairs multiple damage types; quick 20-minute process; dual bottles extend value; clear instructions for novices.
- Weaknesses: Marketing language (“even females”) feels outdated; included blades and strips may be lower quality than premium alternatives; syringe design less sophisticated than vacuum systems.
Bottom Line: The Brennenstuhl kit is a solid choice for cost-conscious DIYers wanting a complete, multi-use solution. While the dated marketing language is off-putting, the dual-resin bottles and comprehensive accessories make it practical for tackling several repairs with confidence.
7. tuncate Windshield Repair Kit for Chips and Cracks– 4 Pack Glass Repair Kit with Enhanced Injection Head for Chips, Cracks & Star-Shaped Cracks, Quick & Easy DIY Fix for Windshields, Black

Overview: The tuncate kit distinguishes itself as a four-pack bundle designed for automotive glass repair, featuring a nano-enhanced resin formula that achieves 120MPa compressive strength—130% stronger than ordinary glass. This black-accented system works across extreme temperatures from -4°F to 104°F and promises undetectable repairs in just 10 minutes.
What Makes It Stand Out: Safety certifications set this apart: no protective gloves required, child/pet-friendly composition, and 97% light transmittance with zero color difference. The three-step process works day or night, and the four-unit packaging makes it ideal for fleet vehicles, families, or sharing with friends. The enhanced injection head ensures deep resin penetration.
Value for Money: At $9.99 for four complete kits, the per-unit cost under $2.50 is unmatched. Even if you only need one repair, having spares for future damage or helping others provides tremendous value. This pricing democratizes professional-quality repairs for virtually any budget.
Strengths and Weaknesses:
- Strengths: Unbeatable per-unit price; impressive safety credentials; extreme temperature versatility; superior strength claims; no-mix convenience; four-pack flexibility.
- Weaknesses: Brand recognition is limited; four units may be excessive for single-vehicle owners; injection head quality unproven over time; strength claims lack independent verification.
Bottom Line: The tuncate four-pack delivers extraordinary value for multi-vehicle households or those wanting spares. Its safety-first formulation and temperature resilience make it ideal for families, though single users might prefer a one-pack premium option. The price is simply hard to beat.
8. J-B Weld 2100 Windshield Saver Repair Kit, 0.025 fl. oz

Overview: From the trusted J-B Weld brand, this minimalist repair kit focuses on small windshield damage up to 1-1/4 inches in diameter. The 0.025 fluid ounce package contains a simple resin system for DIY chip and star crack repairs on laminated windshields, emphasizing ease-of-use over advanced features.
What Makes It Stand Out: Brand reputation is the primary differentiator. J-B Weld’s legacy in adhesive solutions inspires confidence in product reliability. The kit’s simplicity appeals to users intimidated by complex multi-component systems, offering a straightforward approach to minimizing minor damage without overwhelming instructions.
Value for Money: At $12.95 for a tiny 0.025 fl. oz quantity, the price-per-volume is steep compared to competitors offering 2-4 bottles with more accessories. You’re paying premium for brand trust rather than quantity. For single, small repairs, this cost is still negligible versus professional service, but multi-chip owners should look elsewhere.
Strengths and Weaknesses:
- Strengths: Trusted J-B Weld brand name; proven adhesive expertise; straightforward application; effective for minor chips; prevents crack spreading.
- Weaknesses: Extremely limited quantity; basic kit lacks curing strips/tools; only handles damage up to 1.25"; no advanced injection technology; poor value for frequent repairs.
Bottom Line: J-B Weld’s kit suits brand-loyal customers needing a simple, one-time fix for minor chips. However, its minimal contents and high price-per-use make it poor value compared to feature-rich alternatives. Choose this for trust, not features or economy.
9. BLUTOKS Upgraded Windshield Repair Kit for Chips and Cracks – Instant Fix for Chips, Cracks, and Bullseyes, High-Pressure Resin Injection Glass Windshield Crack Repair Kit for Long-Lasting (Orange)

Overview: The BLUTOKS kit employs upgraded nano resin technology with a specialized high-pressure injection tip designed to force resin deep into cracks, eliminating air bubbles and restoring 95% of original glass strength. This orange-accented system handles damage up to 12 inches and cures in 30 minutes with a weather-resistant formula.
What Makes It Stand Out: The high-pressure injection mechanism distinguishes this from gravity-fed systems, theoretically achieving deeper penetration and more invisible repairs. The compact storage case keeps unused resin bottles secure, making it genuinely portable for roadside emergencies. Its versatility covers bullseyes, star breaks, and hairline cracks comprehensively.
Value for Money: Priced at $13.99, this kit sits in the competitive mid-range. The pressure injection technology and included storage case justify the slight premium over basic kits. While not the cheapest, the features align well with the price point, offering professional-grade tools without professional cost.
Strengths and Weaknesses:
- Strengths: High-pressure injection for superior penetration; compact portable case; weather-resistant formula; handles long cracks up to 12"; clear step-by-step instructions.
- Weaknesses: 30-minute cure time slower than some rivals; single resin bottle limits multiple repairs; pressure system adds complexity for novices; brand lacks long-term track record.
Bottom Line: BLUTOKS delivers a thoughtful balance of advanced technology and portability. The pressure injection system appeals to serious DIYers wanting near-professional results, while the compact case makes it practical for trunk storage. A strong choice for those prioritizing repair quality over speed.
10. Windshield Repair Kit - Nano Glass Repair Fluid for Chips & Cracks | Quick Fix, Works on for Chips and Cracks,Cracks Gone Glass Repair Kit, Automotive Windscreen Repair Tool Nano Repair Liquid (Blue)
Overview: This generically-branded kit boasts impressive technical specifications including a 20P-A strength rating, vacuum injection technology, and 5-layer reinforcement that withstands temperatures from -40°F to 240°F. The nano glass repair fluid handles cracks up to 12 inches and cures in 5-20 minutes depending on UV exposure, working on windshields, side windows, and even headlights.
What Makes It Stand Out: The extreme temperature tolerance (-40°F to 240°F) exceeds most competitors, making it ideal for harsh climates. Vacuum injection technology promises bubble-free penetration, while the universal application extends beyond windshields to sunroofs and headlight covers. The 3x faster curing claim appeals to impatient DIYers.
Value for Money: At $13.99, this kit matches the BLUTOKS price while offering broader temperature resistance and more versatile application. The technical sophistication suggests good value for those needing repairs in extreme conditions, though the anonymous branding requires trusting the specs.
Strengths and Weaknesses:
- Strengths: Exceptional temperature durability; vacuum injection system; universal glass compatibility; rapid 5-20 minute cure; high viscosity resin; comprehensive damage coverage.
- Weaknesses: No-name brand lacks reputation; technical jargon may confuse casual users; performance claims difficult to verify; no mention of included accessories quantity.
Bottom Line: This kit suits drivers in extreme climates who need versatile glass repair beyond just windshields. While the anonymous branding and technical marketing require some faith, the specifications are impressive. Best for experienced DIYers who understand the technology and need maximum environmental resilience.
Understanding Frost Cracks: What Makes Them Different?
The Science Behind Thermal Stress Fractures
Frost cracks develop when rapid temperature changes create uneven expansion and contraction across your windshield’s surface. When you blast hot defroster air onto a sub-zero glass surface, the outer layer expands faster than the inner layer, creating tensile stress that seeks the path of least resistance—typically a tiny edge chip or manufacturing imperfection you never noticed before. These cracks often originate from the windshield’s perimeter where the glass meets the frame, spreading inward in characteristic patterns that differ from central impact damage.
The molecular structure of laminated automotive glass makes these cracks particularly insidious. The polyvinyl butyral (PVB) interlayer designed to hold shards together can actually trap moisture between layers as the crack propagates, leading to delamination that complicates repair efforts. This is why frost crack repair requires resins formulated specifically for low-temperature application and moisture displacement.
Why Winter Damage Requires Specialized Solutions
Standard windshield repair kits designed for rock chips often fail miserably on frost cracks because they don’t account for the thermal dynamics at play. The resin viscosity that works perfectly at 70°F becomes too thick to penetrate micro-fractures at 35°F, leaving air pockets that weaken the repair. Additionally, frost cracks frequently run along the windshield’s edge where stress concentrations are highest, requiring bridge designs that can anchor securely without slipping on cold, potentially damp surfaces.
Temperature-cure resins in generic kits may not polymerize properly in winter garages or driveways, leading to soft, yellowing repairs that fail within months. Quality frost crack repair systems incorporate either dual-cure resins that activate with both UV light and chemical catalysts, or specialized heating elements that bring the repair area to optimal curing temperature without shocking the glass.
How Windshield Repair Kits Work
The Resin Injection Process Explained
All professional-grade repair kits operate on the same fundamental principle: creating a vacuum to remove air from the crack, then injecting specialized resin under pressure to fill the void completely. The process begins with sealing a bridge or injector assembly over the damage, forming an airtight chamber. A vacuum cycle pulls air out through micro-capillary action, while subsequent pressure cycles force resin into the smallest fissures.
For frost cracks, this process often requires multiple injection points along the crack’s length. Advanced kits include “crack expanders” or “crack openers”—small devices that apply gentle pressure to separate crack walls briefly, allowing deeper resin penetration. The goal isn’t just surface-level cosmetic improvement, but complete saturation of the damage zone to restore 80-90% of the windshield’s original structural strength.
Curing Mechanisms: UV Light vs. Chemical Hardeners
Curing transforms liquid resin into a solid, optically clear polymer that bonds with the surrounding glass. UV curing uses 365nm wavelength light to initiate polymerization, typically requiring 5-15 minutes of exposure. This method offers precise control—you can work with the resin until you’re ready to cure. However, in winter, UV intensity is lower, and you may need extended exposure times or supplemental UV lamps.
Chemical curing relies on two-part resins that harden when mixed, independent of light conditions. While convenient for cold, dark environments, these systems have limited working time and can create exothermic reactions that stress already-compromised glass. The most sophisticated frost crack kits use hybrid systems: UV-curable resins with chemical accelerators that ensure complete cure even in suboptimal lighting conditions.
Key Features to Look for in Frost Crack Repair Kits
Resin Viscosity and Temperature Formulation
The resin is the heart of any repair system. For frost crack applications, look for low-viscosity formulations specifically labeled for temperatures between 20-50°F. These resins flow more readily into tight cracks and contain surfactants that displace moisture—a critical feature when dealing with winter condensation. Premium resins also include UV inhibitors and antioxidants that prevent yellowing and maintain clarity for years.
Avoid kits with single-viscosity resins claiming “all-temperature” performance. Effective frost crack repair often requires multiple resin types: a very thin “penetrating resin” for the initial fill, followed by a slightly thicker “structural resin” for building strength. The best kits include both, along with clear instructions on application sequencing.
Bridge Design and Stability
The bridge assembly holds the injector over the damage and maintains seal integrity during vacuum/pressure cycles. For frost cracks, stability is paramount because repairs often take longer and require multiple repositionings along the crack length. Look for bridges with wide, adjustable feet that distribute pressure evenly and rubber seals that remain pliable in cold temperatures.
Magnetic bridge systems offer superior stability on steel frames near windshield edges, while suction-cup designs work better on central glass areas. Some advanced bridges feature integrated leveling screws that compensate for windshield curvature, ensuring the injector sits perfectly perpendicular to the crack—a detail that dramatically affects resin flow patterns.
Injection System Precision
Single-stage injectors are fine for simple bullseye chips, but frost cracks demand precision control. Seek kits with dual-action injectors that allow independent vacuum and pressure adjustment. The ability to hold a vacuum for 2-3 minutes while monitoring for leaks is crucial when working with long cracks that may have multiple breach points.
Digital pressure gauges, while not essential, provide confidence that you’re applying optimal force—typically 10-15 PSI for frost cracks. Over-pressurization can widen the crack, while insufficient pressure leaves air bubbles. Some professional-grade kits include pulsating injection modes that alternate pressure and vacuum in cycles, mimicking techniques used by mobile repair technicians.
Curing Technology Efficiency
Since winter sunlight is weaker and daylight hours are shorter, your kit’s curing system must compensate. LED UV lamps with 12+ watt output and focused beam patterns cure resin in 3-5 minutes versus 15+ minutes with weaker lights. Battery-powered options offer flexibility for driveway repairs, while AC-powered units provide consistent output for garage work.
Reflective curing pads that sit inside the windshield amplify UV exposure by bouncing light back through the resin from both sides. This is particularly valuable for deep cracks where surface curing might trap uncured resin below. Some premium kits include temperature sensors that beep when the repair area reaches optimal cure temperature, removing guesswork from the process.
Professional vs. DIY Repair: Making the Right Choice
When to Call the Experts
While DIY kits have improved dramatically, certain frost crack scenarios demand professional intervention. Cracks longer than 12 inches, damage extending into the driver’s primary viewing area (the “critical vision zone”), or cracks that have been contaminated with washer fluid, antifreeze, or road salt for more than a few days are best left to certified technicians.
Professionals also have access to high-pressure injection systems (up to 100 PSI) and specialized tools like crack stoppers—small drills that create termination points to prevent crack propagation. If your crack is growing visibly day-to-day, or if you can feel the fracture line with your fingernail (indicating depth through both glass layers), the structural compromise may exceed what DIY resins can reliably address.
Cost-Benefit Analysis of Home Repairs
A quality frost crack repair kit costs $40-120, while professional repairs run $80-200+. The economic advantage of DIY is clear for single incidents, but consider the learning curve. Your first repair might take 90 minutes and yield imperfect results, while a pro completes it in 20 minutes with a warranty. However, once you’ve mastered the technique, subsequent repairs on family vehicles or helping neighbors become quick, profitable ventures.
Insurance often covers professional repairs with no deductible, which can make DIY seem less attractive—until you factor in time spent scheduling, waiting at the shop, and potential rate increases. For fleet vehicles or multi-car households, a good kit pays for itself after two uses. The real value lies in immediacy: repairing a crack within 24 hours prevents moisture contamination and crack growth that could necessitate a $300-800 replacement.
Assessing Damage: Can Your Frost Crack Be Repaired?
Size and Depth Limitations
The repair industry follows the “dollar bill rule”: if the damage can be covered by a dollar bill (approximately 6x2.5 inches), it’s generally repairable. For frost cracks specifically, length is less critical than width and depth. Cracks narrower than 1/8 inch with no visible gap between walls have excellent repair prospects. If you can slide a business card into the crack, replacement is likely necessary.
Depth assessment is trickier. Laminated windshields consist of two glass layers with a PVB interlayer. Surface cracks affecting only the outer layer are ideal candidates. If the crack has penetrated both layers (you’ll see air pockets or moisture between layers), the windshield’s safety function is compromised. A simple test: press a ballpoint pen along the crack line. If the inner layer feels intact and smooth, repair is viable.
Location Matters: Critical Vision Areas
Regulations vary, but most states prohibit repairs in the driver’s direct line of sight—typically an 11x8 inch area centered on the steering wheel. Even perfect repairs create slight optical distortion that can interfere with depth perception. Frost cracks that arc through this zone may be technically repairable but legally questionable.
Edge cracks within 2 inches of the windshield frame are particularly problematic. This area experiences maximum flex stress, and repairs here have lower success rates. However, because edge cracks compromise the windshield’s structural role in roof crush protection, attempting repair is often worthwhile before resigning to replacement. Just manage expectations: edge repairs may stop crack growth but won’t achieve cosmetic perfection.
Crack Patterns and Their Repairability
Frost cracks exhibit distinct patterns that indicate repair difficulty. Simple radial cracks extending from a central point are easiest—similar to star breaks from impacts. Linear cracks running straight across the glass are moderate difficulty, requiring precise injector positioning. The most challenging are combination cracks with multiple branches or “spider web” patterns where secondary cracks intersect the primary fracture.
Cracks with multiple “legs” often signal that the glass has been stressed beyond its elastic limit. Each branch point represents a stress concentration where the PVB interlayer may be torn. While resin injection can fill these voids, the structural continuity of the glass is permanently altered. In these cases, repair aims to prevent further propagation rather than restore original strength.
Step-by-Step Guide to Using a Repair Kit
Preparation and Cleaning
Success begins with meticulous preparation. Park your vehicle in a sheltered area where temperature will remain stable for at least two hours. The glass surface should be 40-80°F—use a hair dryer on low setting to gently warm excessively cold windshields, keeping the heat source 12 inches away to avoid thermal shock.
Clean the crack and surrounding 6-inch area with a specialized glass cleaner that leaves no residue. Avoid ammonia-based products that can interfere with resin adhesion. Use a straight pin or specialized probe to gently remove loose glass fragments and debris from the crack opening. For frost cracks with moisture contamination, apply a few drops of methanol or isopropyl alcohol to displace water, then use the kit’s vacuum cycle to extract it before resin injection.
Application Process
Mount the bridge assembly so the injector sits directly over the crack’s origin point—usually the edge or a visible chip. Apply a small drop of resin to the injector seal before attaching to ensure an airtight connection. Initiate a 2-minute vacuum cycle; you’ll see air bubbles evacuating through the resin reservoir. If bubbles continue after 90 seconds, your seal is compromised and must be reseated.
After vacuum, switch to pressure mode and slowly increase to 10-15 PSI. For cracks longer than 6 inches, you’ll need to “walk” the injector along the crack. Do this by releasing pressure, sliding the bridge 2-3 inches along the crack line, resealing, and repeating the vacuum/pressure cycle. Work from the origin point outward. Each segment requires 3-5 minutes of pressure injection for complete saturation.
Curing and Finishing
Once the entire crack is filled and no air bubbles remain visible, apply a curing strip or tape over the crack to prevent resin from oozing out. Position the UV lamp 1-2 inches from the surface and cure for the manufacturer-specified time—typically 5-10 minutes for winter formulations. For deep cracks, cure in 3-minute intervals, checking that the resin has hardened before proceeding.
After curing, remove the bridge and scrape away excess resin with a razor blade held at a 45-degree angle. The repaired area should be flush with the glass surface. Apply a final drop of “pit resin” to any surface imperfections and cure briefly to achieve a glass-smooth finish. Polish with a microfiber cloth and glass cleaner. The repair reaches full strength after 24 hours; avoid car washes and extreme temperatures during this period.
Common Mistakes That Ruin Repairs
Temperature and Environmental Errors
The number one DIY failure is attempting repairs on glass below 40°F. Cold glass causes resin to thicken and cure improperly, while thermal shock from sudden heating can extend the crack. Never pour hot water on a frozen windshield to “prepare” it—this creates new stress fractures. Similarly, repairing in direct sunlight on a cold day causes uneven heating; the glass surface may be 50°F while the shaded underside remains 20°F.
Humidity is another silent killer. Repairing in a garage with condensation on surfaces means moisture is already infiltrating your crack. Use a dehumidifier or wait for drier conditions. Wind is problematic too—it cools the repair area unevenly and can blow contaminants into uncured resin. A simple cardboard shield around your work area solves this.
Technical Application Pitfalls
Over-pressurization is the most common technical error. Enthusiastic DIYers crank pressure to 20+ PSI hoping for faster results, but this wedges the crack open wider, creating a repair that’s thick in the middle and thin at the edges. Always start at 5 PSI and gradually increase while monitoring resin flow.
Insufficient vacuum time leaves air trapped in micro-fractures. If you rush the 2-minute vacuum cycle, those bubbles will appear later as the resin settles, creating a “veiled” appearance. Another mistake is using too much resin—a fat bead over the crack doesn’t improve strength; it just wastes material and creates cleanup headaches. A proper repair uses just enough resin to fill the void with minimal overflow.
Safety Considerations and Legal Implications
Structural Integrity Concerns
Your windshield contributes up to 60% of your vehicle’s cabin rigidity in a rollover and serves as the backstop for passenger airbag deployment. A poorly repaired frost crack can shatter unexpectedly during these critical moments. Never repair cracks that penetrate both glass layers or extend into the windshield’s bonding area with the vehicle frame.
After repair, test integrity by gently tapping the repaired area with a plastic tool. A dull thud indicates good resin penetration; a hollow sound suggests air remains trapped. While DIY kits can restore significant strength, they don’t achieve the 95%+ restoration that professional pressure systems deliver. For high-performance vehicles or those with advanced driver assistance systems (ADAS) that rely on windshield-mounted cameras, professional repair is non-negotiable to maintain factory safety specifications.
State-by-State Regulations
Most states follow Federal Motor Vehicle Safety Standard 205, which prohibits repairs in the acute area of the windshield wiper sweep. However, interpretations vary. New York allows repairs anywhere outside the driver’s direct vision area, while California prohibits repairs that “obstruct or distort vision”—a subjective standard that could fail a vehicle inspection.
Some states require repair documentation for insurance claims, and DIY repairs may not qualify for coverage if the damage worsens. Keep before-and-after photos and the kit’s batch number for warranty claims. If your vehicle is leased, check your agreement—many require professional repairs using OEM-approved methods to avoid end-of-lease penalties.
Maintaining Your Windshield After Repair
Immediate Post-Repair Care
The first 24 hours are critical. Keep your vehicle in a temperature-controlled environment between 50-75°F. Avoid driving on rough roads that flex the chassis, as the resin hasn’t reached full polymerization strength. Don’t remove the curing tape or final resin cap until after the full cure time—premature removal can pull resin out of the crack.
If you must drive, keep defrosters on low and avoid directing hot air at the repair. Sudden temperature swings can cause differential expansion between the cured resin and glass, creating new stress points. Park facing away from direct sunlight if possible; uneven heating across the windshield can cause the crack to “remember” its original shape and slowly propagate around the repair.
Long-Term Prevention Strategies
Preventing recurrence is as important as the repair itself. Replace worn weatherstripping around the windshield that allows cold air to contact the glass edges. Consider a windshield cover for overnight parking in extreme cold, which reduces the temperature differential when you start your car. Always warm your vehicle gradually—start defrosters on the lowest setting and increase temperature over 5-10 minutes.
Apply a hydrophobic coating like Rain-X to the entire windshield after repair. This reduces ice adhesion and makes morning defrosting faster, minimizing thermal shock. In garage parking, leave windows cracked slightly overnight to equalize interior and exterior temperatures. For fleet vehicles, train drivers to never pour hot liquids on frozen windshields—a common shortcut that causes thousands in damage.
The Environmental Impact of Repair vs. Replacement
Sustainability Benefits
Repairing a frost crack instead of replacing the windshield prevents 25-30 pounds of laminated glass from entering landfills, where the PVB interlayer takes centuries to decompose. Manufacturing a new windshield generates approximately 170 pounds of CO2 emissions from glass production, transportation, and installation. A DIY repair kit’s carbon footprint is primarily the resin itself—mere ounces of material.
The environmental math is compelling: if just 10% of repairable windshields were fixed instead of replaced annually, we’d prevent over 50 million pounds of glass waste and 85,000 tons of CO2 emissions. The chemicals in repair resins are minimal compared to the urethane adhesives, primers, and cleaners used in replacement installations, which often contain isocyanates and volatile organic compounds.
Resin Disposal Best Practices
Leftover repair resin is classified as non-hazardous waste, but it should never be poured down drains. Cure excess resin under UV light until solid, then dispose with regular trash. The empty resin tubes are typically not recyclable due to chemical residue—check local regulations. Methanol or alcohol used for cleaning should be captured in a sealed container and taken to a household hazardous waste facility.
Consider the kit’s packaging waste. Premium kits with reusable bridges and injectors generate less long-term waste than disposable “one-and-done” systems. When your kit reaches its expiration date (typically 1-2 years), the curing lamp and tools can often be repurposed, while only the resin needs replacement. This modular approach reduces plastic waste by 60% compared to buying entirely new kits.
Budgeting for Quality: Price vs. Performance
What to Expect at Different Price Points
Entry-level kits ($20-40) typically include basic single-stage injectors, generic resin, and weak UV lights. They’re suitable for small, fresh cracks under 4 inches in mild temperatures but struggle with true frost crack complexity. Mid-range kits ($50-80) offer dual-action injectors, temperature-formulated resins, and stronger LED curing lamps—the sweet spot for most DIY enthusiasts tackling winter damage.
Premium kits ($90-150) feature professional-grade bridges with multiple anchor points, multi-viscosity resin sets, high-wattage UV systems, and crack-opening tools. These achieve 85-90% of professional results and pay for themselves after 2-3 successful repairs. They also include detailed instruction videos and technical support—valuable resources when you’re freezing in your driveway at 7 AM.
Hidden Costs to Consider
The sticker price doesn’t tell the whole story. Factor in replacement resin tubes ($15-25 each) since most kits only include enough for 3-5 repairs. Professional-grade UV lamps require $20-30 replacement bulbs after 50-100 hours of use. If you lack a garage, you may need a portable canopy ($50-100) to create a controlled environment.
Failed repairs often necessitate professional intervention at full cost, making that $30 kit potentially a $200 expense if used incorrectly. Consider your time investment too—a first repair takes 60-90 minutes versus 20 minutes for a pro. However, the knowledge gained is cumulative; your third DIY repair will be faster and better than a shop visit.
Warranty and Support: What Manufacturers Should Offer
Understanding Coverage Terms
Reputable manufacturers stand behind their products with at least a 1-year warranty against resin yellowing or bond failure. Read the fine print: some warranties only cover the resin, not the tools, while others require registration within 30 days of purchase. The best policies offer a “repair or replace” guarantee—if the resin fails, they send a new tube; if the injector leaks, they replace the entire bridge assembly.
Pay attention to batch numbers on resin packaging. Manufacturers track these for quality control, and warranty claims require them. Keep your receipt and photograph the kit components upon arrival—this documents any shipping damage and establishes your purchase date. Some companies offer extended warranties if you submit a photo of your completed repair, using customer data to improve product performance.
Customer Support Quality Indicators
Before purchasing, test the manufacturer’s support system. Send an email asking a technical question about temperature ranges. If you don’t receive a knowledgeable response within 24 hours, reconsider the purchase. Premium brands offer video chat support where technicians can diagnose your crack pattern and recommend specific techniques.
Look for comprehensive online resources: detailed PDF guides, troubleshooting videos, and active user forums. The best manufacturers host quarterly webinars on advanced repair techniques and maintain databases of vehicle-specific challenges. This ecosystem of support often proves more valuable than the kit itself when you’re facing an unusual crack pattern at 10°F.
Advanced Techniques for Challenging Repairs
Dealing with Contaminated Cracks
Frost cracks exposed to road salt, washer fluid, or de-icing chemicals for more than 48 hours become contaminated, preventing resin adhesion. The solution is a “flush and fill” technique using a specialized cleaning resin with surfactants that break down contaminants. Inject the cleaner under pressure, vacuum it out, repeat twice, then proceed with standard resin. This adds 15 minutes but can salvage otherwise hopeless damage.
For cracks with visible white residue (dried salt or antifreeze), gently probe with a fine needle to loosen deposits before cleaning. Never use metal tools that can scratch the PVB layer. In extreme cases, a 0.5mm drill bit can create a small access point at the crack’s deepest contamination, allowing targeted flushing. This requires steady hands and should only be attempted on cracks far from the driver’s vision area.
Multi-Point Injection Strategies
Long frost cracks (8+ inches) often require three or more injection points to eliminate air pockets. Start at the crack origin, then place secondary injectors every 4-6 inches along the length. Use a “pressure sequencing” technique: begin vacuum on all points simultaneously, then apply pressure starting at the origin and moving outward. This pushes air ahead of the resin front, preventing bubble entrapment.
Some pros use a “continuous injection” method with a special bridge that slides along the crack while maintaining seal. While DIY kits don’t offer this, you can simulate it by overlapping injection zones by 1 inch, ensuring complete coverage. Mark the crack with painter’s tape to track your progress and avoid missed sections. This methodical approach takes longer but achieves professional-grade results on extensive damage.
Seasonal Storage and Kit Longevity
Proper Storage Conditions
Resin chemistry degrades with heat and UV exposure, yet many owners store kits in hot garages or sunny dashboards. Ideal storage is a cool, dark place at 60-70°F—basement shelves work perfectly. Never leave kits in vehicles long-term; summer heat can reduce resin effectiveness by 50% within three months.
For winter-specific formulations, avoid freezing temperatures during storage. While the resin won’t freeze solid, repeated freeze-thaw cycles cause separation of the chemical components. If your kit does freeze, let it warm gradually to room temperature over 24 hours, then shake vigorously for 2 minutes before use. Test the resin on a piece of glass first to ensure it cures properly.
Shelf Life and Expiration Dates
Most resins have a printed expiration date 12-18 months from manufacture. However, this assumes ideal storage conditions. Kits stored in climate-controlled environments often remain viable 6-12 months beyond the date, while those exposed to heat may fail before expiration. Perform a simple test: place a drop of resin on glass and cure it. If it remains tacky or yellows within a week, the batch is compromised.
Track your kit’s age by writing the purchase date on the box with a permanent marker. When buying online, check the manufacturing date in the product description—some discount retailers sell kits nearing expiration. The $5-10 savings isn’t worth a failed repair. Premium manufacturers print batch-specific QR codes that link to test results and exact expiration data when scanned.
Frequently Asked Questions
1. Can I repair a frost crack in my driveway when it’s below freezing outside?
While possible, it’s not recommended. The glass must be at least 40°F for the resin to flow and cure properly. Use a space heater in a garage or warm the specific area with a hair dryer on low, maintaining temperature for the entire repair process. Some premium kits include heating elements specifically for this scenario.
2. How long will a DIY frost crack repair last compared to a professional job?
A quality DIY repair using proper techniques lasts 3-7 years, while professional repairs typically last 5-10 years. The difference stems from pressure capabilities and resin quality. However, a well-executed DIY repair on a fresh crack often outperforms a rushed professional job on old damage.
3. Will my insurance cover a DIY repair kit, or do they only pay for professional service?
Most insurance policies only reimburse professional repairs with proper documentation. However, using a DIY kit costs less than most deductibles. Some insurers offer policy discounts for vehicles with documented DIY repair histories, viewing it as proactive maintenance. Check with your agent before purchasing.
4. Why do frost cracks keep coming back after I repair them?
Recurrence usually indicates the underlying stress wasn’t relieved. The crack may have reached a point where the glass is permanently weakened, or you didn’t address the origin point completely. Edge cracks are particularly prone to re-opening because the frame continues flexing. Installing a crack stopper at the termination point can prevent this.
5. Can I use a standard rock chip repair kit on frost cracks if that’s all I have?
Standard kits will provide temporary cosmetic improvement but lack the low-viscosity resin and moisture-displacement properties needed for lasting frost crack repair. You might get through one winter, but the crack will likely reappear with temperature cycling. Consider it a stop-gap measure until you can use a proper frost crack system.
6. How do I know if my crack is too old to repair successfully?
The contamination timeline is key. Cracks exposed to elements for over two weeks accumulate moisture, salt, and debris that prevent resin bonding. If the crack interior looks white, feels rough, or has visible dirt when probed gently, success rates drop below 50%. Professional cleaning can sometimes salvage cracks up to a month old.
7. Will a repaired frost crack still be visible, and will it distract me while driving?
All repairs leave some trace—a faint line where the resin refracts light differently than glass. In the critical vision area, this can be distracting. Outside that zone, most repairs become nearly invisible after proper polishing. The structural benefit far outweighs minor cosmetic imperfections, especially compared to an unrepaired crack that spreads.
8. Can frost crack repair kits fix cracks in heated windshields with embedded wires?
Yes, but with extreme caution. The heating elements are printed on the inner glass layer, so surface cracks rarely damage them. However, the repair process can bridge wires with conductive resin if it penetrates too deeply. Use a multimeter to test element continuity before and after repair. If wires are severed, only professional replacement restores defrost function.
9. What’s the biggest difference between $30 and $100 repair kits?
The $70 difference buys pressure control, resin quality, and curing power. Cheap kits use single-stage injectors that can’t create proper vacuum, generic resins that yellow within a year, and weak UV lights requiring 30+ minute cures. Premium kits offer dual-action injectors, optically clear resins with UV inhibitors, and high-intensity LED curing that works in winter conditions.
10. How many frost crack repairs can I realistically expect to perform with one kit?
Most kits include enough resin for 5-8 small-to-medium repairs. The tools themselves last indefinitely with proper care. The limiting factor is resin shelf life—once opened, tubes begin oxidizing. Plan to use the kit within 6 months for optimal results. For households with multiple vehicles or fleet applications, buying resin refills in smaller quantities ensures fresh material for each repair.