Snow plows are the unsung heroes of winter, battling through the harshest conditions to keep roads clear and communities safe. But while you’re pushing tons of snow and ice, your plow is fighting a much more insidious enemy: corrosive road salt, moisture, and physical abrasion that can turn a $10,000 investment into rusted scrap metal in just a few seasons. The undercarriage of your snow plow takes the worst beating, exposed to constant spray, impact debris, and chemical assault. This is where specialized undercoating isn’t just an option—it’s essential armor that can double or even triple the operational lifespan of your equipment.
Choosing the right undercoating for your snow plow requires more than grabbing the first can off the shelf. Unlike standard vehicle undercoatings, snow plow applications demand formulations that can withstand extreme flexing, repeated impact with frozen ground, and prolonged exposure to magnesium chloride and other aggressive de-icing chemicals. The wrong product will crack, peel, or wash away after the first storm, leaving your investment vulnerable. This guide breaks down everything you need to know to make an informed decision, from material science to application techniques, ensuring your plow stays protected season after brutal season.
Top 10 Undercoating For Snow Plows
Detailed Product Reviews
1. Fluid Film 1 Gallon Can Rust Inhibitor Rust Prevention Anti Corrosion Anti Rust Coating Undercoating Underbody Rust Proofing Corrosion Protection for Truck Snow Blower Mower Car Semi Tractor Bus
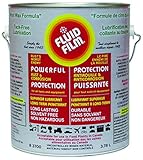
Overview: Fluid Film’s 1-gallon rust inhibitor is a professional-grade lanolin-based coating designed for comprehensive underbody protection. This bulk format serves owners of multiple vehicles or heavy equipment needing extensive rust proofing. Unlike conventional coatings, it remains active and doesn’t dry to a brittle finish, providing lasting protection for trucks, snow blowers, mowers, and commercial vehicles.
What Makes It Stand Out: The lanolin-based, solvent-free formula is this product’s defining feature. It never fully cures, allowing it to self-heal and maintain flexibility even in extreme temperatures. This makes it ideal for snow blower chutes where it acts as an anti-freezing agent while preventing corrosion. The environmentally friendly composition means you can apply it without harsh chemical concerns, and its creeping ability ensures it reaches hidden rust-prone areas that other products miss.
Value for Money: At $0.37 per fluid ounce, this gallon container offers significant savings compared to $8-12 aerosol cans containing only 12-16 ounces. For undercoating a full-size truck, you’ll use 32-48 ounces, making this gallon sufficient for 2-3 vehicles. Considering it lasts 1-2 years per application versus 6 months for cheaper alternatives, the long-term value is exceptional for fleet owners or DIY enthusiasts.
Strengths and Weaknesses: Strengths: Non-toxic and environmentally safe; excellent penetration into seams; remains pliable and won’t crack; versatile across automotive and agricultural equipment; effective anti-freeze properties. Weaknesses: Requires separate spray gun or pump applicator; strong lanolin odor during application; can attract road grime if over-applied; messy application process needing surface prep.
Bottom Line: This gallon-sized Fluid Film is an excellent investment for serious DIYers or small fleet operators battling rust in harsh climates. While the upfront cost and application equipment requirements are higher than aerosols, the superior protection, coverage area, and longevity make it the most economical and effective choice for comprehensive underbody rust prevention.
Why Your Snow Plow Needs Specialized Undercoating
The Unique Challenges of Snow Plow Corrosion
Snow plows operate in what corrosion engineers call a “perfect storm” environment. Unlike regular vehicles that might see occasional winter driving, plows are submerged—literally—in corrosive slurry for hours at a time. The combination of road salt, sand, gravel, and constant moisture creates an electrolyte bath that accelerates galvanic corrosion, especially where dissimilar metals meet. Your plow’s steel blade, aluminum A-frame, and hydraulic components form tiny electrical currents that literally eat away at the metal.
The mechanical stresses are equally brutal. Every time your blade strikes a frozen snowbank, curb, or hidden obstacle, the entire undercarriage experiences shock loads that can crack rigid coatings. Standard automotive undercoatings, designed for passive protection, simply can’t handle this dynamic environment. They’ll chip away at stress points, creating entry points for moisture and salt that get trapped underneath, accelerating hidden rust formation.
How Road Salt Accelerates Undercarriage Damage
Modern de-icing chemicals have evolved far beyond simple rock salt. Many municipalities now use magnesium chloride, calcium chloride, and brine solutions that are more effective at lower temperatures but exponentially more corrosive. These hygroscopic chemicals actively attract moisture from the air, keeping your undercarriage wet even in dry conditions. They also penetrate microscopic cracks and seams, working their way into areas that never fully dry out.
The freeze-thaw cycle compounds this damage. As temperatures fluctuate, metal expands and contracts, opening and closing microscopic fissures in your undercoating. Each cycle pumps corrosive brine deeper into these gaps. Within a single winter, untreated metal can lose up to 0.5mm of thickness in critical structural areas—a loss that significantly weakens load-bearing components and hydraulic mounts.
Types of Undercoating Materials for Snow Plows
rubberized undercoatings: Pros and Cons
Rubberized undercoatings create a flexible, impact-absorbent barrier that excels at deadening sound and resisting gravel spray. These asphalt-rubber blends typically contain 30-40% rubber content, giving them exceptional elongation properties—often stretching 200-400% before tearing. This flexibility makes them ideal for areas that experience constant vibration and flex, such as blade mounts and frame rails.
However, the rubber content is a double-edged sword. While flexible, these coatings can soften in summer heat, attracting road debris and becoming tacky. They’re also vulnerable to petroleum-based chemicals like hydraulic fluid and diesel fuel, which can cause swelling and degradation. For snow plows, this means careful consideration of where you apply rubberized products—excellent for general undercarriage protection but potentially problematic near hydraulic lines and fuel tanks.
Asphalt-Based Undercoatings: Heavy-Duty Protection
Asphalt-based formulations represent the traditional heavy-duty choice for commercial snow plow operators. These products create a thick, tar-like barrier that excels at sealing out moisture and resisting salt penetration. Their high solids content (typically 60-70%) means you can build substantial film thickness in a single coat, providing robust protection against stone chips and abrasion.
The downside is rigidity. Pure asphalt coatings become brittle in extreme cold, making them prone to cracking when your plow flexes under load. Modern formulations often incorporate polymers to improve cold-weather performance, but they still require careful application in terms of thickness—too thick, and they’ll crack; too thin, and they won’t provide adequate protection. They also demand longer curing times, sometimes 48-72 hours, which can be problematic for equipment that needs to be ready at a moment’s notice.
Wax-Based Undercoatings: The Traditional Approach
Wax-based undercoatings, often called “cosmoline-type” products, have been protecting military and industrial equipment for decades. These formulations use petroleum waxes combined with corrosion inhibitors that creep into seams and crevices, displacing moisture. Their self-healing properties are particularly valuable—minor scratches and chips are filled as the wax flows back into damaged areas.
For snow plows, wax-based products offer excellent penetration into the internal cavities of tubular frames and box sections, areas where rust often starts unseen. They’re also easy to reapply and touch up without extensive surface preparation. The trade-off is durability. Wax coatings wash away more quickly than permanent films, requiring reapplication every 12-18 months. They also provide less impact resistance, making them better suited as a supplemental treatment rather than primary protection.
Oil-Based Undercoatings: Penetrating Rust Inhibitors
Oil-based undercoatings work through capillary action, wicking into the microscopic pores of metal and displacing moisture. These products typically contain rust-inhibiting additives like zinc or aluminum flakes suspended in a penetrating oil carrier. Once the carrier evaporates, it leaves behind a protective film that actively prevents oxidation.
The key advantage for snow plows is their ability to treat existing rust. Unlike surface coatings that simply cover problems, oil-based formulas can stabilize light surface rust, converting iron oxide into a passive layer. This makes them ideal for older plows showing early corrosion signs. However, they don’t build significant film thickness, so they won’t protect against physical abrasion or stone impacts. They’re best used as a rust-inhibiting primer beneath a more robust topcoat.
Polyurethane Undercoatings: Modern Synthetic Solutions
Polyurethane undercoatings represent the cutting edge of corrosion protection technology. These two-component formulations create a cross-linked polymer film that’s both flexible and incredibly durable. With elongation rates of 300-600% and tensile strength exceeding 2,000 psi, they can absorb impacts that would shatter other coatings while maintaining a continuous protective barrier.
For snow plow applications, polyurethanes offer superior chemical resistance to modern de-icers and hydraulic fluids. They cure quickly (often touch-dry in 2-4 hours) and can be applied in temperatures as low as 35°F, crucial for emergency mid-season applications. The primary drawback is cost—typically 3-5x more expensive than traditional options—and application complexity, requiring proper mixing and specialized spray equipment. For commercial operators running multiple plows, the long-term durability often justifies the upfront investment.
Key Features to Evaluate in Snow Plow Undercoatings
Salt and Chemical Resistance Ratings
When evaluating undercoatings, look beyond generic “salt-resistant” claims. Reputable manufacturers provide specific test data, often referencing ASTM B117 salt spray testing. For snow plow duty, you want products that withstand 1,000+ hours of continuous salt spray without failure. More importantly, check for resistance to magnesium chloride specifically—this chemical is 5-10x more corrosive than sodium chloride and can degrade coatings that perform well in standard salt tests.
Also examine the product’s resistance to calcium acetate and potassium acetate, increasingly common in airport and municipal applications. These organic salts have different chemical properties that can soften or dissolve certain coating types. The best snow plow undercoatings will have documented performance against a cocktail of common de-icing chemicals, not just individual components.
Flexibility and Impact Resistance
Flexibility in undercoatings is measured by elongation-at-break percentage and mandrel bend testing. For snow plows, target products with at least 200% elongation and the ability to pass a 1/8-inch mandrel bend test at -20°F. This ensures the coating won’t crack when your blade strikes frozen ground at 15 mph in subzero temperatures.
Impact resistance is equally critical. Look for products rated to ASTM D2794, which measures resistance to rapid deformation. A rating of 80+ inch-pounds indicates the coating can withstand significant strikes without cracking. Some advanced formulations include micro-fibers or ceramic microspheres that distribute impact energy, preventing crack propagation. These additives are particularly valuable along the leading edges of plow frames and mounting points.
Adhesion Properties on Steel and Aluminum
Snow plows typically combine steel blades and frames with aluminum hydraulic manifolds and light housings. This mixed-metal construction demands undercoatings with excellent adhesion to both substrates. Check for products that specify adhesion ratings to both blasted steel and aluminum without requiring separate primers.
The best formulations use adhesion promoters that chemically bond to metal oxides, creating a covalent bond stronger than mechanical adhesion alone. Look for products mentioning “silane coupling agents” or “phosphate conversion” properties. These technologies are especially important on aluminum, where poor adhesion can lead to filiform corrosion—worm-like threads of corrosion that spread beneath the coating, invisible until catastrophic failure occurs.
Curing Time and Temperature Requirements
In the snow removal business, downtime equals lost revenue. Undercoatings that require 72 hours to fully cure might be unacceptable for emergency equipment. Evaluate both “dry to touch” and “full cure” times. Modern fast-cure formulations can be dry enough for light use in 4-6 hours and fully cured within 24 hours.
Temperature flexibility is equally crucial. You might need to touch up damage mid-season when temperatures are in the teens. Some advanced undercoatings can be applied at temperatures as low as 0°F, though curing times extend significantly. Products requiring 50°F+ application temperatures are essentially useless for emergency winter repairs. Check the technical data sheet for “application temperature range” and “service temperature range”—the latter should extend from -40°F to 200°F for true snow plow suitability.
Sound Dampening Capabilities
While corrosion protection is paramount, don’t overlook the acoustic benefits of quality undercoating. Snow plows generate tremendous noise from stone impact, vibration, and metal-on-metal contact. A good undercoating can reduce cabin noise by 3-7 decibels, significantly reducing operator fatigue during 12-hour shifts.
Sound dampening is measured by damping loss factor. Products with a factor above 0.1 at relevant frequencies (500-2000 Hz) provide noticeable noise reduction. Rubberized and polyurethane undercoatings typically excel here, converting vibrational energy into negligible heat through polymer deformation. This not only quiets operation but also reduces metal fatigue from vibration, extending structural component life.
Application Methods: What You Need to Know
Spray Application Techniques for Maximum Coverage
Professional-grade spray equipment is non-negotiable for adequate snow plow protection. Airless spray systems operating at 2,000-3,000 psi can atomize thick undercoatings into a fine mist that penetrates seams and wraps around complex geometries. This pressure range is critical—too low, and you won’t achieve proper film thickness; too high, and you’ll create overspray waste and dry spray that doesn’t adhere.
For optimal coverage, use a spray tip sized 0.021-0.025 inches with a fan pattern of 12-18 inches. Apply in multiple light passes rather than one heavy coat, building to a final dry film thickness of 8-12 mils on flat surfaces and 15-20 mils in seam areas. Hold the gun 6-8 inches from the surface and maintain a consistent 50% overlap pattern. For tubular frames, use a circular “whipping” motion to ensure coating flows into the gap between the spray pattern and the pipe’s far side.
Brush and Roll Methods for Detail Work
While spraying covers large areas efficiently, brushes and rollers are essential for detail work around hydraulic fittings, electrical connections, and bolt heads. Use natural bristle brushes for oil-based products and synthetic brushes for water-based formulations. The brush technique matters—apply with a stippling motion that works material into seams rather than broad strokes that bridge gaps.
For small touch-ups, foam rollers can apply consistent film thickness without air entrapment. Cut rollers into 2-inch widths to access tight spaces between frame rails. Always “lay off” brushed areas by lightly dragging the brush tip across the surface to eliminate brush marks and ensure even film build. Remember, brushed areas often require 20-30% longer curing time than sprayed sections due to thicker application.
Professional vs. DIY Application Considerations
Professional application typically costs $800-$1,500 for a complete snow plow treatment but offers advantages difficult to replicate in a home shop. Commercial booths provide controlled temperature and humidity, critical for proper curing. Professionals also have lift equipment that allows 360-degree access to the undercarriage, ensuring no missed spots. Most importantly, they can apply multiple product types—using penetrating oils inside frame tubes, flexible polyurethanes on high-impact areas, and heavy asphalt on general surfaces.
DIY application can save 60-70% of the cost but requires significant preparation. You’ll need a heated garage (minimum 50°F), proper PPE including respirators rated for organic vapors, and patience for the multi-day process. The biggest DIY mistake is inadequate surface prep—professionals use industrial-grade degreasers and media blasting that most homeowners can’t replicate. If you choose DIY, consider hiring a professional for the initial heavy application, then handle touch-ups yourself.
Preparing Your Snow Plow for Undercoating
Critical Cleaning and Degreasing Steps
Surface preparation accounts for 70% of coating success. Start with a commercial-grade degreaser containing alkaline detergents and emulsifiers that break down petroleum-based contaminants. Apply with a pressure washer operating at 2,500-3,000 psi, using a 15-degree nozzle to avoid driving water into sealed components. Pay obsessive attention to the inside of frame rails—use a pressure washer wand extension to blast 3 feet into each tube end.
After degreasing, perform a water-break test. Spray the surface with clean water; if it beads up, you still have contaminant films present. Repeat cleaning until water sheets evenly. For hydraulic fluid stains, use a solvent-based degreaser followed by a detergent wash to remove residue. Never apply undercoating over any grease or oil—these will cause immediate delamination. Even fingerprint oils can create adhesion failures, so wear clean nitrile gloves throughout the entire prep process.
Rust Removal and Treatment Protocols
Active rust must be converted or removed; covering it simply hides the problem while it continues to grow. For light surface rust (less than 0.5mm deep), use a phosphoric acid-based rust converter that transforms iron oxide into iron phosphate, an inert compound that actually improves coating adhesion. Apply with a brush, allow 24 hours for reaction, then rinse with clean water and dry thoroughly.
For heavier rust, media blasting is the gold standard. Use crushed glass or aluminum oxide at 90-110 psi to achieve a near-white metal finish (SSPC-SP10 standard). Avoid sand—it contains moisture and contaminants that cause flash rusting. After blasting, apply a thin “wash coat” of penetrating oil-based rust inhibitor within 30 minutes to prevent flash rusting, then proceed with undercoating within 4 hours. For pitted areas, fill with epoxy filler before undercoating to create a smooth surface that won’t trap moisture.
Masking and Protection of Sensitive Components
Proper masking is tedious but critical. Use high-temperature masking tape (rated to 250°F) to protect hydraulic cylinder rods—these must remain pristine to prevent seal damage. Cover breather vents on gearboxes and hydraulic reservoirs with aluminum foil tape that can be easily removed. For electrical connections, use dielectric grease on contacts before covering with tape to prevent moisture intrusion.
Pay special attention to grease fittings and zerk fittings—cover these with small caps or tape to prevent coating from blocking lubrication access. Mask the entire hydraulic manifold with plastic sheeting, as even overspray can clog sensitive valves. For plows with electronic sensors or proximity switches, remove these components entirely if possible. The 30 minutes spent on careful masking saves hours of troubleshooting electrical or hydraulic failures later.
Maintenance and Reapplication Strategies
How Often Should You Reapply Undercoating?
The reapplication interval depends on usage intensity and product type. Commercial operators running plows 500+ hours per season should inspect undercoating monthly during operation and plan for complete reapplication every 2-3 years. Municipal plows in high-salt areas may need annual touch-ups on high-wear areas like blade mounts and push frames.
For residential users with 50-100 hours of annual use, a quality polyurethane undercoating should last 4-5 years. However, perform a thorough inspection each spring when you remove the plow. Use a thickness gauge to measure film build in representative areas; if you’ve lost more than 30% of original thickness, it’s time for a maintenance coat. Wax-based and oil-based products require more frequent attention—plan on reapplication every 12-18 months regardless of usage.
Signs Your Undercoating is Failing
Early failure indicators are subtle but critical to catch. Look for “mud cracking”—fine network cracks resembling dried mud, indicating the coating has lost flexibility. Check seam areas for “bridging failure,” where the coating has pulled away from sharp edges, creating a capillary gap that draws in moisture. Use a pocket knife to gently scrape suspect areas; if the coating flakes off or you see rust staining underneath, you’ve got active corrosion.
Another warning sign is color change. Many undercoatings contain UV indicators that darken as the product ages and degrades. If your bright gray coating has turned dark brown or black, the protective additives have likely been depleted. Also inspect for “chalking”—a powdery residue when you rub the surface, indicating polymer breakdown. Pay particular attention to the “splash zone” areas behind wheels and near the blade, which see the highest impact and chemical exposure.
Touch-Up Techniques for Damaged Areas
Mid-season touch-ups require a different approach than full applications. First, clean the damaged area with a wire brush and solvent wipe to remove salt and debris. For small chips (less than 1-inch diameter), use an aerosol version of your original undercoating—shake vigorously for 2 minutes and apply light mist coats to avoid runs. For larger areas, use a brushable touch-up compound that matches your base coating chemistry.
Critical tip: Never touch up asphalt-based coatings with rubberized products or vice versa. The different solvent systems can cause lifting and delamination. If you’re unsure of the original product, use a neutral oil-based rust inhibitor for emergency repairs, then properly recoat in spring. For polyurethane systems, keep a small kit of the two-component product mixed and ready—once catalyzed, you typically have 30-45 minutes of working time. Apply touch-ups when temperatures are above 40°F and rising for best adhesion.
Cost Analysis and Value Considerations
Understanding Price vs. Performance Ratios
Undercoating prices range from $50 for DIY rubberized spray cans to $2,000+ for professional polyurethane systems. The cost per mil of dry film thickness is the true metric of value. A $150 gallon of asphalt-based coating that yields 30 mils of protection costs $5 per mil, while a $400 gallon of polyurethane providing 10 mils might seem more expensive at $40 per mil. But if the polyurethane lasts 5 years versus 2 years for asphalt, the annual cost is actually lower.
Factor in application costs too. DIY might save $1,000 initially, but if improper prep leads to premature failure after 18 months, you’ve lost money. Commercial operators should calculate cost per hour of plow operation. A $1,500 professional treatment that protects a plow for 2,000 hours costs $0.75 per hour—a negligible expense compared to $50+ per hour for equipment replacement costs. For municipal fleets, the math is even clearer: extending plow life from 5 to 10 years represents tens of thousands in deferred capital expenses.
Long-Term Savings from Proper Undercoating
The financial case for quality undercoating extends beyond equipment life. Corroded hydraulic lines and fittings are the leading cause of in-season failures, with a single roadside repair costing $300-500 in labor and lost productivity. A properly coated plow experiences 70-80% fewer hydraulic failures. Frame corrosion that compromises structural integrity can lead to catastrophic blade detachment—a safety liability costing millions in potential lawsuits.
Consider resale value too. A 7-year-old plow with intact undercoating and minimal rust will command 40-50% more than a rusted equivalent. For commercial operators who rotate equipment every 3-5 years, this difference can be $3,000-5,000 per plow. Additionally, many insurance companies offer 5-10% discounts on equipment policies for documented corrosion prevention programs. Over a fleet of 10 plows, these savings can offset the entire undercoating program cost.
Environmental and Safety Considerations
VOC Regulations and Eco-Friendly Options
Volatile Organic Compound (VOC) regulations vary dramatically by state, with California’s CARB standards being the most restrictive. Many traditional asphalt and rubberized undercoatings contain 400-600 g/L VOCs, making them illegal in some jurisdictions. Water-based formulations have emerged with VOC levels under 100 g/L, though they historically lacked durability. New hybrid waterborne polyurethanes now offer performance approaching solvent-based products while meeting strict environmental standards.
For eco-conscious operators, bio-based undercoatings derived from soybean oil or recycled rubber offer sustainable alternatives. These products typically sacrifice some chemical resistance but perform adequately for light-duty applications. When selecting any product, check the Safety Data Sheet (SDS) for Section 15 regulatory information. Products marked “EPA 40 CFR 59 compliant” meet federal standards, but always verify state and local requirements, especially if you’re a commercial applicator requiring an EPA certification.
Proper Disposal and Cleanup Procedures
Undercoating overspray and waste materials are hazardous waste due to heavy metal content and petroleum solvents. Never wash tools or spray equipment where runoff can enter storm drains. Collect all cleaning solvents in sealed containers for disposal at a certified hazardous waste facility—a single gallon of waste thinner can contaminate 250,000 gallons of groundwater.
For cleanup, use mineral spirits for oil-based products and warm soapy water for water-based formulations. Soiled rags pose a spontaneous combustion risk; store them in OSHA-approved metal disposal containers with tight-fitting lids. If you’re stripping old undercoating, the waste material may contain hexavalent chromium from previous rust—this requires professional hazardous waste handling. Document all disposal with manifests; commercial operators can face $10,000+ fines for improper disposal. Consider hiring a certified coatings contractor who includes waste disposal in their service package.
Common Mistakes to Avoid
Skipping Surface Preparation
The most catastrophic error is insufficient cleaning. Undercoating applied over even invisible salt residue will delaminate within weeks. A common mistake is pressure washing without subsequent solvent wiping—water can push salt deeper into seams rather than removing it. Always follow water cleaning with a solvent wipe using clean white rags. When the rag shows no discoloration after wiping, you’re ready for coating.
Another prep failure is inadequate rust treatment. Wire brushing alone leaves behind active rust spores that continue growing under the coating. Even if you can’t see them, they create osmotic blisters that eventually crack the coating. Always use a rust converter or phosphoric acid treatment after mechanical removal. The chemical reaction creates a passive layer that stabilizes the surface and improves adhesion.
Applying in Poor Conditions
Temperature and humidity dramatically affect curing. Applying undercoating when temperatures are below the manufacturer’s minimum (often 50°F) prevents proper film formation, leaving a tacky, weak coating that washes away. High humidity (above 85%) can cause “blushing” in polyurethane coatings, creating a milky appearance and weak surface layer.
Wind is another overlooked factor. Even a 10 mph breeze can cause 30-40% overspray loss and carry airborne contaminants onto your wet coating. If you must apply outdoors, create a temporary windbreak with plastic sheeting. Better yet, wait for calm conditions. The optimal application window is 60-75°F, humidity below 70%, and wind under 5 mph—not always easy to find in plow season, which is why professional booths are worth the investment.
Overlooking Drainage Holes and Seams
Snow plow frames are riddled with drainage holes, weld seams, and overlapping plates that trap moisture. A common mistake is coating over these areas without ensuring they can still drain. Use pipe cleaners or wire to keep drainage holes clear during application. For seams, apply a stripe coat with a brush first, forcing material into the gap, then spray the general area. This “stripe and spray” technique ensures complete coverage without bridging.
Pay special attention to the area where the A-frame meets the blade—this high-stress joint flexes constantly and is a prime rust spot. Apply extra material here, building up a “filet” of coating that reinforces the seam. Similarly, treat the inside of frame tubes by spraying through access holes, rotating the plow to ensure complete coverage. Missing these hidden areas is like locking your front door while leaving windows wide open.
Frequently Asked Questions
How long does undercoating last on a snow plow?
Quality polyurethane undercoating lasts 4-5 years for residential use and 2-3 years for commercial applications with 500+ annual hours. Asphalt-based products typically last 2-3 years residentially and 1-2 years commercially. Wax and oil-based treatments need annual reapplication. The key is annual inspection—regardless of product type, high-impact areas like blade mounts may need touch-ups every 12-18 months.
Can I apply undercoating over existing rust?
Light surface rust can be treated with rust converter and then coated, but heavy scale rust must be removed. Undercoating over thick rust is like painting over rotten wood—it hides the problem while it continues to spread. Media blasting to near-white metal is the gold standard. If blasting isn’t possible, use needle guns and grinding wheels to remove all loose material, then apply a rust converter before coating.
What’s the best time of year to undercoat my plow?
Late spring, after plow season ends, is ideal. This allows maximum curing time before next winter and lets you address any rust that developed during the season. Temperatures are typically optimal (60-75°F), and you can keep the plow out of service for the required 48-72 hour cure period. Avoid fall applications unless using fast-cure formulations, as unexpected early snow can damage uncured coating.
Does undercoating void my plow manufacturer’s warranty?
Most manufacturers allow undercoating but require it be applied to painted surfaces only, not bare metal. Check your warranty terms—some specify approved coating types or require professional application. Never coat hydraulic cylinder rods, seals, or electrical components. Keep documentation of the products used; if a corrosion-related warranty claim arises, you’ll need to prove you used appropriate materials.
How much undercoating do I need for a standard pickup plow?
A typical 8-foot pickup plow requires 1.5-2 gallons of sprayable undercoating for complete coverage, including inside frame tubes. For brush application, plan on 2-2.5 gallons due to thicker application. Commercial V-plows need 2.5-3 gallons. Always buy 20% more than calculated—you’ll use more than expected on seams and touch-ups, and partial gallons can’t be stored once catalyzed.
Can I use truck bed liner as undercoating on my plow?
While tempting due to its toughness, standard spray-on bed liner is too rigid for plow undercarriages. It lacks the flexibility to withstand constant frame flexing and will crack within months. However, some manufacturers offer “pliable” bed liner formulations specifically for undercarriage use. If you choose this route, verify the product has at least 200% elongation and is rated for subzero temperatures.
Is rubberized or asphalt undercoating better for snow plows?
For most applications, rubberized undercoating offers better impact resistance and flexibility, making it superior for high-stress areas. However, asphalt-based products provide better moisture barrier properties for general undercarriage protection. The optimal solution is a hybrid approach: asphalt-based on large flat areas, rubberized on flex points and impact zones. Some professional applicators offer two-product systems for this reason.
How do I remove old undercoating before reapplication?
Chemical strippers containing methylene chloride are effective but extremely hazardous and now restricted in many areas. Safer options include soy-based gel strippers that work overnight, or mechanical removal with needle guns and wire wheels. For large areas, some shops use dry ice blasting, which leaves no secondary waste. Whatever method you choose, complete removal is essential—new coatings won’t adhere properly to old, oxidized undercoating.
Will undercoating interfere with my plow’s quick-mount system?
Yes, if applied carelessly. Undercoating buildup on mounting surfaces can prevent proper engagement and cause misalignment. Mask all mounting plates, pins, and alignment tabs before application. Apply a light coat of anti-seize compound to these areas instead of undercoating. For receiver-style mounts, apply undercoating only to the external surfaces, keeping the internal socket clean. Check engagement after coating and file away any overspray that interferes with fit.
Can I undercoat just the blade, or does the whole plow need treatment?
While the blade experiences the most impact, the entire plow system needs protection. The A-frame, hydraulic manifold, and mounting hardware are equally vulnerable to salt spray and often fail first because they’re overlooked. The blade itself is typically replaceable, but a rusted A-frame totals the plow. Focus your efforts and budget on the structural components first, then treat the blade as a secondary priority. A compromised mounting system is far more dangerous than a rusty cutting edge.