Your rocker panels live a thankless existence. While you’re enjoying the gleam of a freshly waxed hood or the deep shine of polished wheels, these low-slung body panels are being brutally assaulted by gravel, salt, slush, and road debris. They’re the unsung heroes of your vehicle’s structural integrity—and often the first casualties of rust. Choosing the right undercoating isn’t just about preservation; it’s about understanding the unique battlefield your rocker panels face and arming them with purpose-built protection that goes beyond generic undercarriage sprays.
In this comprehensive guide, we’ll dismantle the marketing hype and dive deep into the science, application techniques, and critical decision-making factors that separate effective rocker panel protection from wasted effort and money. Whether you’re a hands-on enthusiast prepping a classic restoration or a daily driver owner in the rust belt, these insights will help you make an informed choice that extends your vehicle’s life and maintains its value.
Top 10 Undercoating For Rocker Panels
Detailed Product Reviews
1. Blysk Ultra Fine Black Texture Coat U270 – Paintable Chip Guard Spray for Automotive Bumpers, Rocker Panels & Trim – Fast-Drying, Durable Protective Finish 16 oz (1)

Overview: The Blysk U270 offers DIY automotive enthusiasts a cost-effective solution for protecting vulnerable vehicle surfaces. This 16-ounce aerosol delivers an ultra-fine textured finish that mimics factory OEM styling on bumpers, rocker panels, and trim pieces. Designed for quick application and rapid turnaround, it provides a practical middle ground between bare paint and professional-grade coatings.
What Makes It Stand Out: The ultra-fine texture distinguishes it from coarser competitors, creating a more refined appearance that blends seamlessly with modern vehicle finishes. Its rapid drying formula—touch-dry in minutes and paintable within 30-60 minutes—significantly accelerates project completion. The even spray pattern minimizes overspray waste, making it accessible for novice users while delivering consistent results across multiple surface types.
Value for Money: At $23.59 for 16 ounces, this represents exceptional value at approximately $1.47 per ounce. It undercuts premium brands by 50-70% while delivering comparable protection. For single-vehicle applications or spot repairs, one can provides adequate coverage without the financial commitment of professional products. The versatility across multiple applications further maximizes return on investment.
Strengths and Weaknesses: Strengths: Budget-friendly pricing; refined ultra-fine finish; rapid drying enables same-day painting; minimal overspray; versatile application across numerous surfaces; user-friendly for beginners.
Weaknesses: Lesser-known brand may concern quality-conscious buyers; may require multiple cans for larger vehicles; durability未经 long-term testing versus established competitors; limited color options.
Bottom Line: The Blysk U270 is an excellent entry-level chip guard that punches above its weight class. For DIYers seeking OEM-style protection without premium pricing, it delivers impressive results. While professionals might prefer established brands for high-volume work, weekend warriors will appreciate the balance of performance, ease-of-use, and affordability.
2. 3M Rocker Panel Coating Aerosol Spray, 08889, 21 oz, Gray, Textured Finish, Abrasion Resistant, Chip Resistant, One Size, Factory
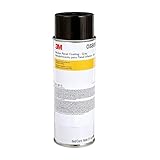
Overview: 3M’s 08889 represents the gold standard in automotive protective coatings, offering professional-grade protection for high-impact areas. This 21-ounce aerosol targets medium to coarse OEM textures found on rocker panels and valances, providing a robust shield against gravel and road debris. The light gray formulation serves as a versatile undercoat compatible with most automotive paint systems.
What Makes It Stand Out: The 3M brand carries decades of professional shop credibility, ensuring consistent batch quality and proven durability in harsh conditions. Its medium-coarse texture precisely matches factory specifications on domestic and import vehicles, eliminating the “aftermarket look” that plagues finer-textured competitors. The formulation balances toughness with paintability, creating a reliable foundation for topcoat application.
Value for Money: At $65.85 ($3.14 per ounce), this commands a significant premium over budget alternatives. However, the price reflects validated performance data, ISO-certified manufacturing, and trusted OEM partnerships. For collision shops and restoration professionals, the cost is justified by reduced rework and guaranteed customer satisfaction. Hobbyists must weigh whether brand assurance justifies the 100%+ price increase.
Strengths and Weaknesses: Strengths: Proven 3M durability; authentic OEM texture matching; excellent paint adhesion; professional shop approval; light gray color works under most topcoats; consistent spray pattern.
Weaknesses: Premium pricing prohibitive for budget builds; gray color may require additional base coats on darker vehicles; coarser texture too aggressive for some modern applications; overspray potential in windy conditions.
Bottom Line: For professionals and perfectionists, 3M 08889 justifies its premium through proven reliability and authentic texture replication. DIYers on tight budgets may find better value elsewhere, but those restoring vehicles to factory specifications will appreciate the authentic results. This is a tool for craftsmen, not casual experimenters.
3. Blysk Ultra Fine Black Texture Coat U270 – Paintable Chip Guard Spray for Automotive Bumpers, Rocker Panels & Trim – Fast-Drying, Durable Protective Finish 16 oz (2)
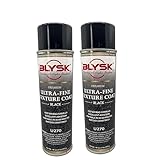
Overview: This two-pack bundle of Blysk U270 delivers the same ultra-fine texture coating in a value-oriented package. Each 16-ounce can provides identical performance to the single offering—fast-drying, paintable protection for automotive bumpers, rocker panels, and trim. The pairing targets users with larger projects or multiple vehicles, eliminating mid-job supply runs.
What Makes It Stand Out: The twin-pack configuration addresses the primary limitation of single-can purchases: insufficient coverage for trucks, SUVs, or complete rocker panel restoration. Maintaining the same refined texture and rapid cure time, this bundle ensures color consistency across extensive applications. The bulk packaging also reduces environmental waste versus separate shipments.
Value for Money: At $41.89 for 32 total ounces ($1.31 per ounce), this represents a 10% per-ounce savings compared to buying individually. The pricing structure rewards commitment, making it ideal for comprehensive undercarriage protection or shop inventory. For full-size truck rocker panels requiring 1.5-2 cans, the second can prevents costly project delays and ensures material compatibility.
Strengths and Weaknesses: Strengths: Reduced per-ounce cost; ensures material consistency across large projects; eliminates emergency supply runs; same rapid drying and fine finish; economical for multiple vehicles.
Weaknesses: Higher upfront investment; may encourage over-purchase for small jobs; storage space required; no single-can option within bundle; identical formula limitations apply.
Bottom Line: This two-pack transforms the Blysk U270 from a spot-repair solution into a legitimate project coating. For anyone tackling complete rocker panels, wheel wells, or multiple vehicles, the modest savings and guaranteed batch consistency justify the purchase. Single-can buyers should only upgrade if their project scope genuinely requires extended coverage.
4. XPEL ARMOR Black Universal Rocker Panel Guard, 9" x 30’ - Truck Exterior Protection Film Kit for Rocker Panels against Road Debris and Damage

Overview: XPEL ARMOR diverges from spray coatings by offering a physical 23-mil PVC paint protection film. This 9-inch by 30-foot roll provides a tangible barrier against rock chips, scratches, and scuffs on rocker panels, doors, and fender flares. Unlike permanent sprays, this removable solution hides existing damage while preventing future wear, catering specifically to trucks and off-road vehicles.
What Makes It Stand Out: The embossed PVC construction delivers immediate impact absorption without curing time or paint compatibility concerns. Its DIY-friendly application requires only scissors and basic cleaning supplies—no masking, spraying, or ventilation needed. The textured surface maintains appearance while allowing future removal without damaging original paint, making it ideal for leased vehicles or resale preparation.
Value for Money: At $81.54 for 30 square feet, the initial cost exceeds spray alternatives, but the reusable nature and error-forgiving installation offset the premium. Professional PPF installation typically costs $500-800, making this self-application kit highly economical. The durability over 5-7 years provides long-term value surpassing most spray coatings.
Strengths and Weaknesses: Strengths: Physical barrier superior to chemical coatings; hides existing damage; removable and replaceable; no overspray or drying time; excellent for leased vehicles; covers large area.
Weaknesses: Steep learning curve for bubble-free installation; requires meticulous surface prep; edges may lift if improperly applied; higher initial cost; limited to relatively flat surfaces.
Bottom Line: XPEL ARMOR is the superior choice for truck owners prioritizing reversible, long-term protection. While spray coatings suit permanent restorations, this film excels for daily-driven work trucks and off-road enthusiasts. Commit to proper installation technique, and you’ll achieve professional-grade protection at a fraction of shop prices.
5. 3M Off-White Rocker Panel Coating - Liquid 5.5 oz Pouch - 08734 [PRICE is per EACH]
![3M Off-White Rocker Panel Coating - Liquid 5.5 oz Pouch - 08734 [PRICE is per EACH]](https://m.media-amazon.com/images/I/31UVeLVvuUL._SL160_.jpg)
Overview: 3M’s 08734 presents a professional liquid formulation in a unique pouch packaging, targeting precision application scenarios. This off-white coating requires spray equipment, positioning it as a specialized solution for experienced users. The tiny 5.5-ounce quantity suggests spot repair or touch-up rather than broad coverage applications.
What Makes It Stand Out: The pouch format allows for precise mixing and reduces material waste compared to aerosols. Its off-white base provides superior opacity, requiring fewer topcoats on light-colored vehicles. As a liquid, it can be reduced and customized for specific spray gun setups, offering flexibility unavailable in pre-atomized aerosols. The 3M pedigree ensures compatibility with OEM paint systems.
Value for Money: At $36.99 for 5.5 ounces ($6.72 per ounce), this is prohibitively expensive for general use. The pricing reflects professional-grade resin chemistry and niche market positioning. For collision shops already equipped with spray booths, the per-job cost is negligible. However, DIYers must factor in equipment costs, making it economically impractical for one-time use.
Strengths and Weaknesses: Strengths: Professional liquid formulation; superior mixing control; excellent opacity; 3M quality assurance; customizable viscosity; minimal waste in skilled hands.
Weaknesses: Extremely high per-ounce cost; requires spray gun and compressor; tiny quantity limits application scope; off-white color unsuitable for dark vehicles without heavy base coats; steep learning curve.
Bottom Line: The 08734 is a specialist’s tool, not a consumer product. Purchase only if you own spray equipment and require OEM-matched chemistry for insurance work or high-end restorations. For standard rocker panel protection, aerosol alternatives deliver better value and convenience. This pouch earns its keep in professional bays, not home garages.
6. Keliejnese for DOD ge Ram Pickup 2002-2008 4Pcs Quad Cab Rocker Panels & Cab Corners Set
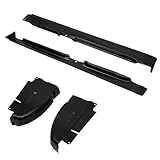
Overview: The Keliejnese rocker panel and cab corner set offers a targeted restoration solution for 2002-2008 Dodge Ram Quad Cab owners battling rust and corrosion. This four-piece kit replaces vulnerable body sections with precision-engineered components designed to match factory specifications without requiring permanent vehicle modifications.
What Makes It Stand Out: This set’s model-specific engineering ensures contours align perfectly with OEM bodylines, eliminating guesswork during installation. The three-layer defense system—1.2mm stamped steel, zinc undercoating, and textured finish—provides exceptional protection against road salt and moisture. The bolt-on design using pre-drilled holes and existing mounts (like CH1002377) preserves structural integrity while saving expensive welding costs. Reinforced ribbing and flanged edges absorb impacts and maintain door alignment, while the matte black finish integrates seamlessly with factory underbody guards.
Value for Money: At $226.99, this kit represents significant savings compared to OEM replacement panels ($400+) and professional welding installation ($500-800). The no-weld approach makes it accessible to DIY enthusiasts, eliminating labor costs entirely. The corrosion-resistant construction ensures longevity, making it a smart long-term investment for truck preservation.
Strengths and Weaknesses: Strengths include perfect model-year specificity, straightforward bolt-on installation, multi-layer corrosion protection, impact-resistant reinforcement, and OEM-matching aesthetics. Weaknesses involve limited compatibility (only 2002-2008 Quad Cabs), potential need for painting if matching exterior color, and requirement for basic mechanical skills and tools.
Bottom Line: For Ram owners facing rocker panel deterioration, this Keliejnese set delivers professional-grade results at a fraction of dealership costs. The combination of precise fitment, robust protection, and DIY-friendly installation makes it an excellent value proposition worth every dollar.
Why Rocker Panels Are Your Vehicle’s Achilles’ Heel
The Hidden Vulnerability of Modern Vehicles
Rocker panels occupy the perfect storm location for corrosion. Positioned just inches from the road surface, they collect moisture, trap salt, and absorb every piece of gravel your tires kick up. Modern manufacturing has made this worse—tighter tolerances between body panels, complex folded metal constructions, and foam-filled cavities create moisture traps that factory paint simply can’t defend long-term. Once rust penetrates these structural members, you’re not just facing cosmetic damage; you’re compromising crash safety and facing repair bills that can easily exceed $2,000 per side.
How Road Debris and Moisture Wage War on Your Rocker Panels
Every mile you drive launches a micro-assault on your rocker panels. Stone chips create microscopic breaches in the factory coating, exposing bare metal. Road salt, hydroscopic by nature, clings to these wounds and accelerates electrochemical corrosion. In winter conditions, freeze-thaw cycles act like a slow-motion jackhammer, expanding existing cracks and forcing moisture deeper into seams. Unlike horizontal undercarriage surfaces where gravity helps shed water, rocker panels have vertical surfaces and complex geometries that hold contaminants against the metal like a sponge.
Understanding Undercoating Technologies
Traditional Asphalt-Based Solutions
The old-school black tar-like coatings your grandfather swore by still have merit. These petroleum-derived formulations create a thick, dense barrier that’s excellent at sound deadening and impact absorption. They work by creating a physical shield that moisture and oxygen can’t penetrate. However, they harden over time, becoming brittle and potentially cracking in extreme cold. Modern iterations have added polymers for flexibility, but they remain best suited for vehicles that see moderate climates and owners who don’t mind a utilitarian appearance.
Polyurethane and Rubberized Coatings
These represent the middle ground between durability and refinement. Two-part polyurethane systems chemically cross-link to form a flexible, rubber-like membrane that can stretch up to 300% without cracking. They maintain elasticity even at -40°F and resist degradation from UV exposure when formulated with proper stabilizers. The key advantage is their ability to self-heal from minor impacts—the material compresses and rebounds rather than chipping away. Look for formulations with at least 60% solids content for adequate build thickness.
Wax-Based and Drip-Oil Systems
Popular in the rust-belt states, these “creeping” coatings never fully harden, remaining slightly tacky to continuously flow into microscopic gaps. They excel at penetrating factory seams and spot welds where other coatings can’t reach. The trade-off is messiness—they’ll weep slightly in summer heat and attract road grime. They’re ideal for hidden inner rocker panel cavities but require reapplication every 12-18 months. Modern synthetic wax formulations have improved wash-off resistance while maintaining that crucial creeping action.
Ceramic-Infused Modern Formulations
The newest entrants leverage ceramic microspheres suspended in polymer resins. These create a hard, abrasion-resistant surface that still maintains flexibility. The ceramic content provides exceptional heat resistance—important for rocker panels near catalytic converters—and creates a slick surface that resists mud and salt adhesion. They’re typically water-based, making cleanup easier and VOC compliance simpler. The downside? They require meticulous surface prep and precise application conditions to bond properly.
Key Performance Metrics That Matter
Salt Spray Resistance Ratings
ASTM B117 salt spray testing provides objective data on corrosion protection. Quality rocker panel undercoatings should withstand 1,000+ hours of continuous salt fog without failure. But here’s what marketing doesn’t tell you: the test is performed on perfectly prepared steel panels, not real-world conditions with existing rust or poor prep. Always look for products that publish their performance data, then assume you’ll achieve 60-70% of that rating in your driveway application.
Impact and Abrasion Durability
Gravel bombardment is your rocker panel’s daily reality. The Taber Abraser test measures coating wear resistance—aim for formulations showing less than 40mg loss per 1,000 cycles. For impact resistance, the falling dart test reveals how well a coating resists chipping. Multi-layer systems with a flexible base coat and harder top coat often outperform single-layer solutions. Remember, a coating that’s too hard will crack; too soft and it’ll erode quickly.
Flexibility and Cure Time Considerations
Rocker panels flex with body movement and temperature changes. Your undercoating needs to move with them. Mandrel bend tests (typically 1/8" diameter) should show no cracking at -20°F. Cure time is equally critical—many DIY failures happen because owners rush the process. A proper cure can take 7-14 days depending on humidity and temperature, during which the coating remains vulnerable to washing and abrasion.
Sound Dampening Properties
While not the primary function, effective undercoatings reduce road noise transmission. Look for products with a damping coefficient above 0.15. This is particularly valuable for vehicles with thin-gauge steel rocker panels common in modern fuel-efficient designs. The mass of the coating itself helps deaden resonance, turning your rockers from drum skins into muted surfaces.
Critical Features to Evaluate Before Buying
Corrosion Inhibitor Concentration
The real magic happens at the metal-coating interface. Quality formulations contain active corrosion inhibitors like zinc phosphate, barium metaborate, or calcium sulfonate. These chemicals actively interrupt the oxidation reaction, not just block it physically. Check technical data sheets for inhibitor percentages—premium products contain 5-8% by volume. Beware of “inhibitor-rich” marketing without specifics; it’s often just trace amounts.
UV Stability and Color Retention
If any portion of your rocker panels are visible (especially with lifted trucks or running boards), UV degradation matters. Unprotected asphalt-based coatings can fade, chalk, and crack within two years of sun exposure. Look for UV stabilizers like HALS (Hindered Amine Light Stabilizers) and benzotriazoles in the formulation. For visible areas, consider top-coating with a UV-resistant product, even if it’s just a clear sealant.
Temperature Application Range
That perfect July weekend might be ideal for you, but is it right for the product? Quality undercoatings specify application temperatures between 50-90°F with relative humidity below 85%. Some advanced formulations work down to 35°F, crucial for late-season applications in northern climates. Too cold and the coating won’t flow properly; too hot and it skins over before adhering. Always check the product’s technical data sheet, not just the can label.
VOC Compliance and Environmental Safety
State regulations vary dramatically. California’s SCAQMD standards are the strictest, limiting VOCs to 250g/L for underbody coatings. Many traditional solvent-based products exceed this, making them illegal to purchase or apply in certain jurisdictions. Water-based technologies have closed the performance gap while keeping VOCs under 100g/L. If you’re spraying in a residential area, low-VOC products aren’t just compliant—they’re neighborly.
Surface Preparation: The Non-Negotiable Foundation
Cleaning Protocols for Existing Rust
You can’t encapsulate rust and hope for the best. Active rust must be converted or removed. For light surface rust (less than 5% coverage), a phosphoric acid-based rust converter chemically transforms iron oxide into a stable iron phosphate. Heavy rust requires mechanical removal—wire wheel on a drill, needle scaler, or media blasting. The goal isn’t showroom metal; it’s stable, deoxidized steel with a consistent anchor pattern for mechanical adhesion.
Degreasing and Decontamination Steps
Even invisible oil from your fingertips can cause adhesion failure. Use a wax-and-grease remover (not just soap and water), applying it with lint-free cloths in one direction. Follow with a dedicated panel wipe solvent like isopropyl alcohol. For vehicles with years of undercoating buildup, a chemical stripper may be necessary—mechanical removal often just polishes the old coating without exposing bare metal. Pressure washing alone is insufficient; it drives contaminants deeper into seams.
Masking and Protection Strategies
Nothing ruins a DIY job like overspray on your paint. Use 3M Fine Line tape for sharp edges and quality automotive masking paper (not newspaper, which bleeds). Cover at least 6 inches above the rocker panel line. Remove door seals and trim pieces that overlap the panel—it’s easier than cleaning them later. For inner rocker cavities, use expanding foam plugs to prevent coating from entering the cabin through drain holes.
When to Consider Professional Media Blasting
If your rocker panels show bubbling paint or pinhole rust, you’re likely dealing with corrosion from the inside out. In these cases, DIY preparation is futile. Professional media blasting with fine crushed glass or soda can remove old undercoating and rust from inside cavities through access holes. This typically costs $400-600 but reveals the true condition of your metal and provides the ideal surface profile for coating adhesion.
Application Methods Decoded
Spray Gun Techniques for DIY Enthusiasts
A dedicated undercoating gun (not a paint gun) with a 2.0-2.5mm tip is essential. These guns handle high-viscosity materials and provide the fan pattern needed for even coverage. Hold the gun 6-8 inches away and move in overlapping passes with 50% overlap. Apply 3-4 thin coats rather than one heavy coat—this prevents sagging and ensures proper cure. Each coat should be tacky but not wet before applying the next, typically 15-30 minutes apart.
Aerosol Can Applications: Pros and Limitations
Aerosols work for touch-ups and small areas but lack the film build for serious protection. Most cans apply only 2-3 mils wet, requiring 6-8 coats to achieve adequate thickness. The propellant can cause bubbling if applied too heavily. For rocker panels, aerosols are best used for inner cavity treatment through access holes, where their extension tubes reach areas guns can’t. Expect to use 8-12 cans for complete rocker panel coverage on a mid-size sedan.
Brush and Roller Methods for Precision
For edges, seams, and complex geometries, brushing ensures complete coverage that spraying misses. Use a high-quality natural bristle brush (synthetic bristles can dissolve in solvents). Work the coating into seams with a stippling motion, then lay it off smoothly. Rollers with 1/4" nap work for broad flat areas but require back-brushing edges. This method is slower but provides the best control for achieving the recommended 15-20 mils dry film thickness in critical areas.
Professional Undercoating Gun Systems
Professionals use airless or air-assisted airless systems that can atomize thick coatings without thinning. These systems operate at 2,000-3,000 PSI and can apply 20+ mils in a single pass. The investment ($800-2,000) only makes sense for serious enthusiasts or shops. The real advantage is the ability to inject coating into inner rockers at pressure, forcing it into seams and cavities. DIY systems can’t replicate this level of penetration.
Climate-Specific Considerations
Winter Road Salt Regions: Maximum Protection Needs
If you live where salt trucks operate November through March, accept no compromises. Your rocker panels need a multi-layer approach: rust converter, epoxy primer, flexible undercoating, and a hard topcoat. Reapply a wax-based cavity treatment annually. Consider electronic rust inhibitors as a supplemental measure—they’re controversial but provide peace of mind in extreme environments. The cost of over-protection is minimal compared to rust repair.
Coastal Areas: Battling Salt Air and Humidity
Salt fog penetrates everywhere, even when you’re not driving. In coastal regions, focus on breathable undercoatings that don’t trap moisture underneath. Wax-based systems that remain slightly porous allow any trapped moisture to escape while still inhibiting corrosion. Avoid thick, impermeable coatings unless you’re certain the metal underneath is completely dry. Annual inspections are critical—salt air finds any weakness within months.
Desert Climates: Dust and Heat Challenges
Intense UV and abrasive dust storms require a different approach. Hard, ceramic-infused coatings resist sandblasting effect better than soft rubberized products. The extreme temperature swings (140°F day to 50°F night) demand exceptional flexibility to prevent cracking. Dust sticks to tacky surfaces, so fully cured, non-tacky finishes are preferable. Reapplication may be needed every 2-3 years due to UV degradation, even with stabilizers.
Northern Freeze-Thaw Cycles
The constant expansion and contraction of moisture in seams is rust’s best ally. Here, penetration is more important than surface thickness. Use creeping oil-based products that remain liquid enough to migrate into cracks as they form. Apply in late fall so the coating can flow into warmed seams before winter sets in. The goal is maintaining a protective presence inside the panel, not just on the surface.
Compatibility and Material Science
Matching Undercoating to Factory Coatings
Modern vehicles use complex factory coatings: e-coat, chip-resistant primers, and PVC-based stone guards. Your undercoating must be compatible. Asphalt-based products can soften PVC factory coatings, causing delamination. Polyurethanes generally bond well to properly prepared e-coat. Always test compatibility on a hidden spot first. Some manufacturers (especially European brands) use wax-based cavity protection from the factory—applying a different chemistry over it can cause separation.
Plastic Rocker Panel Cover Interactions
Many trucks and SUVs have plastic rocker panel covers. These trap moisture and debris underneath, accelerating rust. Remove them before applying undercoating. Clean the mounting clips and apply dielectric grease to prevent galvanic corrosion between the steel panel and stainless steel clips. Some undercoatings contain solvents that can warp ABS plastic—if you must coat the backside of covers, use a plastic-safe formulation and keep it thin.
Compatibility with Existing Rust Inhibitors
If your vehicle was previously treated with fluid film or similar oil-based products, you face a dilemma. These products prevent proper adhesion of new coatings. Complete removal is nearly impossible. Your best path is continuing with the same chemistry—apply fresh oil-based treatment annually. If switching to a hard coating, you must remove every trace using steam cleaning and solvent washing, which may take multiple attempts over weeks.
Paint and Clear Coat Safety
Overspray happens despite best efforts. Keep a bottle of quick detailer and microfiber towels handy during application. If coating contacts painted surfaces, don’t wipe it dry—this smears and damages clear coat. Instead, spray with detailer and gently lift the coating off. For dried overspray, use a clay bar with plenty of lubricant. Never use aggressive solvents like acetone on factory paint—they’ll dull the finish instantly.
Longevity and Maintenance Planning
Expected Lifespan Under Normal Conditions
A properly applied quality undercoating should last 5-7 years on rocker panels. However, “normal” is misleading. Daily highway driving in moderate climates extends life; city driving with constant salt exposure shortens it. The critical factor is film thickness—15-20 mils dry is the minimum for long-term protection. Thinner applications may look fine but fail prematurely. Document your application with photos and thickness measurements using a wet film gauge.
Reapplication Intervals and Warning Signs
Don’t wait for visible rust to reapply. Inspect rocker panels every spring and fall. Signs of degradation include: whitening or chalking of the coating, loss of flexibility (test by pressing with a fingernail), visible thinning in high-impact areas, and cracking at edges. Plan reapplication at the first sign of degradation, not when failure is advanced. Catching it early means simple cleaning and recoating; waiting means complete stripping and starting over.
Touch-Up Procedures for Damaged Areas
Stone chips happen. For small damage (quarter-size or smaller), clean the area with wax-and-grease remover, feather the edges of the existing coating with sandpaper, and apply 3-4 thin coats of matching material. For larger damage, you must remove the coating 2-3 inches beyond the visible damage to ensure you’re bonding to sound material. Never touch up without addressing the underlying cause—if gravel is causing damage, consider adding clear protective film over the undercoating.
Seasonal Inspection Checklists
Spring: Check for winter damage, wash thoroughly, inspect for coating loss at leading edges. Summer: Evaluate UV degradation, look for bubbling indicating trapped moisture. Fall: Prepare for winter with touch-ups, consider fresh cavity treatment. Winter: Minimize washing during sub-freezing temperatures, but remove salt buildup when possible. Document each inspection with dated photos to track degradation rates specific to your driving conditions.
Cost-Benefit Analysis Framework
DIY Material Costs vs Professional Services
Quality DIY materials for rocker panels run $150-300 depending on product choice and vehicle size. Professional application ranges from $400-800 for comprehensive treatment. The DIY savings evaporate if you need to buy equipment (spray gun: $50-150, compressor if you don’t have one: $200-500). Professionals include warranty, proper prep, and disposal. For a daily driver you plan to keep 5+ years, professional application often delivers better value. For enthusiasts who enjoy the process, DIY provides satisfaction and repeatability.
Hidden Expenses: Equipment and Cleanup
Your $200 material purchase is just the start. Add $30-50 for masking supplies, $20-40 for cleaning solvents, $15 for brushes/guns, and $25 for proper PPE. Disposal of waste materials can cost $20-50 depending on local regulations. If you make a mistake and need to strip and restart, you’ve doubled your material cost. Factor in a full weekend of labor (16-20 hours for proper prep and application). Suddenly, that professional quote looks more reasonable.
Value of Warranty Protection
Professional applications often include 5-10 year warranties against rust perforation. Read the fine print: they typically require annual inspections at the shop ($50-75) and immediate repair of any damage. DIY products carry limited warranties that are nearly impossible to claim—they require proof of proper prep, application, and maintenance. The real warranty value isn’t the money-back promise; it’s the professional’s incentive to do the job right the first time.
Resale Value Impact
Documented undercoating maintenance adds tangible value in rust-prone regions. Keep receipts, photos, and inspection records. When selling, point out the protected rocker panels—it’s a differentiator that justifies premium pricing. Conversely, a poorly applied DIY job with overspray and uneven coverage can decrease value. Buyers see it as a cover-up for existing rust. Quality of application matters as much as the presence of coating.
Common Application Pitfalls
Over-application and Sagging Issues
The most common DIY mistake is applying too much material too quickly. This creates sags, runs, and solvent entrapment that prevents proper cure. Follow the manufacturer’s wet film thickness recommendations precisely. Use a wet film gauge (a simple metal comb) to verify each coat. If you do get a sag, don’t touch it—let it dry, then sand smooth and recoat. Attempting to fix wet sagging creates a mess that requires complete removal.
Inadequate Curing Time Mistakes
That “dry to touch in 4 hours” claim is misleading. Full chemical cure takes days to weeks. Driving before full cure subjects the coating to flexing, gravel impact, and washing that can cause delamination. Wait at least 72 hours before driving, longer in humid conditions. Avoid washing for 30 days. Park in a warm, dry garage if possible. The patience you exercise here directly correlates to coating lifespan.
Skipping Edge and Seam Coverage
Rocker panels rust from the edges inward, yet these are the most commonly missed areas. Use brush application for all edges, seams, and spot welds before spraying the main panel. Pay special attention to the lower flange where the rocker meets the floor pan—this area collects water and is invisible during normal inspection. A 1-inch artist’s brush gives you the control to work coating into these critical zones.
Poor Temperature and Humidity Timing
Applying coating in the morning dew or evening humidity traps moisture underneath. Ideal conditions are 60-80°F with humidity below 70% and no precipitation for 48 hours. Check the dew point—if it’s within 5°F of ambient temperature, moisture will condense on your panels as they cool. In humid climates, use a dehumidifier in your garage. In cold climates, use space heaters to warm the metal, not just the air, to prevent flash rusting during application.
Professional vs DIY: Making the Right Choice
Skill Level and Workspace Requirements
Be brutally honest about your abilities. Proper undercoating requires comfort working on your back, knowledge of air tools, and attention to detail. Your workspace needs excellent ventilation, lighting, and containment for overspray. A gravel driveway in February is not acceptable. Professionals have lifts, forced-air ventilation, and climate control. If you can’t provide conditions within 20% of professional standards, you’re setting yourself up for failure.
Time Investment Reality Check
A professional shop completes a rocker panel treatment in 4-6 hours using two technicians. DIY typically takes 16-24 hours spread over a weekend—or longer if you’re meticulous. Prep work is 70% of the job. Rushing it guarantees poor results. If your free time is limited, professional application preserves your weekends and delivers faster results. Factor in cleanup and disposal time, which shops handle as part of the service.
Warranty and Liability Considerations
Professional shops carry insurance against overspray damage and fire hazards. Your homeowner’s policy likely doesn’t cover garage fires from solvent-based coatings. If you damage your vehicle or a neighbor’s property with overspray, you’re personally liable. Professionals also assume responsibility if their coating fails prematurely. Weigh these risks against the cost savings of DIY.
When Professional Application is Non-Negotiable
If your vehicle shows any signs of advanced rust (blistering paint, pinholes, flaking metal), professional evaluation is mandatory. DIY coating over compromised metal is wasted money. Vehicles with existing undercoating that needs removal, complex inner rocker cavities, or factory warranty concerns also warrant professional handling. The $600 professional cost is insurance against a $3,000 mistake.
Environmental and Health Safety
Proper Ventilation Requirements
Solvent vapors are heavier than air and accumulate near the floor. A simple exhaust fan isn’t enough—you need cross-ventilation with fresh air intake low to the ground and exhaust high. For indoor application, calculate air changes: you need 10-15 changes per hour. A respirator is non-negotiable; use a NIOSH-approved organic vapor cartridge, not just a dust mask. CO monitors are wise since vapors can overwhelm you without warning.
Personal Protective Equipment Essentials
Beyond a respirator, wear chemical-resistant gloves (nitrile for water-based, butyl rubber for solvents), safety goggles (not glasses), and disposable coveralls. Solvents absorb through skin and damage organs. Long sleeves and pants prevent overspray contact that can cause chemical burns. Keep a bucket of water and soap nearby for immediate cleanup of skin contact. Have an emergency exit plan—vapors can disorient you quickly.
Disposal Regulations for Leftover Materials
That half-can of undercoating isn’t regular trash. Most jurisdictions classify it as hazardous waste. Cured solids can go in regular trash, but liquid waste must go to hazardous waste collection. Empty aerosol cans are recyclable only if completely depressurized. Check local regulations—fines for improper disposal start at $500. Professionals pay for licensed disposal; factor this into your DIY cost analysis.
Low-VOC and Water-Based Alternatives
The performance gap has closed significantly. Modern water-based formulations offer 85-90% of the protection of solvent-based products with 90% fewer VOCs. They clean up with soap and water, reducing hazardous waste. The trade-off is longer cure times and more critical temperature requirements. For enclosed garage application or environmentally conscious owners, they’re now a viable primary choice, not just a compromise.
Warranty and Insurance Implications
Manufacturer Warranty Considerations
Federal law (Magnuson-Moss Warranty Act) prohibits manufacturers from voiding warranties simply because you applied aftermarket undercoating. However, they can deny rust warranty claims if your application trapped moisture or caused corrosion. Document everything: photos before, during, and after application, product data sheets, and environmental conditions. If rust appears, you must prove your coating didn’t cause it—a high bar without professional documentation.
Aftermarket Coating Impact on Claims
Insurance companies may question aftermarket undercoating if you file a claim for rust damage. Some view it as a modification that could have caused the damage. Keep receipts and product specifications. Better yet, inform your insurance agent before application. Some carriers offer premium discounts for documented rust prevention—it’s worth a phone call. If you’re leasing, check your contract—some prohibit modifications including undercoating.
Documentation Best Practices
Create a “rust prevention file” for each vehicle. Include: purchase receipts for materials, date-stamped photos of the application process, product technical data sheets, inspection records, and any professional assessments. Store it digitally and physically. When selling, this file demonstrates diligent maintenance and justifies premium pricing. For warranty claims, it’s your evidence of proper care.
Certified Installer Advantages
Products with certified installer networks often provide stronger warranties because the manufacturer controls application quality. These installers have completed training on prep and application specific to that product. The certification process includes equipment verification and insurance requirements. While more expensive, this route provides the strongest protection for high-value vehicles or owners wanting maximum peace of mind.
Frequently Asked Questions
How do I know if my rocker panels are already too far gone to undercoat?
If you can see rust blistering through the paint, poke the area gently with a screwdriver. If it penetrates or flakes away, you’re dealing with perforated metal that undercoating can’t save. Professional assessment is needed—what looks like surface rust often hides extensive internal damage. Undercoating is preventive, not curative.
Can I apply undercoating over existing factory undercoating?
Only if the factory coating is perfectly intact and well-adhered. Any lifting, cracking, or peeling means it’s failing, and new coating will just trap moisture underneath. Test adhesion by pressing firmly with your thumbnail—if it lifts or crumbles, remove it completely. When in doubt, strip it out.
How long should I wait after painting my rockers before applying undercoating?
Fresh paint needs to fully cure, which takes 30-90 days depending on the paint system. Applying undercoating too soon traps solvents from the paint, causing softening and potential delamination of both layers. If you’ve done bodywork and paint, wait the full cure period, then scuff the paint with 320-grit before undercoating for mechanical adhesion.
Will undercoating affect my side impact safety rating?
No tested undercoating formulation adds enough mass or rigidity to alter crash performance. In fact, some manufacturers apply factory undercoating to rocker panels for noise reduction. The coating thickness (15-20 mils) is negligible compared to the structural steel. However, improper application that traps moisture and causes rust will definitely compromise safety over time.
How do I treat the inside of my rocker panels if they don’t have drain holes?
Most vehicles have hidden drain holes—check factory service manuals for locations. If truly sealed, you have two options: drill 3/8" holes at the lowest points (which may affect resale value) or use a fogging oil applied through small access holes near the ends. The fogging oil approach is less intrusive but requires annual reapplication.
Can I drive through a car wash after undercoating?
Wait at least 30 days before any pressure washing, and even then, avoid direct high-pressure spray on the coated areas. Touchless car washes are safer than brush types, which can abrade the coating. The best practice is hand washing for the first 90 days, using a gentle stream of water rather than a pressure nozzle. The coating achieves full chemical resistance only after complete cure.
What’s the difference between undercoating and bedliner for rocker panels?
Bedliners are typically harder, more abrasion-resistant, and designed for horizontal surfaces. While they work on rocker panels, their rigidity can lead to cracking on vertical surfaces that flex. Undercoatings are formulated for flexibility and corrosion inhibition first, abrasion resistance second. Some hybrid products claim to do both, but they usually compromise on one performance aspect.
How do I maintain my undercoating once it’s applied?
Annual pressure washing with a gentle fan tip removes salt buildup. Inspect for damage during oil changes. Touch up any chips immediately. Avoid aggressive degreasers or solvents on the coated surface. Some wax-based treatments benefit from annual refresh sprays into cavities. Think of it like sunscreen—it’s not apply-and-forget, it’s apply-and-maintain.
Is there any way to remove undercoating if I apply it wrong?
Chemical strippers work but are messy and hazardous. Mechanical removal with a heat gun and scraper is effective but risks warping thin metal. Media blasting is fastest but requires professional equipment. Prevention is far easier than removal. If you make a mistake in the first 24 hours, mineral spirits may soften it enough for removal. After full cure, you’re looking at hours of difficult labor.
Do electric vehicles need different rocker panel undercoating?
EVs have additional considerations: battery packs often vent near rocker panels, and some use aluminum rockers for weight savings. Ensure your coating is compatible with aluminum (many are steel-specific) and won’t interfere with battery thermal management. The high-voltage cables running through rocker areas on some models also require careful application—avoid covering any orange cables or connectors. Consult your EV’s service manual before applying anything.