Restoring a classic car is a labor of love that extends far beyond shiny paint and polished chrome. While most enthusiasts obsess over visible details, the underside of your vintage treasure faces the harshest punishment—from road salt and moisture to gravel impacts and chemical exposure. A quality undercoating isn’t just an upgrade; it’s essential preservation that protects your investment from the inside out. Unlike modern vehicles with factory-applied corrosion protection, classic cars left the assembly line with minimal rust defense, making them particularly vulnerable decades later.
Choosing the right undercoating complete kit requires more than grabbing the first product you see at the auto parts store. The unique construction methods, metal composition, and restoration status of vintage vehicles demand a strategic approach. This comprehensive guide walks you through everything you need to know about selecting and applying undercoating systems that honor your classic car’s integrity while providing modern-level protection.
Top 10 Undercoating Kits For Classic Cars
Detailed Product Reviews
1. Barrier Bond - Rubberized Undercoating Sound Deadener Kit, 28oz 4-Pack, Black Spray, Vehicle Undercoating, with Spray Gun
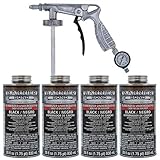
Overview: The Barrier Bond Rubberized Undercoating Sound Deadener Kit arrives as a comprehensive solution for DIY enthusiasts looking to protect their vehicle’s undercarriage. This package includes four 28-ounce cans of black spray coating paired with a dedicated spray applicator gun, positioning itself as a convenient entry point into automotive rust prevention.
What Makes It Stand Out: This kit’s primary advantage lies in its all-in-one nature, eliminating the guesswork of matching applicators to product. The 50-state VOC compliance ensures legal application anywhere in the US, while its paintable formula allows for customized finishing. The fast-drying characteristic significantly reduces project time, letting you complete undercoating in a single afternoon rather than waiting days between coats.
Value for Money: At $114.99 for 112 total ounces, the price works out to approximately $1.03 per ounce. While not the cheapest option available, the inclusion of the spray gun adds considerable value for those without existing equipment. Comparable professional-grade undercoating runs $1.20-$1.50 per ounce without applicators, making this kit economically sensible for first-time users.
Strengths and Weaknesses: Strengths include complete kit convenience, regulatory compliance, versatile application, and paint compatibility. Weaknesses involve unknown spray gun durability with heavy use, potential need for additional cans on larger trucks, and the learning curve for spray pattern control. The 28-ounce cans may require frequent changing during extensive projects.
Bottom Line: This kit serves as an excellent starting point for DIY undercoating projects, offering professional features without requiring separate equipment purchases. Ideal for passenger vehicles and light trucks, it balances convenience, compliance, and performance for the home mechanic.
2. Tekton44 Auto Undercoating for Vehicles, Black Undercoating for Cars, Trucks, RVs, Commercial Trucks (8 Cans Only, No Kit)

Overview: Tekton44 Auto Undercoating targets serious automotive enthusiasts and professional operators seeking premium protection for cars, trucks, RVs, and commercial vehicles. This offering includes eight cans of high-performance black undercoating without additional application equipment, focusing entirely on product quality.
What Makes It Stand Out: The formulation’s permanent tackiness maintains flexibility even in extreme cold, preventing the cracking and peeling common in lesser products. Its high corrosion resistance creates a durable barrier against road salt and moisture. The non-drip, non-run consistency when sprayed ensures clean application without messy cleanup, while brush and dip compatibility provide versatility for different surface types.
Value for Money: At $174.90 for eight cans (assuming standard 16-ounce cans), you receive approximately 128 ounces at $1.37 per ounce. While pricier than budget options, this reflects professional-grade chemistry. Bulk purchasing reduces per-can cost compared to individual retail purchases, and the superior performance can mean longer intervals between reapplications, saving labor costs over time.
Strengths and Weaknesses: Major strengths include exceptional flexibility, professional-grade corrosion protection, multiple application methods, and clean spraying characteristics. Weaknesses center on the lack of included applicator equipment, requiring separate purchase of spray gun or brushes. The higher upfront cost may deter casual DIYers, and “permanently tacky” finish can attract dirt if not top-coated.
Bottom Line: Tekton44 suits experienced users who prioritize performance over convenience and already own application equipment. For commercial vehicles, RVs, or harsh climate operation, its advanced formulation justifies the premium price through extended protection and reduced maintenance frequency.
3. Pro Undercoating Gun Kit, with 1 Quart Bottle, 2 Wands, and 50 Rust Plugs

Overview: The Pro Undercoating Gun Kit provides professional-grade application equipment without the coating itself, serving as a force multiplier for serious DIYers and automotive professionals. This specialized toolkit includes a high-quality spray gun, quart bottle, two distinct wands for varied access, and fifty rust plugs for comprehensive treatment.
What Makes It Stand Out: This kit addresses a critical gap in the undercoating market by offering superior application precision. The dual-wand system allows users to reach frame rails, inner panels, and wheel wells with appropriate spray patterns. The included rust plugs enable proper treatment of existing corrosion points, elevating the quality of any undercoating job beyond simple surface spraying.
Value for Money: Priced at $82.45, this equipment-only kit represents a smart investment for those purchasing coating in bulk or performing multiple vehicles. Professional-grade spray guns alone typically cost $60-$100, making this package reasonable when factoring in the additional wands and rust plugs. The quart bottle compatibility reduces waste compared to aerosol cans for large projects.
Strengths and Weaknesses: Strengths include professional build quality, versatile wand options, rust plug inclusion, and bulk-coating compatibility. Primary weakness is the absence of actual undercoating material, requiring separate purchase. The initial investment only makes sense for users with ongoing undercoating needs. Learning proper spray technique requires practice, and cleanup demands appropriate solvents.
Bottom Line: This kit proves invaluable for repeat users or professionals who buy undercoating by the quart or gallon. If you’re coating multiple vehicles or maintaining a fleet, the precision and efficiency gains quickly offset the initial cost. For one-time users, renting or buying a complete kit makes better financial sense.
4. Zenex Rubberized Undercoat - Heavy Duty Undercoating for Vehicles | Rubberized Undercoating Spray for Cars, Trucks, and Trailers | Waterproof Rust Prevention | Sound Deadening | 16 oz (2 Count)

Overview: Zenex Rubberized Undercoat offers heavy-duty protection in a compact, accessible package. This two-count of 16-ounce cans delivers professional-grade rust prevention and sound deadening for vehicles, trailers, and machinery exposed to harsh conditions. Made in the USA, it targets DIYers seeking quality without bulk commitment.
What Makes It Stand Out: The dual-action formula provides both robust rust protection and noticeable sound deadening, addressing two common undercarriage concerns simultaneously. Its extreme flexibility withstands temperature fluctuations without cracking, while the waterproof seal locks out moisture and road salt. The paintable finish allows customization, and the product maintains its integrity through seasonal abuse and rough operating environments.
Value for Money: At $24.99 for 32 total ounces, the cost calculates to $0.78 per ounce—among the most economical options reviewed. This pricing structure makes it ideal for touch-up work, smaller vehicles, or trial applications before committing to larger quantities. The made-in-USA designation often correlates with consistent quality control and reliable formulation.
Strengths and Weaknesses: Strengths include exceptional affordability, dual sound-deadening and rust-proofing capabilities, domestic manufacturing, and flexible, paintable finish. Weaknesses involve limited quantity for full vehicle coverage, lack of included applicator, and potential need for multiple coats on severely rusted surfaces. Aerosol application may not achieve the thickness of professional spray systems.
Bottom Line: Zenex excels for partial applications, touch-ups, and smaller vehicles where premium per-ounce cost isn’t justified. It’s perfect for maintaining older cars, treating specific problem areas, or testing undercoating benefits before investing in larger systems. For full undercarriage protection on trucks or SUVs, purchase additional cans or consider spray gun systems.
5. Rust Bullet - Black Undercoating Undercarriage Truck Kit - 192 oz.

Overview: The Rust Bullet Black Undercoating Undercarriage Truck Kit delivers industrial-strength protection in a substantial 192-ounce package. This premium system combines advanced rust-inhibiting technology with user-friendly application, targeting truck owners battling severe corrosion or operating in extreme environments.
What Makes It Stand Out: Holding two US patents, this formula represents genuine innovation in protective coatings. Its unique ability to apply directly over rust while neutralizing further corrosion sets it apart from surface-only products. UV resistance prevents sun degradation, maintaining flexibility and adhesion even on exposed frame sections. The rubberized finish creates a permanent, non-cracking shield that actively fights oxidation.
Value for Money: At $359.99 for 192 ounces, the unit price reaches $1.87 per ounce—premium territory. However, this reflects advanced chemistry and patent-protected performance. For severe rust cases, this treatment can salvage components that would otherwise require replacement, potentially saving thousands. The large volume suits full-size trucks, commercial vehicles, or multiple applications.
Strengths and Weaknesses: Strengths include patented rust-neutralizing technology, UV resistance, versatile brush/roll/spray application, and professional-grade durability. Weaknesses center on high initial cost, potential overkill for vehicles with minimal rust, and the need for proper surface prep to maximize effectiveness. The price point positions it as a serious investment rather than casual purchase.
Bottom Line: Rust Bullet justifies its premium pricing for vehicles with significant rust damage or those operating in coastal, salted-road, or industrial environments. It functions as both treatment and prevention, making it cost-effective for restoration projects. For pristine vehicles in mild climates, less expensive options suffice. This is a restoration-grade solution, not routine maintenance.
Why Undercoating is Critical for Classic Car Preservation
Classic vehicles face a perfect storm of corrosion factors that modern cars simply don’t encounter. Original factory undercoating from the 1950s-1970s was often minimal—thin asphalt-based sprays that cracked within years, exposing bare metal to moisture. Combined with today’s more aggressive road de-icing chemicals and environmental pollutants, your vintage frame, floor pans, and suspension components are under constant attack. Proper undercoating creates a flexible, waterproof barrier that seals out moisture while allowing trapped condensation to escape, preventing the hidden rust that destroys structural integrity.
Understanding Modern Undercoating Technology vs. Original Factory Methods
The evolution from original equipment manufacturer (OEM) undercoating to today’s advanced formulations represents a quantum leap in protection. Factory applications were typically single-stage products applied to clean metal, offering limited flexibility and poor adhesion once cracked. Modern complete kits utilize multi-layer systems with specialized primers, base coats, and top seals that chemically bond to surfaces while maintaining pliability. This flexibility is crucial for classic cars that experience more chassis flex than modern unibody designs.
Types of Undercoating Materials Explained
rubberized undercoatings: Pros and Cons for Vintage Vehicles
Rubberized coatings deliver exceptional sound deadening and impact resistance, mimicking the factory appearance many concourse restorations demand. These formulations create a textured, matte black finish that replicates original equipment. However, they can trap moisture if applied over unprepared surfaces and may become brittle with age. For show-quality builds requiring authentic appearance, rubberized options remain popular when properly installed.
Wax-Based Formulations: Traditional Protection Reimagined
Modern wax-based undercoatings (often called cavity wax or slushing wax) penetrate seams and hidden cavities where rust begins. These self-healing formulations remain semi-solid at room temperature, flowing into stone chips and scratches. They’re ideal for doors, rocker panels, and frame rails but require periodic reapplication in harsh climates. Complete kits should include both spray wands for access and bulk product for brush application.
Asphalt-Based Solutions: Heavy-Duty Defense
The heaviest protection comes from asphalt-based undercoatings, offering superior stone chip resistance and durability. These thick, tar-like coatings excel on frames, undercarriages, and wheel wells but add significant weight and can be messy to apply. Modern formulations have improved flexibility compared to vintage versions, though they still require meticulous surface prep to prevent delamination.
Polyurethane and Polyurea Coatings: Modern Performance Standards
Professional-grade polyurethane and polyurea coatings represent the pinnacle of underbody protection, offering extreme chemical resistance, flexibility, and longevity. These two-part systems cure rapidly to form a seamless, impenetrable membrane. While more expensive and requiring specialized spray equipment, they provide decades of protection ideal for daily-driven classics or vehicles in coastal regions.
Complete Kit Components: What Should Be Included
A truly comprehensive undercoating kit must contain more than just the coating material. Look for systems that include etching primer or rust converter for surface preparation, multiple application nozzles (including wands for internal cavities), proper cleaning solvents, masking materials, and detailed instructions specific to classic car applications. Premium kits also provide seam sealer for repairing factory spot welds and panel joints before coating application.
Key Features to Evaluate When Selecting Your Undercoating System
Assess drying time flexibility—classic car restorations often proceed slowly, and coatings that remain workable for extended periods allow for meticulous application. VOC compliance matters for garage applications; water-based formulas offer easier cleanup. UV resistance prevents degradation on exposed frame sections, while thermal stability ensures the coating won’t soften during summer heat or become brittle in winter cold. Check for salt spray testing certifications, which indicate real-world corrosion resistance.
Surface Preparation: The Foundation of Lasting Protection
Rust Removal Strategies Before Application
Never apply undercoating over rust—it seals in moisture and accelerates corrosion. For light surface oxidation, mechanical removal with wire wheels and abrasive pads suffices. Heavy scaling requires media blasting, but avoid aggressive methods on thin-gauge metal common in vintage bodies. Chemical rust converters work well for pitted surfaces, converting iron oxide into a stable, paintable surface. Always follow with a phosphoric acid-based metal prep to ensure coating adhesion.
Cleaning and Degreasing Protocols
Classic cars accumulate decades of oil, grease, and road grime that repel undercoating. Use a two-step cleaning process: first, apply a heavy-duty degreaser with a pressure washer (keeping water away from electrical components), then follow with a wax-and-grease remover solvent wipe-down. Pay special attention to frame rails and boxed sections where contaminants hide. Allow complete drying—minimum 24 hours in low humidity—before coating application.
Masking and Protection of Critical Components
Proper masking distinguishes professional results from amateur mistakes. Protect brake lines, fuel lines, exhaust systems, and suspension components with heavy-duty aluminum foil and tape. Remove or cover rubber bushings, as coating solvents can degrade them. Mask off body mounting points and bolt threads to maintain proper assembly tolerances. Consider removing the fuel tank and brake components for complete access and safety.
Application Techniques for Professional Results
Spraying Methods: HVLP vs. Aerosol vs. Undercoating Guns
High-volume low-pressure (HVLP) spray systems provide the most controlled application with minimal overspray, ideal for detailed restorations. Traditional undercoating guns deliver thicker coverage faster but require practice to avoid runs. Aerosol kits work for touch-ups and small areas but lack the build thickness for severe environments. For internal cavities, invest in wands with 360-degree spray tips that reach 24-36 inches into frame rails and rocker boxes.
Brush and Roll Applications for Hard-to-Reach Areas
Some areas defy spray application—inside trunk drops, behind suspension mounts, and around complex brackets. Natural bristle brushes work the coating into seams and edges, while foam rollers create uniform coverage on flat surfaces like floor pans. Always brush-coat first, then spray over the brushed areas to eliminate brush marks and ensure complete coverage.
Temperature and Humidity Considerations
Apply undercoating when ambient temperatures range between 60-80°F with humidity below 60%. Cold temperatures prevent proper flow and adhesion, while excessive heat causes the coating to skin over before it levels. Never apply in direct sunlight or when the metal surface is hot to the touch. In humid climates, use a moisture meter to confirm metal surfaces are below 15% moisture content.
Curing Times and Post-Application Care
Most undercoatings require 24-48 hours to become tack-free and 7-14 days for full cure. During this period, avoid driving on wet roads or exposing the underside to water. Keep the vehicle in a well-ventilated area as solvents evaporate. After curing, inspect for thin spots or missed areas using a bright flashlight. Apply a second coat to any areas showing metal or thin coverage—most quality kits recommend two coats for optimal protection.
Common Mistakes That Destroy Undercoating Performance
Applying coating too thin leaves insufficient protection; too thick and it may crack or peel. Skipping seam sealer on panel joints allows moisture penetration behind the coating. Failing to remove all rust scale guarantees future failure. Another critical error: coating over factory undercoating without testing compatibility—some formulations react negatively, causing delamination. Always test a small inconspicuous area first.
Environmental and Regional Factors in Product Selection
Coastal regions with salt air demand maximum chemical resistance—polyurethane systems excel here. Northern climates with heavy road salt require thick, impact-resistant coatings on wheel wells and lower panels. Desert environments need UV-stable formulas that won’t dry out and crack. For vehicles stored long-term, breathable wax-based coatings prevent moisture entrapment better than fully sealed rubberized products.
Professional Application vs. DIY: Making the Right Choice
DIY application saves money but requires substantial prep time, proper equipment, and a suitable workspace. Professional shops offer media blasting, industrial ovens for accelerated curing, and experience with classic car-specific issues. Consider professional application if your classic has extensive rust repair, uses rare or expensive materials, or if you lack a lift and proper ventilation. For enthusiasts with mechanical aptitude and a clean garage, quality DIY kits deliver excellent results when instructions are meticulously followed.
Long-Term Maintenance and Inspection Schedules
Inspect undercoating annually, ideally before winter. Look for cracks, chips, or separation at edges. Touch up damaged areas immediately using the same product type—mixing formulations causes failure. Reapply a maintenance coat every 5-7 years for daily drivers, 10-15 years for trailer queens. Pressure wash the underside seasonally to remove salt buildup, but avoid direct high-pressure spray on the coating itself, which can cause erosion.
Cost Analysis: Investment vs. Protection Value
A quality complete undercoating kit for a classic car typically ranges from $200 to $600, covering materials for a full-sized vehicle. Professional application adds $800 to $2,500 depending on prep work needed. Compare this to the cost of replacing rusted floor pans ($1,500+), frame sections ($3,000+), or a complete body-off restoration ($20,000+). The math is compelling: undercoating delivers the highest return on investment in classic car preservation, protecting not just metal but also your countless hours of restoration work.
Frequently Asked Questions
How long does undercoating last on a classic car that’s only driven in summer?
Summer-only driving extends undercoating life significantly—expect 10-15 years from quality applications. However, humidity and morning dew still cause corrosion, so annual inspections remain essential. Store the vehicle in a climate-controlled environment and avoid gravel roads to maximize longevity.
Can I undercoat over existing factory undercoating from the 1960s?
Never apply new coating over old without complete removal or professional assessment. Vintage undercoating becomes brittle and separates from metal, trapping moisture. Test a small area—if the old coating is firmly adhered, sound, and not cracked, you can scuff and coat over it. Otherwise, strip it completely.
What’s the difference between undercoating and rustproofing?
Undercoating creates a protective barrier on the underside and visible chassis components. Rustproofing (or cavity protection) treats internal, enclosed areas like frame rails and rocker panels with thinner, creeping formulas. Complete kits should address both for comprehensive protection.
Will undercoating affect my classic car’s concourse judging?
Most concourse events deduct points for non-original undercoating appearance. For judged vehicles, use rubberized coatings that replicate factory texture and color, applied only to originally coated areas. Document the process with photos to demonstrate authenticity to judges.
How do I remove undercoating if I need to weld or repair a section?
Mechanical removal with a heat gun and scraper works for small areas—heat softens the coating. For larger sections, chemical strippers designed for undercoating soften the material for pressure washing. Always remove coating 2-3 inches beyond the repair area to ensure clean welds and proper adhesion of repair coatings.
Is it safe to undercoat exhaust systems and catalytic converters?
Never coat exhaust components—undercoating is flammable and will burn, creating toxic fumes and fire hazards. Mask exhaust pipes, mufflers, and converters completely. High-temperature exhaust coatings exist for rust prevention on these components but are separate products.
Can I apply undercoating on a frame-off restoration before final assembly?
This is actually the ideal method. Coat all components separately, allowing complete coverage of hidden areas. Avoid coating mounting surfaces, bolt holes, and suspension pivot points. Assemble after full curing, then touch up areas disturbed during assembly.
How do I know if my undercoating is failing?
Look for bubbling, cracking, or flaking. Tap the coating with a screwdriver—hollow sounds indicate delamination. Surface rust bleeding through edges or pinholes signals failure. Early-stage failure appears as white or gray discoloration in the coating, indicating moisture penetration.
Do I need to undercoat a fiberglass-bodied classic car?
While fiberglass doesn’t rust, the underlying steel frame, suspension, and floor pans still require protection. Additionally, many fiberglass classics have steel reinforcements and mounting points that corrode. Focus coating on all metal components, including bolts and brackets.
What’s the best season to apply undercoating?
Early fall provides optimal conditions—moderate temperatures, low humidity, and time for curing before winter salt exposure. Spring works for vehicles stored over winter. Avoid summer’s heat and humidity peaks, and never apply in winter when surfaces are cold and moisture-laden.