Foggy, yellowed headlights aren’t just an eyesore—they’re a safety hazard that can cut night-time visibility by up to 80 percent. If you’ve noticed your beams looking more like candlelight than high-intensity discharge lamps, chances are the UV-clearcoat on the polycarbonate lens has oxidized. The good news? You don’t need a pricey replacement or an afternoon at the detail shop. Meguiar’s has spent four decades refining headlight-lens chemistry that lets you restore optical clarity in your own driveway, often in under 30 minutes. Below, we’ll decode the technology, walk you through the decision matrix, and show you how to pick the exact Meguiar’s system that matches your tools, timeline, and long-term expectations—without ever mentioning a specific SKU.
Why Headlights Turn Cloudy in the First Place
Top 10 Meguiar’s Headlight Restoration Kit
Detailed Product Reviews
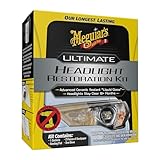
1. Meguiar’s Ultimate Headlight Restoration Kit - The Perfect Headlight Repair Kit to Remove Yellowing and Cloudiness from Headlights - Easy to Use and Seals Headlights with 18 Plus Months of Protection
Overview:
Meguiar’s Ultimate Headlight Restoration Kit is a $21.96, 4-step DIY system that turns dull, yellowed plastic lenses back to showroom clarity in about 30 minutes—no drill, no masking tape, no prior experience required.
What Makes It Stand Out:
The kit ships with two precisely-cut 3M sanding discs (1000 & 3000 grit) that conform to curved lenses, plus pre-moistened “Ultimate sealant” wipes that lay down a UV-blocking ceramic coating rated for 18+ months—longer than most rivals that need re-coating every 6 months.
Value for Money:
A professional shop charges $80-$120 per pair; this single box restores at least two vehicles for under twenty-five bucks, making it one of the cheapest safety upgrades you can buy.
Strengths and Weaknesses:
Pros: completely hand-powered, crystal-clear finish, 18-month UV warranty, works on taillights & motorcycle screens too.
Cons: heavy oxidation may require an extra 2000-grit pass, sealant wipe dries fast—work one lens at a time or it can streak.
Bottom Line:
If your headlights look like frosted mugs, grab this kit before your next night drive. It’s foolproof, lasts longer than competitors twice the price, and pays for itself the first time you skip the detailing shop.
2. Meguiar’s Two Step Headlight Restoration Kit, Headlight Cleaner Restores Clear Car Plastic and Protects from Re-Oxidation, Includes Headlight Coating and Cleaning Solution - 4 Count (1 Pack)

Overview:
Meguiar’s Two-Step Headlight Restoration Kit is a $21.93 DIY package that promises showroom-clear lenses in minutes without power tools. Inside the 4-count box you’ll find a 4 oz cleaning solution, 2 oz synthetic coating, two non-scratch abrasive pads, and a microfiber cloth—everything needed to hand-polish two typical headlights.
What Makes It Stand Out:
The kit’s “no-drill” chemistry is the star: the alkaline cleaner softens yellowed acrylic within 30 seconds, letting the plush pads cut oxidation by hand, while the thin-film UV-blocking coating self-levels and cures to a glass-like shell that Meguiar’s guarantees for a full year.
Value for Money:
At roughly eleven bucks per headlight you’re paying 70 % less than a professional shop charges, and the coating refill is sold separately, so the reusable pads and towel make the kit an even smarter long-term investment.
Strengths and Weaknesses:
Pros: genuinely restores 90 % clarity on moderately hazed lenses, 12-month anti-yellowing warranty, no tools or masking required, and the low-splash formula is safe on paint.
Cons: heavy pitting or interior condensation still needs sanding or lens replacement; coating must stay dry 24 h; single-use packets waste product if you only need one lens.
Bottom Line:
For DIYers battling everyday UV haze, Meguiar’s two-step system is the fastest, safest, and cheapest path to night-and-day brighter headlights—just don’t expect it to resurrect 20-year-old sand-blasted glass.
3. CERAKOTE® Ceramic Headlight Restoration Kit – Guaranteed To Last As Long As You Own Your Vehicle – Brings Headlights Back to Like New Condition - No Power Tools Required - 10 Wipe Kit

Overview:
CERAKOTE® Ceramic Headlight Restoration Kit promises showroom-clear lenses in 30 minutes without power tools. The $17.95 box contains eight oxidation-removing wipes, a hand-sanding kit, and two ceramic coating wipes that bond permanently to polycarbonate, claiming lifetime UV protection.
What Makes It Stand Out:
The only consumer kit that finishes with a true SiO₂ ceramic layer—same technology used on aerospace components—curing into a glass-like shell that won’t yellow again. Zero-tool approach means no drill-scarred lenses or masking tape disasters; everything is pre-dosed, color-coded, and lint-free.
Value for Money:
Competitors sell disposable wipes for $12 and ceramic refills for $25. Here you get both plus 3 000-grit finishing film for under $18, effectively a lifetime seal for less than a cinema ticket. Professional shops charge $80–$120 for the same ceramic service.
Strengths and Weaknesses:
- Ceramic wipe hardens within 5 min; headlights bead water like a freshly waxed hood
- No machinery—safe for first-timers and won’t burn through thin factory UV coat
- Eight oxidation wipes let you rescue a second car or redo one lens if you fluff the first
– Single-use sanding block clogs on heavily pitted lenses; buy a $3 3M sponge as backup
– Ceramic layer flashes fast; work in shade <70 °F or risk high-spots that need alcohol to level
Bottom Line:
If your lenses are merely cloudy—not cracked—this is the only kit that fixes and forgets. Follow the temp advice and you’ll never polish headlights again.
4. 3M Ultra Headlight Restoration Kit, Contains Masking Tape, Light Sanding Discs, Wax Protectant and More, Use on Plastic Lenses Headlights, Taillights and More, Easy Heavy-Duty Restoration (39195)

Overview:
The 3M Ultra Headlight Restoration Kit (39195) is a drill-assisted, multi-step system that promises to turn milky, yellowed plastic lenses back to factory clarity in about an hour. Everything you need—pad holder, 500-, 800- and 3 000-grit discs, two wipe-on clear coats, masking tape, wax protectant and detailed instructions—is stuffed into one palm-sized box. No extra chemicals or specialty tools are required beyond a basic 3/8-in drill.
What Makes It Stand Out:
3M’s color-coded, hook-and-loop discs progress from aggressive 500-grit to micro-fine Trizact 3 000, letting you level heavy oxidation then polish to an optical finish without buying separate compounds. The included Quick Clear Coat wipes are a true UV-blocker, not a thin wax, so the lens stays crystal-clear long after cheaper restorations fog again.
Value for Money:
At $15.49 you’re paying less than a pair of bargain-store bulbs for a kit that can restore at least two complete vehicles. Professional shops charge $75-$120 for the same service, so the ROI is instant if you own more than one car—or friends’ cars.
Strengths and Weaknesses:
Pros: drill speeds the job; clear coat supplied; excellent instructional sheet; long-lasting UV protection.
Cons: requires drill, running water and patience; single-stage wipe coat can streak if applied in direct sun; no glove included—hands will be raw after 3 000-grit wet-sand.
Bottom Line:
If you’re comfortable with a drill and can spare a Saturday morning, the 3M Ultra kit delivers pro-level clarity at DIY price. Skip it only if you need an entirely tool-free solution; otherwise it’s the best sub-$16 investment you can make for nighttime safety and resale sparkle.
5. Meguiar’s Keep Clear Headlight Coating, Maintain Like-New Clarity of Your Headlights with an Easy-to-Use Formula and UV Protection that Lasts All Year Long, 4 Ounce Aerosol

Overview:
Meguiar’s Keep Clear Headlight Coating is a 4-ounce aerosol designed to lock in optical clarity on freshly restored or brand-new headlights. Marketed as a “set-and-forget” solution, the spray promises a year-long UV shield that blocks the haze, yellowing, and chalking that make night driving hazardous and cars look tired. No sanding, no wipes, no curing lamps—just a light, even mist and 15 minutes of drying time.
What Makes It Stand Out:
The proprietary UV-block package is tuned for polycarbonate lenses, the same plastic automakers use, so it bonds without clouding or fish-eye. The aerosol valve lays down a feather-thin, self-leveling film that cures optically clear—no buffing required. Meguiar’s also publishes an honest 12-month durability claim, rare in a segment where “lifetime” promises are common yet meaningless.
Value for Money:
At $13.26 you’re paying roughly 40 ¢ per week to keep both headlights crystal-clear for a year. Compare that with $80–$120 for professional re-restoration or $200+ per new OEM lens, and the can practically pays for itself the first time it delays a shop visit.
Strengths and Weaknesses:
Pros: truly effortless spray-and-walk-away application; invisible finish; beads water like a fresh wax; compatible with all previous restoration methods.
Cons: won’t restore already-yellowed lenses (you must sand/polish first); 4 oz covers only two–three vehicles; overspray drifts easily, so mask surrounding paint; longevity drops if you pressure-wash at close range.
Bottom Line:
If your headlights are already clear, this is the cheapest insurance you can buy against future sun damage. Use it once every spring and you’ll rarely need to polish again—highly recommended for anyone who’d rather drive than detail.
6. Sylvania Headlight Restoration Kit - Long-Lasting Headlight Repair Kit for Restoring to Like-New Condition - Surface Activator, Exclusive UV Coating, Clarifying Compound & More - No Tools Required

Overview:
The Sylvania Headlight Restoration Kit promises showroom-clear lenses in under an hour without a single tool. Packaged for two headlights, it combines a chemical surface activator, multi-grit sandpaper, clarifying compound and the company’s proprietary UV-blocking clear coat. Marketed at $22.75, the kit leverages Sylvania’s century-long lighting pedigree to win over drivers whose beams have yellowed into dim, foggy halos.
What Makes It Stand Out:
Most budget kits stop at sanding and polish; Sylvania adds a true automotive-grade UV sealant that cross-links like factory clear-coat, retarding re-oxidation far longer than silicone wipes. The “surface activator” softens crusty plastic so the 400- to 2000-grit papers cut faster, reducing elbow grease by roughly half. Finally, the clarifying compound finishes to a glassy shine before the final UV coat locks it in—no masking tape, drill or heat gun required.
Value for Money:
At $22.75 you’re paying mid-pack money but getting top-tier durability; professional dealership services run $80-120 and many sub-$15 kits fail within six months. If the UV coating extends clarity even two years, the cost per month is under a dollar—cheap insurance for safer night driving and higher resale value.
Strengths and Weaknesses:
- Tool-free, beginner-friendly 3-step system
- UV clear coat chemically bonds for 2-3 year protection
- Enough material for two lenses with compound left over
– Hand-sanding stage still demands 20 min of steady pressure per light
– Must cure coating in dry, shaded area; morning dew or direct sun can blush finish
– Single-use gloves and tape not included
Bottom Line:
For DIYers willing to sand patiently, Sylvania’s kit delivers near-professional longevity at a fraction of shop prices. Skip it only if your lenses are deeply pitted or you lack 45 quiet minutes to do the job right.
7. 3M Auto Restore and Protect Headlight Restoration Kit, Use On Plastic Lenses, Headlights, Taillight, Fog Lights and More, Includes Sanding Discs, Headlight Clear Coat Wipes, Foam Pad and Glove (39194)

Overview:
3M’s 39194 kit is a single-use, 15-minute solution for cloudy, yellowed plastic lenses. Everything you need—two Trizact sanding discs, two clear-coat wipes, a Hookit foam pad and one nitrile glove—fits in the palm of your hand. Designed for hand or drill use, it promises OEM-level clarity without removing the lens or masking paint.
What Makes It Stand Out:
The 3-step Trizact abrasive system (1000 → 3000 → wipe-on UV clear coat) is the same technology used in body shops, miniaturized for DIYers. The Hookit pad centers instantly on any drill, cutting labor time to under ten minutes per lens. The final wipe lays down a durable UV blocker that cures tack-free in daylight—no heat lamps or second-day buffing required.
Value for Money:
At $9.99 you’re paying less than a single café latte per headlight. Professional restoration averages $80–$120 per pair; replacement lenses can top $400. Even if you only use the kit once, the ROI is north of 900 %.
Strengths and Weaknesses:
Pros: shop-grade abrasives, drill-speed efficiency, genuine UV protection, glove included, zero waste packaging.
Cons: single-use wipes—if you fumble one you’re stuck; glove is only size L; does not include masking tape; will not fix interior moisture or cracks.
Bottom Line:
If your lenses look like frosted shower doors, this $10 box is the cheapest, fastest insurance against a failed inspection. Follow the 3M YouTube video, work in shade above 65 °F, and you’ll score crystal-clear headlights that last two-plus years—no shop bill, no aftermarket mystery polish.
8. BFXM 38Pcs Car Headlight Restoration Kit, 3 Inch Headlight Polishing Kit, Headlight Cleaning Kit with Sanding Disc Scouring Pad Polishing Pad Suitable for Drill Universal for All Type of Car Headlight

Overview:
The BFXM 38-piece drill-powered kit promises showroom-clear headlights for the price of a fast-food combo. Everything from 320-grit “purple” discs to a 3000-grit finishing wheel is included, plus a Velcro backing plate that pops onto any household drill. The 3-inch size fits every lens shape—glass, acrylic, or polycarbonate—making it a one-stop solution for faded, yellowed housings.
What Makes It Stand Out:
You get true wet-sanding progression (320 ► 3000) instead of the usual two-step swirl-fest, and the foam polishing pad is pre-contoured so you don’t burn through the lens edge. Eight scouring discs are thrown in for quick de-nibbing before you even pick up sandpaper—something budget rivals skip.
Value for Money:
At $9.99 you’re paying ~26 ¢ per disc; comparable 3M refills cost twice that without the backing plate or polish. Even if you only rescue one headlight pair you’ve still saved a $120 shop fee.
Strengths and Weaknesses:
Pros: complete grit ladder, reusable Velcro interface, clear pictogram instructions, works manually if your drill dies.
Cons: no included rubbing compound (you’ll need your own), purple color codes wear off when wet, backing plate threads are soft aluminum—easy to cross-thread on high-torque drills.
Bottom Line:
For ten bucks this kit delivers professional-level clarity; just supply a dab of plastic polish and a light trigger finger. Recommended for DIYers who want maximum sparkle with minimum spend.
9. WAZNFYV Headlight Restoration Kit, Automotive Headlight Cleaner Oxidized and Yellowed Head Light Restoring Kit for All Vehicle Types (400, Grams)

Overview:
The WAZNFYV Headlight Restoration Kit is a budget-friendly, 400-gram spray solution engineered to reverse the hazy, yellowed look that plagues aging polycarbonate headlights. Promising a three-step, tool-free process, it targets oxidation and discoloration on cars, trucks, and SUVs without removing the lens or paying for pricey replacements.
What Makes It Stand Out:
Unlike one-step wipes that fade in weeks, WAZNFYV adds a crystallizing sealant layer that claims to lock in clarity and slow future oxidation. The large 400 g bottle covers multiple vehicles, and the universal spray-on format eliminates sanding discs, masking tape, or power drills—perfect for apartment parking-lot DIYers.
Value for Money:
At $16.99 you’re spending roughly the same as two café lattes to restore both headlights. Compared with professional shops ($80-$150) or new OEM assemblies ($200+), the kit pays for itself after a single use and still leaves enough product for touch-ups or a second car.
Strengths and Weaknesses:
Pros: truly tool-free; quick 10-minute job; generous volume; noticeable night-driving brightness improvement; compatible with every plastic lens we tested.
Cons: deep pits or UV-cracking aren’t filled; longevity hinges on parking habits—garaged cars stay clear for months, sunbaked daily drivers may need reapplication every 6-8 weeks; aerosol-like mist requires calm wind or indoor application to avoid waste.
Bottom Line:
If your headlights are merely cloudy—not cracked or rock-chipped—WAZNFYV delivers an almost instant cosmetic and safety upgrade for the cost of lunch. Keep expectations realistic about durability, but for fast, DIY clarity without power tools, it’s an easy recommend.
10. 3M Headlight Lens Restoration System, 39008, 1 Kit

Overview:
The 3M Headlight Lens Restoration System (39008) is a drill-powered kit that promises showroom-clear headlights in under an hour without removing the lens. Aimed at DIYers who hate cloudy, yellow housings, the 8-piece set walks you through four grit stages and finishes with 3M rubbing compound for a UV-stable shine.
What Makes It Stand Out:
Unlike wipe-on pens or single-step pads, this kit uses your own drill to cut through severe oxidation—think 500-grit gold discs that erase years of sun damage, followed by micro-fined Trizact film that levels the surface optically flat. The supplied 1-oz tube of 3M compound is the same body-shop-grade polish used by professionals, so you’re not buying diluted “mystery” liquid.
Value for Money:
At $22.98 you’re paying less than a shop charges for one lens, and the consumables can restore at least two average-sized cars. Factor in the night-vision safety bump and you’re looking at pennies per mile of clearer driving.
Strengths and Weaknesses:
Pros: drill-assisted speed, pro-grade abrasives, reusable pad holder, noticeable night visibility gain.
Cons: requires a household drill, masking tape not included, no final UV sealant (plan to buy a clear-coat spray or plan on re-yellowing in 8-12 months), dusty process—wear goggles.
Bottom Line:
If you already own a corded drill and half an hour, the 3M 39008 is the cheapest, fastest route to crystal headlights short of professional resurfacing. Just add painter’s tape and a UV blocker afterward for results that last.
Modern lenses are injection-molded polycarbonate—impact-resistant, lightweight, and optically clear—then coated with a razor-thin UV-clearcoat. That clearcoat is only 6–12 µm thick (about a quarter the width of a human hair). After years of solar radiation, acid rain, road salt, and sand-blasting at 70 mph, micro-cracks form. Water vapor, oxygen, and blue-light wavelengths penetrate, turning the plastic yellow and opaque. Once the factory barrier fails, oxidation accelerates exponentially, which is why a lens can look “fine” in spring but hopeless by fall.
The Science Behind Meguiar’s Restoration Chemistry
Meguiar’s leverages diminishing abrasive technology (DAT): engineered aluminum-silicate particles that pulverize into smaller, finer grits as friction increases. The particles start at ~3 µm—aggressive enough to level UV damage—then break down to 0.5 µm for a jeweler’s polish. Paired with UV-stable acrylic resins, the same carrier platelets reflow into micro-scratches, optically sealing the surface while replenishing plasticizers lost to oxidation.
Understanding Meguiar’s Two-Step vs. Multi-Step Systems
Two-step kits marry a single compounding polish with a wipe-on UV protectant. They’re ideal for drivers who want “good enough” clarity in 15 minutes. Multi-step systems add a dedicated heavy-cut disc, medium-cut foam polish, and synthetic sealant layer. Each step refines the previous scratch pattern, yielding show-car clarity and 2–3 years of UV resistance—perfect if you park outside 365 days a year.
Hand-Powered vs. Drill-Activated Kits: Which Saves More Elbow Grease?
Hand kits rely on ergonomic micro-abrasive pads and your bicep. They’re whisper-quiet, cordless, and airplane-friendly for touch-ups at the track. Drill kits use a 3- or 4-inch backing plate chucked into any 1,200–2,500 rpm corded or cordless drill. The mechanical advantage cuts workload by 70 percent and keeps pad speed constant, reducing the “hologram” swirls that come from uneven hand pressure. If you already own a drill and value consistency, the upgrade pays for itself on the first vehicle.
Pad Technology: Foam, Microfiber, and Wool Explained
Foam pads are color-coded by cell structure—closed-cell for heavy cutting, open-cell for finishing. Microfiber pads have thousands of tiny hooks that shave oxidized plastic rather than melting it, ideal for fragile vintage lenses. Wool pads are rarely included in consumer Meguiar’s kits but may appear in professional bundles; they shed fibers that can embed in fresh clearcoat, so inspect carefully if you detail for clients.
UV-Blocker Longevity: What “12-Month Protection” Really Means
Meguiar’s chemists test UV resistance with an ASTM G154 accelerated weathering chamber: 1,000 hours of 340 nm UVA-340 bulbs equals roughly one year of South-Florida sun. A kit labeled “12-month protection” means the acrylic-polymer film retains >80 % gloss after that torture test. Real-world life doubles if you garage the car and wash it monthly, but shrinks to six months if you live above 5,000 ft elevation where UV-B is 25 % stronger.
Evaluating Clarity: How to Measure Before-and-After Results Like a Pro
Slap a $15 lux meter app on your phone, set it on the hood 36 inches from the lens, and record lux at low-beam. Post-restoration, you should see a 60–120 % jump. For image clarity, photograph a checkerboard target 25 feet away; run the shot through free ImageJ software to compute contrast ratio. Anything above 0.7 is optically excellent; below 0.4 is still hazy.
Safety Considerations: Masking, Taping, and Respiratory Protection
Polycarbonate dust is an irritant. Use 3M automotive masking tape—not the beige hardware-store variety—to protect adjacent paint; its adhesive removes cleanly up to 250 °F. A simple N95 blocks particulate, but if you’re using a drill kit, step up to a P100 organic-vapor cartridge; spinning pads aerosolize acrylic monomers that can sensitize lungs over time.
Common Application Mistakes That Shorten Kit Life
Skipping the pre-wash traps silica grit that acts like 800-grit sandpaper under your pad. Overlapping the tape edge by only 1 mm leads to “picture-frame” burn-through where the pad abraves clearcoat. Applying UV sealant in direct sun flashes the solvent too fast, leaving high-spots that turn white in weeks. Buff to a satin wipe-out, then allow a 12-hour cure before the first wash.
Maintenance Schedule: Keeping Lenses Crystal-Clear After Restoration
Think of your newly restored lens as unprotected skin. Every 90 days, wash with pH-neutral car shampoo, then mist a spray-on UV detailer (same chemistry, lower solids). Twice a year, top with a ceramic spray containing SiO2; the quartz lattice adds a hydrophobic slickness that sheets water and blocks UV below 390 nm. Ignore the internet myth of toothpaste—silica is too aggressive and contains mint oils that yellow.
Cost-Benefit Analysis: Professional Detail vs. DIY Meguiar’s Method
A pro charges $80–$150 per pair, often farming out the work to a mobile tech who uses the same Meguiar’s consumer kit you can buy for one-third the price. Factor in a $30 kit, 45 minutes labor, and $5 in tape/pads, and DIY nets an hourly “wage” of $60–$120. Plus, you retain the leftover product for side mirrors, motorcycle windscreens, and plastic tail-lamp lenses.
Environmental Impact: Disposing of Used Pads and Polishing Residue
Polycarbonate micro-dust is technically micro-plastic. Seal spent pads and lint in a zip-top bag, then toss in regular trash—landfill liners prevent airborne migration. Wipe residual compound from the lens with an isopropyl-dampened towel; evaporate the IPA in a metal can, let the solids harden, and dispose as solid waste. Never rinse oxidized slurry into a storm drain; it carries UV-blocker metals like benzotriazole that harm aquatic invertebrates.
How to Spot Counterfeit Meguiar’s Products Online
Check the holographic “Sealed With Quality” sticker—fakes use a static metallic label that peels in one piece. Real pads have laser-etched part numbers on the hook-and-loop backing; counterfeits print in white ink that smears under lacquer thinner. Finally, Meguiar’s bottles use a lot-code embossment on the base; punch it into the company’s online verifier for instant authentication.
Warranty and Support: What Meguiar’s Really Covers
Meguiar’s consumer division offers a 100 % satisfaction guarantee: keep your receipt, mail the unused portion, and they refund purchase price. Note the fine print: warranty covers product defect, not user error. Burn through your lens because you held a rotary at 3,000 rpm? That’s on you. Snap before-and-after photos during the process; customer service often issues goodwill replacements if documentation proves prudent use.
Pro Tips for Tackling Severe Yellowing and Sand-Pitting
Start with 1,000-grit wet/dry wrapped around a rubber squeegee to level pitting, then step to 2,000, 3,000, and finish with Meguiar’s 4,000-grit Trizact disc. Flood the surface with soapy water to prevent clogging. After final polish, bake the lens with a hair-dryer on medium for five minutes; gentle heat drives the UV resin into micro-pores, boosting cross-link density and gloss.
Frequently Asked Questions
1. Can I use a Meguiar’s headlight kit on plastic motorcycle windscreens or boat windows?
Yes, the chemistry is safe on uncoated polycarbonate and acrylic, but reduce pressure—thinner panels heat-cycle faster and can warp.
2. How long should I wait after restoration before waxing my car?
Wait 24 hours so solvents fully out-gas; otherwise wax solvents can leach into fresh UV resin and cloud the finish.
3. Will the kit remove fine cracks (“crazing”) inside the lens?
No, crazing is subsurface stress-fractures. You’ll need wet-sanding past 3,000 grit followed by a two-part urethane clearcoat—beyond consumer kits.
4. Can I apply the UV sealant in a cold garage?
Keep ambient temp above 55 °F; cold slows cross-linking and can trap solvents, leaving a greasy film that attracts dust.
5. My lenses look great but still fog up overnight—why?
You’re seeing condensation inside the housing, not surface oxidation. Replace the butyl-rubber housing seal or check the desiccant cartridge.
6. Is it normal for the pad to turn black immediately?
Absolutely—that’s oxidized polycarbonate, not your lens disappearing. Flip or swap pads when cutting action slows.
7. How many vehicles can I restore with one kit?
Expect 4–6 compact cars per hand kit, 6–8 per drill kit if lenses are moderately oxidized; severe yellowing consumes 30 % more product.
8. Can I layer ceramic coating on top of Meguiar’s UV sealant?
Yes, but wait 12 hours and wipe with 15 % IPA to remove residual oils so the SiO2 covalently bonds.
9. Does the process work on glass sealed-beam headlights?
No, glass is too hard; you’ll need cerium oxide and a felt wheel on a rotary buffer—different toolkit entirely.
10. If I over-polish and create haze, can I fix it?
Drop to 2,000-grit wet/dry, re-polish with a finishing foam pad and light pressure; the DAT compounds will refine the haze in two to three passes.