If you’ve ever opened your car door on a scorching summer day only to be hit with a wave of oven-like heat, you already understand the pain of inadequate automotive insulation. Traditional solutions have long forced car enthusiasts to choose between effective thermal protection and manageable installation, often requiring bulky materials that add significant weight and eat up precious interior space. Enter the world of liquid ceramic insulation—a game-changing approach that’s revolutionizing how we protect our vehicles from extreme temperatures and unwanted noise.
lizardskin ceramic insulation represents a paradigm shift in automotive thermal management, offering a spray-applied solution that conforms to every contour of your vehicle while delivering exceptional heat rejection and sound dampening properties. Whether you’re restoring a classic muscle car, building a track monster, or simply want your daily driver to be more comfortable, understanding how this innovative technology works will help you make an informed decision about protecting your investment.
Top 10 Lizardskin Ceramic Insulation
Detailed Product Reviews
1. LizardSkin 50115 Sound Control Ceramic Insulation - 2 Gallon,Black
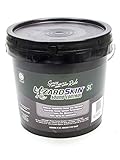
Overview: The LizardSkin 50115 represents the premium tier of automotive insulation, combining both sound deadening and thermal ceramic properties in a single two-gallon application. Manufactured in the United States, this water-based coating is engineered for enthusiasts who refuse to compromise between cabin quietness and heat management. At 25.1 pounds, the package contains substantial material for covering critical areas like firewalls, floor pans, and roof panels in most passenger vehicles.
What Makes It Stand Out: Unlike standard ceramic insulations that focus solely on heat rejection, the 50115 formula integrates sound-dampening technology, effectively blocking both thermal transfer and road noise. Its vehicle-specific formulation ensures compatibility with automotive substrates, creating a seamless barrier that adheres to complex contours without cracking or peeling. The black finish provides a professional OEM appearance while remaining paintable for custom applications.
Value for Money: At $196.04, this product commands a premium over thermal-only alternatives, but delivers dual functionality that would otherwise require two separate products. When compared to purchasing sound deadening mats and ceramic coating separately, the 50115 offers significant material and labor savings. The American manufacturing quality justifies the price point for discerning builders.
Strengths and Weaknesses: Pros: Dual sound/thermal protection, professional-grade USA manufacturing, excellent adhesion, paintable finish, comprehensive coverage per gallon. Cons: Requires specialized spray equipment (not included), higher initial investment than single-purpose products, lengthy curing time, professional application recommended for optimal results.
Bottom Line: For restoration projects and high-end builds where both thermal management and acoustic comfort are priorities, the 50115 is worth every penny. The convenience of a single-application solution combined with American-made quality makes it the smart choice for serious enthusiasts.
2. Lizard Skins LizardSkin 50100 Ceramic Insulation - 2 Gallon Black

Overview: The LizardSkin 50100 focuses exclusively on thermal management, delivering pure ceramic insulation performance in a two-gallon black pail. As a USA-made product weighing 5.67 kilograms, this formulation targets the core need of heat rejection without the added complexity of sound-dampening compounds. Designed for vehicle-specific applications, it creates a thermal barrier that can reduce interior temperatures by up to 30 degrees Fahrenheit with proper application.
What Makes It Stand Out: This product’s singular focus on thermal insulation allows for optimized ceramic particle concentration, potentially outperforming multi-purpose formulas in extreme heat scenarios. The black coloration provides excellent UV resistance and a clean under-hood appearance. Its water-based acrylic binder system ensures environmental compliance while maintaining strong adhesion to metal, fiberglass, and composite substrates common in automotive construction.
Value for Money: Priced at $179.99, the 50100 positions itself as the thermal-specialist alternative to dual-purpose products. For builders who have already addressed sound deadening with traditional mats or don’t require noise reduction, this offers a cost-effective solution. The per-gallon cost is competitive with premium ceramic coatings, and the American manufacturing pedigree adds value through consistent quality control.
Strengths and Weaknesses: Pros: Specialized thermal performance, USA manufacturing, environmentally friendly water base, excellent substrate compatibility, competitive pricing for premium tier. Cons: No sound deadening properties, requires separate spray equipment, curing process demands careful temperature control, not ideal for extreme cold climates.
Bottom Line: If your primary goal is heat management and you’ve already handled acoustics, the 50100 delivers focused performance at a fair price. It’s the pragmatic choice for race cars, hot rods, and restoration projects where thermal control takes precedence.
3. LizardSkin 1301-1GAL White Ceramic Insulation (1 Gallon Pail)

Overview: The LizardSkin 1301-1GAL offers an entry point into ceramic insulation technology with this single-gallon white pail. Manufactured in China, this product provides the same core thermal barrier technology as its American-made counterparts but in a smaller, more manageable quantity. Weighing significantly less than two-gallon options, it’s ideal for targeted applications or smaller vehicles where full coverage isn’t necessary.
What Makes It Stand Out: This one-gallon format eliminates waste for hobbyists working on compact cars, motorcycles, or specific trouble spots like transmission tunnels. The white color reflects heat effectively and provides a bright, clean appearance that makes future inspections easier. Its accessibility allows first-time users to experiment with ceramic coating technology without committing to larger, more expensive quantities.
Value for Money: At $113.98, the per-gallon cost is higher than bulk options, but the total investment remains low. For projects requiring less than 50 square feet of coverage, this eliminates the expense of unused material. Compared to professional installation services, even this small quantity represents substantial savings. The Chinese manufacturing reduces cost but may raise quality consistency questions for purists.
Strengths and Weaknesses: Pros: Low initial investment, perfect for small projects, no material waste, lightweight packaging, easy to handle. Cons: Higher per-gallon cost, China origin may concern quality-focused buyers, requires separate spray equipment, limited coverage area, white color may require topcoat for aesthetic preferences.
Bottom Line: For DIY enthusiasts tackling their first insulation project or addressing specific hot spots, this one-gallon pail is the sensible starting point. The manageable quantity and lower price point reduce risk while delivering genuine ceramic insulation benefits.
4. LizardSkin 1301-2GAL White Ceramic Insulation (2 Gallon Pail)

Overview: The LizardSkin 1301-2GAL provides a middle-ground solution with two gallons of white ceramic insulation in a single pail. Originating from China, this offering doubles the coverage of its one-gallon sibling while maintaining the same thermal barrier properties. The cubic 25.4-centimeter packaging is compact and stackable, making storage convenient for shops and garages with limited space.
What Makes It Stand Out: This two-gallon configuration hits the sweet spot for mid-size vehicles, offering enough material for complete floor pan and firewall coverage without excessive leftover product. The white formulation provides superior heat reflection compared to darker colors, particularly beneficial in extreme sun exposure scenarios. Its standardized packaging suggests streamlined manufacturing, potentially improving batch consistency over single-gallon production runs.
Value for Money: Priced at $168.99, this represents a 26% savings compared to purchasing two separate one-gallon pails at $113.98 each. The per-gallon cost becomes more competitive with premium American-made options while still undercutting them significantly. For projects requiring 80-100 square feet of coverage, this offers the most economical path without sacrificing performance characteristics.
Strengths and Weaknesses: Pros: Excellent price-to-quantity ratio, adequate coverage for most cars, compact packaging, heat-reflective white color, significant savings over single gallons. Cons: Chinese manufacturing may lack USA quality perception, spray equipment not included, white finish may not suit all aesthetic preferences, requires careful mixing for consistency.
Bottom Line: This two-gallon white pail is the value champion for budget-conscious builders covering a complete vehicle interior. The savings over single gallons make it the smarter purchase for any project requiring more than minimal coverage.
5. LizardSkin LSCI-4GAL Kit Ceramic Insulation with Spray Gun - 4 Gallon

Overview: The LizardSkin LSCI-4GAL Kit represents the complete professional solution, bundling four gallons of premium ceramic insulation with a dedicated spray gun and all necessary accessories. Engineered to reduce interior temperatures by 25-30 degrees Fahrenheit with just a .040-inch application, this kit covers up to 100 square feet. The water-based composition uses high-grade acrylic binders loaded with ceramic particles to create an impenetrable thermal barrier.
What Makes It Stand Out: This all-in-one package eliminates the guesswork of equipment compatibility, providing a spray gun specifically calibrated for LizardSkin’s viscosity and particle size. The four-gallon quantity handles complete vehicle insulation including floors, doors, roof, and firewall in one coordinated session. The included accessories ensure proper mixing, application thickness, and cleanup, preventing costly mistakes that can occur with improvised equipment.
Value for Money: At $489.95, the kit commands a premium but delivers tangible value. The spray gun alone represents a $150-200 investment, making the insulation cost per gallon effectively $72-85—substantially below individual pail pricing. For professional shops or serious enthusiasts, the time savings and guaranteed results justify the upfront cost. The comprehensive coverage eliminates multiple orders and ensures color consistency across the entire vehicle.
Strengths and Weaknesses: Pros: Complete turnkey solution, professional-grade spray gun, covers 100 sq ft, guaranteed compatibility, superior thermal performance, ideal for entire vehicle application. Cons: High initial investment, may be excessive for small projects, requires compressor (not included), substantial storage space needed.
Bottom Line: For those committed to doing the job right the first time, this kit is non-negotiable. The professional results, equipment inclusion, and comprehensive coverage make it the ultimate choice for show cars, restorations, and performance builds where perfection matters.
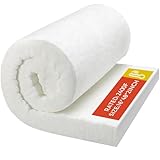
6. Fanfanwin Ceramic Fiber Insulation 2" Thick x 16" x 48", Fireproof Insulation Baffle Rated to 2400f Ceramic Fiber Blanket for Forge, Foundry, Stoves, Furnace, Kilns, Fire Bricks, Boilers, Kilns, Ovens
Overview:
The Fanfanwin Ceramic Fiber Insulation delivers professional-grade thermal protection in a substantial 2-inch thickness. Measuring 16" x 48", this blanket provides robust insulation for demanding high-temperature environments up to 2400°F. Designed for both industrial and residential applications, it maintains structural integrity under extreme heat, making it suitable for forges, kilns, furnaces, and stove baffles.
What Makes It Stand Out:
The exceptional 2-inch thickness sets this apart from standard 1-inch options, offering superior heat retention and energy efficiency. The manufacturer provides unusually comprehensive safety instructions, demonstrating responsibility toward user protection. Its versatility spans from pottery kilns to jewelry making, serving hobbyists and professionals alike. The blanket’s ability to maintain shape at maximum temperature ensures reliable long-term performance.
Value for Money:
At $57.99, this represents mid-range pricing that aligns with its professional specifications. Comparable industrial-grade materials often cost significantly more, while thinner consumer options can’t match its insulation value. For serious applications requiring 2-inch thickness, this offers substantial savings over layering multiple 1-inch blankets.
Strengths and Weaknesses:
Strengths include outstanding temperature rating, generous thickness, clear safety guidance, and versatile sizing. The dense weave provides excellent thermal resistance. Weaknesses involve necessary safety precautions—fibers require gloves, goggles, and respiratory protection. The rigid handling characteristics may challenge beginners, and it’s over-specified for minor repairs.
Bottom Line:
This is an excellent investment for serious DIY enthusiasts and professionals tackling high-heat projects. The 2-inch thickness provides peace of mind where thermal performance is critical, making it ideal for forges, kilns, and industrial furnaces.
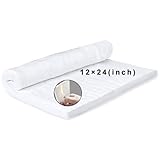
7. 24" x12"x1" (Thick) Ceramic Fiber Blanket Fireproof Insulation Baffle Rated to 2400F, High-Temperature Resistance for Oven Stoves, Kilns, Forges
Overview:
This compact ceramic fiber blanket offers an accessible entry point into high-temperature insulation. Measuring 24" x 12" x 1", it’s designed for small-scale projects requiring up to 2400°F protection. The manufacturer emphasizes flexibility and ease of handling, positioning it as a user-friendly option for hobbyists and homeowners making minor stove or oven repairs.
What Makes It Stand Out:
The aggressive $14.99 price point makes this the most budget-friendly option in its class. Its compact dimensions suit tight spaces and targeted repairs where larger blankets would be wasteful. The material promises good flexibility and tear resistance, allowing clean cuts with basic tools. The odorless composition is a notable benefit for indoor applications.
Value for Money:
Exceptional value for occasional users. At this price, it’s cheaper than many replacement parts for appliances. While professional fabricators might need larger quantities, homeowners addressing single issues get premium temperature rating without premium cost. The cost per square foot is competitive for small purchases.
Strengths and Weaknesses:
Strengths include affordability, easy handling, compact size for precise applications, and straightforward installation. The 2400°F rating matches premium competitors. Weaknesses include limited coverage area, thinner 1-inch profile providing less insulation, and a confusing product description that mentions both ceramic fiber and rockwool. Not suitable for large-scale or industrial projects.
Bottom Line:
Perfect for DIYers needing a small amount of high-quality insulation for minor repairs or single projects. Buy this if you’re insulating a pellet stove baffle or building a small forge without breaking the bank.
8. Ceramic Fiber Insulation, 1" Thick x 16" x 48", 2400F Fireproof Insulation Blanket, 3026E

Overview:
The 3026E ceramic fiber blanket delivers USA-made quality in a standard 1-inch thickness. With precise dimensions of 16" x 48" and a specified density of 8 lb/ft³, this product targets users who value documented specifications and domestic manufacturing. Rated to 2400°F, it serves both residential and light industrial applications from wood stoves to glassblowing studios.
What Makes It Stand Out:
Transparency sets this apart—clear density ratings and “Made in USA” labeling provide confidence in quality control. The manufacturer helpfully lists equivalent brand names (Kaowool, Inswool, Durablanket), making it easier for experienced users to understand exactly what they’re purchasing. This specification clarity is rare in the ceramic fiber market.
Value for Money:
At $39.79, it commands a premium over import alternatives but justifies this through manufacturing standards and specification transparency. For professionals requiring consistent, documented materials, the price premium is negligible compared to project risk. Hobbyists may find comparable performance for less, but without the quality assurance.
Strengths and Weaknesses:
Strengths include American manufacturing, clear technical specifications, recognized brand equivalency, and versatile application range. The 8 lb/ft³ density indicates durable construction. Weaknesses include higher cost than generic imports, 1-inch thickness requiring double-layering for maximum insulation, and limited size options compared to roll products.
Bottom Line:
Ideal for users who prioritize specification certainty and domestic production. Whether you’re a professional jeweler or serious hobbyist, this delivers reliable performance with the documentation to back it up.
9. Ceramic Fiber Insulation, 2" Thick x 16" x 48", 2400F Fireproof Insulation Blanket, 3037E

Overview:
The 3037E model provides the same USA-made quality as its 1-inch counterpart but doubles the thickness to 2 inches for superior thermal performance. Maintaining the 16" x 48" dimensions and 8 lb/ft³ density, this blanket targets demanding applications where maximum heat retention is paramount. The 2400°F rating ensures reliability across extreme environments.
What Makes It Stand Out:
This combines the specification transparency of the 3026E with enhanced insulation value. The 2-inch thickness significantly improves R-value without sacrificing material quality or handling characteristics. For high-heat applications like foundry work or kiln linings, this single layer replaces multiple thinner blankets, simplifying installation and reducing failure points at seams.
Value for Money:
At $61.19, it’s priced efficiently compared to purchasing two 1-inch layers. The premium over imports is offset by superior performance per inch and reduced labor costs. For professional installations, the time saved during application justifies the higher upfront investment. The density specification ensures you’re not paying for air.
Strengths and Weaknesses:
Strengths include exceptional thickness, documented density, Made in USA quality, and professional-grade temperature rating. It eliminates thermal bridging concerns present in multi-layer applications. Weaknesses include the highest price point in its size class, reduced flexibility compared to 1-inch options, and potential over-specification for low-temperature projects.
Bottom Line:
The top choice for maximum thermal performance in a single layer. Perfect for professional forges, industrial kilns, and serious blacksmithing operations where heat efficiency translates directly to results.
10. Deouss Ceramic Fiber Insulation Baffle Fire Blanket - 25’x24 x1 High Density Heat 2400F (1315C), for Forge, Foundry, Stoves, Furnace, Kilns, Fire Bricks, Boilers, Kilns, Blacksmithing, Pizza Ovens

Overview:
The Deouss ceramic fiber blanket distinguishes itself through massive coverage, offering 25 feet of continuous 1-inch thick material in a 24-inch width. This roll format eliminates seams in large installations while maintaining the standard 2400°F rating. Designed for extensive projects, it provides consistent insulation across fireplaces, pizza ovens, and industrial furnaces without piecemeal assembly.
What Makes It Stand Out:
The extraordinary length provides seamless coverage for large kilns or multiple small projects from a single purchase. Unlike pieced-together sections, this continuous roll ensures uniform density and eliminates weak points. The high-density construction and explicit non-toxic claim address health concerns often associated with ceramic fibers. Its moldability simplifies complex installations around curves and irregular shapes.
Value for Money:
At $109.99, the initial cost seems high, but the per-square-foot price rivals smaller blankets. For contractors or enthusiasts with multiple projects, it’s substantially cheaper than buying individual pieces. The time saved on installation and elimination of seam-related heat loss provides additional value. Storage requirements are the main trade-off.
Strengths and Weaknesses:
Strengths include massive coverage, seamless installation, easy moldability, high density, and non-toxic formulation. The continuous format ensures consistency. Weaknesses include high upfront cost, storage challenges for small workshops, and potential waste for single small projects. The 1-inch thickness may require doubling for maximum insulation.
Bottom Line:
Best suited for contractors, serious hobbyists with multiple projects, or large installations like pizza ovens and pottery kilns. Buy this roll when coverage area and installation efficiency outweigh storage considerations.
What Is LizardSkin Ceramic Insulation?
LizardSkin ceramic insulation is a water-based, sprayable coating embedded with high-performance ceramic microspheres that create an effective thermal barrier on automotive surfaces. Unlike traditional mat-based insulators, this liquid solution forms a continuous, seamless membrane that adheres directly to metal, fiberglass, and most automotive substrates. The technology leverages microscopic hollow ceramic spheres that trap air and disrupt heat transfer through conduction, convection, and radiation.
What sets this solution apart in the car care world is its dual-action capability—simultaneously blocking thermal transfer while absorbing sound vibrations. The coating typically dries to a flexible, durable finish that won’t crack or peel under normal automotive conditions, making it ideal for everything from floor pans and firewalls to trunk compartments and roof panels.
Why Your Car Needs Proper Insulation
The Hidden Costs of Poor Thermal Management
Beyond simple discomfort, inadequate insulation creates a cascade of problems that affect your vehicle’s performance, longevity, and your wallet. Unmitigated heat from exhaust systems and engine bays can warp interior plastics, degrade wiring harnesses, and prematurely age leather upholstery. In extreme cases, excessive cabin temperatures can stress electronic components, leading to infotainment glitches or sensor failures.
The financial impact extends to your fuel economy as well. When your cabin reaches 140°F on a summer day, your air conditioning system works overtime, potentially reducing fuel efficiency by up to 25%. This hidden tax on your wallet makes proper insulation an investment that pays dividends every time you drive.
How Ceramic Technology Changed Automotive Insulation
Traditional insulation methods relied on mass and density to block heat—think heavy asphalt-based mats or thick fiberglass batting. While effective, these materials add substantial weight and create installation challenges in tight spaces. Ceramic insulation flipped this script by using physics rather than mass, creating a lightweight solution that outperforms many conventional materials.
The breakthrough came from aerospace technology, where ceramic coatings protected spacecraft from extreme temperature fluctuations. By adapting these principles for automotive use, manufacturers created a solution that reflects radiant heat while the microsphere structure blocks conductive transfer, all at a fraction of the weight of traditional materials.
Key Benefits of LizardSkin Ceramic Coatings
Superior Heat Rejection Properties
The primary advantage lies in its exceptional ability to reduce radiant heat transfer by up to 30°F in real-world conditions. The ceramic microspheres create countless tiny air pockets that interrupt heat flow, while the reflective properties of the coating bounce infrared radiation away from protected surfaces. This means your firewall can block engine heat more effectively, and your floor pan can shield against exhaust system temperatures exceeding 600°F.
Sound Deadening Capabilities
While marketed primarily for thermal protection, the viscoelastic nature of the cured coating provides measurable sound dampening benefits. The material converts vibrational energy into low-level heat through internal friction, reducing road noise, exhaust drone, and panel resonance. Most users report a 3-6 decibel reduction in cabin noise, particularly in the problematic low-frequency range that traditional mats struggle to address.
Moisture and Corrosion Resistance
The seamless, water-resistant barrier prevents moisture from reaching metal surfaces, effectively starving rust of the water it needs to form. This is particularly valuable for classic car restorations where original floor pans might have minor pinholes or thin spots. The coating’s pH-neutral chemistry won’t promote corrosion, and it can even be applied over light surface rust after proper preparation, encapsulating it and preventing further oxidation.
Understanding the Science Behind Ceramic Insulation
How Ceramic Microspheres Work
Imagine thousands of microscopic ping-pong balls, each a perfect thermal insulator, suspended in a flexible matrix. These hollow ceramic spheres have extremely low thermal conductivity, meaning heat struggles to pass through them. When heat hits the coating, it must navigate a torturous path around each sphere, dramatically slowing transfer. The spheres also reflect radiant energy, creating a one-two punch against thermal intrusion.
The Role of Thermal Barriers in Performance
Heat is the enemy of performance. High intake air temperatures rob engines of power, while hot fuel can cause vapor lock. By creating thermal barriers in strategic locations—like under-hood areas and fuel cell surrounds—you maintain cooler, denser air for combustion and protect sensitive components. In racing applications, this can translate to consistent lap times as engine and cockpit temperatures remain stable throughout a session.
Application Areas: Where to Use LizardSkin
Interior Cabin Insulation
The most common application targets the passenger compartment. Floor pans, toe boards, and rear seat dividers benefit immensely from a uniform coating that doesn’t interfere with carpet installation. The material’s thin profile—typically 0.04-0.06 inches when cured—means you won’t lose precious headroom or foot space, a critical consideration in vehicles with tight interiors.
Underhood and Engine Bay Protection
Firewall insulation is perhaps the most impactful location for reducing cabin heat. The coating can be applied to both the engine side and cabin side of the firewall for maximum effect. It’s also ideal for the underside of hoods, where it protects paint from heat-induced discoloration while keeping underhood temperatures more stable.
Undercarriage and Floor Pan Coating
Exhaust system proximity makes floor pans one of the hottest surfaces in any vehicle. A uniform application to the entire undercarriage creates a thermal shield that dramatically reduces heat soak into the cabin. This is especially beneficial for vehicles with side-exit exhausts or catalytic converters positioned near the floor.
Trunk and Rear Compartment Treatment
For vehicles with rear-mounted fuel cells or batteries, trunk insulation serves dual purposes: protecting cargo from heat and shielding volatile components from exhaust heat. The coating also prevents condensation buildup that can lead to musty odors or corrosion in rarely-accessed compartments.
Critical Features to Evaluate Before Buying
Thermal Protection Rating (R-Value)
While ceramic coatings don’t fit traditional R-value measurements perfectly, reputable manufacturers provide thermal resistance data. Look for products that specify heat flux reduction percentages at various temperatures. A quality coating should reduce radiant heat transfer by at least 30% at 400°F. Be wary of vague claims without specific test data or ASTM compliance ratings.
Coverage Area per Container
Coverage varies significantly based on desired thickness and application method. Most products cover 20-25 square feet per gallon at recommended thickness. However, achieving optimal performance often requires two coats, effectively halving your coverage. Calculate your total surface area carefully, then add 20% for waste and overlap. Remember: skimping on material yields disappointing results.
Dry Time and Curing Process
Understanding the cure cycle prevents costly mistakes. Most formulations dry to the touch in 2-4 hours but require 24-72 hours for full cure. Factors like humidity, temperature, and application thickness dramatically affect curing. Premium products offer faster cure times without sacrificing performance, crucial for time-sensitive projects. Check whether the product cures via evaporation or chemical cross-linking—the latter provides superior durability.
Compatibility with Existing Materials
Not all ceramic coatings play nice with other automotive products. Some can soften uncured paint or react with certain plastics. Verify compatibility with your vehicle’s specific materials: EPDM rubber, polyurethane sealants, and OEM undercoatings. The best products adhere tenaciously to properly prepared metal, fiberglass, and most plastics without adverse reactions.
VOC Content and Environmental Safety
Modern formulations should be low-VOC (Volatile Organic Compound) compliant, typically under 250 grams per liter. This isn’t just about environmental responsibility—high-VOC products often have stronger odors and longer cure times. Water-based formulations offer easier cleanup and safer application in enclosed spaces, though they may be more sensitive to humidity during curing.
Pre-Application Preparation Essentials
Surface Cleaning and Degreasing Protocols
The golden rule: the coating is only as good as the surface it bonds to. Begin with a thorough degreasing using wax and grease remover, followed by scuffing with 80-120 grit sandpaper to create mechanical tooth. Remove all rust scale; while the coating can encapsulate light surface oxidation, loose rust prevents proper adhesion. Finish with a tack cloth to remove all dust—ceramic microspheres will magnify any imperfections trapped beneath.
Masking and Protection Strategies
Overspray travels surprisingly far. Use quality automotive masking tape and paper to protect adjacent panels, glass, and trim. Pay special attention to brake lines, wiring harnesses, and moving components—ceramic coating on a brake line can insulate it from cooling air, creating a safety hazard. Remove or thoroughly mask seats, carpet, and interior components before spraying cabin areas.
Temperature and Humidity Considerations
Ideal application conditions range from 65-85°F with relative humidity below 60%. Cold surfaces cause the coating to thicken and flow poorly, while excessive heat accelerates drying too quickly, potentially trapping solvents. In humid climates, consider a dehumidifier for enclosed spaces. Never apply in direct sunlight—the substrate temperature can be 20-30°F hotter than ambient air, causing application issues.
Application Methods and Techniques
Spray Gun Setup and Pressure Requirements
Most formulations require a 1.8-2.2mm tip with 25-30 PSI at the gun for proper atomization. The material is thicker than typical automotive paint, so a siphon-feed gun often works better than gravity-feed. Strain the product through a paint strainer to remove any settled microspheres that could clog the tip. Maintain consistent gun distance—12-14 inches—and overlap each pass by 50% for uniform coverage.
Achieving Optimal Mil Thickness
The sweet spot typically falls between 40-60 mils (0.04-0.06 inches) when cured. Thinner applications sacrifice performance; thicker coats risk cracking and extended cure times. Use a wet film thickness gauge during application to verify coverage. The coating should hide the substrate color but not appear heavily textured or orange-peeled. Multiple thin coats trump one heavy application every time.
Multiple Coat Strategies
For maximum performance, two coats are standard practice. Allow the first coat to flash off until tacky—usually 30-60 minutes—before applying the second. This builds a more uniform barrier than attempting a single pass. Some enthusiasts apply a third coat to high-heat zones like firewalls and tunnel areas. When layering, alternate spray directions (first coat horizontal, second vertical) to ensure complete coverage.
Common Application Mistakes to Avoid
Over-application and Sagging Issues
The most frequent error is applying too much material too quickly. Heavy passes lead to sagging, runs, and extended drying times. If you notice the coating pooling or running, stop immediately and back-paddle with a brush to redistribute. Prevention is easier than correction—build thickness gradually with multiple light passes. Remember: you can always add more, but removing excess is nearly impossible without starting over.
Inadequate Surface Preparation
Skipping proper prep is like building a house on sand. The coating may initially adhere but will eventually delaminate, especially in high-vibration areas. Take the time to sand, clean, and degrease thoroughly. Test adhesion on a small, inconspicuous area first. If you can peel it off with your fingernail after curing, your prep was insufficient.
Rushing the Curing Process
Impatience ruins more projects than bad products. Installing carpet or interior panels before full cure traps solvents, leading to soft spots and potential odor issues. Follow manufacturer cure times religiously. In cool or humid conditions, extend cure times by 50%. A simple test: press your thumbnail into an inconspicuous area—if it leaves an indent, it’s not ready.
Performance Testing and Verification
DIY Heat Gun Tests
After full cure, verify performance with a simple heat gun test. Apply heat to the coated side while measuring temperature on the opposite surface with an infrared thermometer. A quality application should show a temperature differential of 30-50°F under consistent heat application. Test multiple spots to ensure uniform coverage and identify any thin areas that need touch-up.
Professional Thermal Imaging Assessment
For serious builds, professional thermal imaging reveals the complete picture. A thermal camera shows heat patterns and identifies any gaps or thin spots invisible to the eye. Many performance shops offer this service for $100-200, providing documented proof of insulation effectiveness. This is particularly valuable for warranty claims or resale documentation on high-end builds.
Long-term Durability Checks
Monitor your application every six months, especially in the first two years. Look for cracking, delamination, or color changes that might indicate UV degradation or chemical incompatibility. Quality applications should maintain flexibility and adhesion for 5-7 years under normal conditions. Touch up any damaged areas promptly to prevent moisture intrusion and maintain thermal performance.
Comparing LizardSkin to Traditional Insulation
vs. Dynamat and Butyl-Based Products
Butyl mats excel at sound deadening through mass loading but add significant weight—often 50-80 pounds for complete coverage. Ceramic coatings provide comparable thermal performance at roughly 1/10th the weight. However, mats may offer slightly better sound dampening in specific frequency ranges. The ideal solution often combines both: ceramic coating for thermal protection, with strategic mat placement on resonant panels for maximum noise control.
vs. Fiberglass and Foam Insulation
Traditional batting insulates well but absorbs moisture, leading to mold, rust, and foul odors. It also compresses over time, reducing effectiveness. Ceramic coatings are hydrophobic and maintain performance indefinitely. Foam sprays can match ceramic performance but often contain harsh chemicals and may degrade when exposed to automotive fluids. Ceramic’s chemical resistance gives it a clear edge in engine bay applications.
vs. Foil-Based Heat Barriers
Foil barriers reflect radiant heat effectively but do nothing for conductive transfer and require an air gap to work properly. They’re also notoriously difficult to install in complex shapes. Ceramic coatings combine radiant reflection with conductive resistance in a single, conformal layer. While foil might be cheaper for flat surfaces, ceramic’s versatility and comprehensive protection justify the premium for most applications.
Cost Analysis and Value Proposition
Initial Investment vs. Long-term Savings
A typical DIY application runs $300-500 in materials for a complete vehicle, while professional installation can reach $1,500-2,500. Compare this to the cost of premature component failure: a warped dashboard can cost $800+ to replace, and fuel system vapor lock can leave you stranded. Factor in improved comfort and potential fuel savings, and the ROI becomes compelling within the first year for daily drivers.
Professional Installation vs. DIY Economics
Professional shops bring experience, proper equipment, and climate-controlled environments, justifying their labor rates. However, DIY installation saves 60-70% of total cost and allows meticulous attention to detail. The learning curve is moderate—if you can paint with a spray gun, you can apply ceramic insulation. Your time investment will be 8-12 hours for a complete vehicle, spread over several days to accommodate cure times.
Maintenance and Longevity Considerations
Cleaning and Care Best Practices
Once cured, the coating requires minimal maintenance. For exposed areas like undercarriages, annual pressure washing removes road grime that could trap moisture. Avoid harsh chemicals or solvents—they can degrade the binder over time. For interior applications covered by carpet, no maintenance is needed. If you must clean a visible coated surface, use mild soap and water only.
When to Reapply or Touch Up
Quality applications last 5-7 years in protected areas, 3-5 years in exposed undercarriage applications. Reapply when you notice diminished thermal performance or visible degradation. Touch-up is straightforward: scuff the area with fine sandpaper, clean thoroughly, and apply a fresh coat feathering into the existing material. Unlike mat-based systems, you don’t need to remove the entire application to address localized wear.
Safety Protocols During Application
Respiratory Protection Requirements
Despite low-VOC formulations, always wear a NIOSH-approved respirator with organic vapor cartridges during application. Ceramic microspheres are benign but become airborne during spraying, and inhaling any particulate is undesirable. The respirator also protects against isocyanates if you’re applying the coating in conjunction with other automotive finishes.
Ventilation Standards
Maintain active ventilation moving 4-6 air changes per hour in enclosed spaces. Box fans with filters work well for DIY applications. Never spray in a completely sealed garage—solvent buildup can reach combustible levels, and inadequate airflow extends drying times. Professional shops use downdraft booths; DIYers should aim for cross-ventilation with make-up air.
Skin and Eye Protection
Wear chemical-resistant gloves and eye protection at all times. The coating is difficult to remove from skin once dried, and ceramic microspheres can cause mechanical irritation. Long sleeves and a spray suit prevent overspray from adhering to your skin. If material contacts your eyes, flush immediately with water for 15 minutes and seek medical attention—better safe than sorry.
Professional vs. DIY Installation Considerations
Your skill level, available time, and project scope should drive this decision. DIY installation offers satisfaction and savings but requires proper equipment and patience. Professional installation guarantees consistent results and often includes warranty coverage. Consider hybrid approaches: DIY accessible areas like floors and trunk, while paying a professional for complex firewall work. Many shops will sell you material and provide technical support if you want to tackle most of the job yourself but need expert guidance for challenging sections.
Frequently Asked Questions
How much LizardSkin ceramic insulation do I need for a typical muscle car?
Most classic cars require 2-3 gallons for complete coverage, assuming two coats on floor pans, firewall, trunk, and inner doors. Calculate your square footage precisely, then add 20% for waste. It’s better to have a half-gallon left over for touch-ups than to run short mid-project.
Can I apply LizardSkin over existing undercoating or rust?
Light surface rust can be encapsulated after aggressive wire brushing and treatment with a rust converter. Heavy scaling must be removed. Most existing undercoatings should be removed completely, as the ceramic coating needs direct metal contact for optimal adhesion and heat transfer. Test adhesion on a small area if you’re unsure.
How long before I can install carpet over a fresh application?
Wait a minimum of 72 hours at 70°F and 50% humidity. Press your thumbnail into an inconspicuous area—if it leaves no mark, it’s ready. Installing carpet too early traps solvents, leading to soft spots and potential odor issues that are nearly impossible to remedy without starting over.
Will LizardSkin ceramic insulation prevent all heat from entering my cabin?
No insulation is 100% effective. Quality ceramic coatings typically reduce heat transfer by 30-50% depending on application thickness and location. This translates to a 20-30°F cooler cabin in extreme conditions. Combine it with other strategies like window tinting and proper ventilation for maximum comfort.
Does ceramic insulation add significant weight to my vehicle?
This is where ceramic technology shines. A complete two-coat application adds just 15-25 pounds to a typical car—roughly the weight of two gallons of milk. Compare that to 50-80 pounds for traditional mat insulation, and the weight savings become a performance advantage, especially for racing applications.
Can I paint over LizardSkin ceramic insulation?
Yes, but wait for full cure (72+ hours) and scuff the surface with 320-grit sandpaper to promote adhesion. Use automotive-grade paint compatible with water-based undercoats. Some enthusiasts apply a color-matched topcoat to exposed engine bay areas for a finished appearance.
Is LizardSkin ceramic insulation flammable?
Quality formulations are non-flammable when cured and actually provide a degree of fire resistance. The ceramic microspheres are naturally fire-resistant, and water-based binders don’t support combustion. However, always verify specific fire ratings if this is a concern for your application.
How does ceramic insulation perform in extremely cold climates?
The same principles that block heat entry also prevent heat loss, making it equally effective in winter. The coating helps maintain cabin warmth and can reduce heater workload. It remains flexible down to -30°F in quality formulations, though application should never be attempted below 50°F ambient temperature.
Can I use LizardSkin on fiberglass or carbon fiber components?
Absolutely. The coating adheres exceptionally well to properly prepared composite materials. In fact, it’s often superior to mat-based products on irregular fiberglass shapes like Corvette bodies or custom carbon panels. Scuff with 120-grit paper and clean thoroughly before application.
What’s the shelf life of unopened LizardSkin ceramic insulation?
Most manufacturers guarantee unopened containers for 12 months when stored between 50-80°F. Once opened, use within 30 days as exposure to air begins a slow curing process. Store partially used containers upside down to create an air seal, and always strain material before reuse to remove any skin that may have formed.