Your car’s paint faces a constant barrage of environmental threats—UV radiation, acid rain, road salt, industrial fallout, and abrasive contaminants. While a single layer of sealant offers decent protection, savvy enthusiasts know that strategic layering creates a synergistic shield far more resilient than the sum of its parts. The art of stacking compatible sealants isn’t about slapping on more product; it’s about engineering a multi-stage defense system that can withstand months of punishment while delivering jaw-dropping gloss.
But here’s the challenge: not all sealants play nice together, and durability depends on far more than just the number of coats you apply. The chemistry, application sequence, and curing dynamics between layers determine whether your efforts yield a rock-hard, water-beading masterpiece or a gummy, streaky mess that fails within weeks. This guide cuts through the marketing hype and dives deep into what actually matters when building a durable, layered sealant system for your vehicle.
Top 10 Layering Sealant
Detailed Product Reviews
1. RV Roof Magic California VOC Compliant RV Roof Coating Liquid Butyl Rubber Waterproof Sealant | 1 Gallon Pail White Covers 50sq Best RV Roof SealantSS

Overview: The RV Roof Magic California VOC Compliant Coating is a premium liquid butyl rubber sealant designed specifically for recreational vehicle roofs. This one-gallon pail covers approximately 50 square feet and adheres to California’s strict VOC requirements. Manufactured in the United States, the coating works seamlessly on EPDM, metal, fiberglass, and previously coated surfaces without requiring a primer, making it an ideal choice for DIY enthusiasts.
What Makes It Stand Out: With over 25 years of proven success in the industry, this product boasts exceptional performance metrics including 350% elongation and 600 PSI tensile strength. The formulation waterproofs within 2-3 hours and fully cures in 8-10 hours, creating a seamless, puncture-resistant membrane that conforms to any shape. Its superior UV and ozone resistance extends roof life by 14-15 years, while the odorless finish ensures comfortable living spaces.
Value for Money: At $105.99 per gallon ($0.83/fl oz), this coating represents significant savings compared to professional RV roof replacement costing thousands. The two-coat application provides professional-grade protection, and the lack of primer requirement reduces material costs further. For a typical RV roof, one to two gallons suffice, making it a cost-effective long-term investment.
Strengths and Weaknesses: Strengths include VOC compliance, versatile substrate compatibility, excellent elasticity, rapid curing, and proven durability. Weaknesses involve requiring two coats, temperature-sensitive application windows, and limited coverage per gallon for larger roofs. The initial cost may seem high but pales compared to alternative solutions.
Bottom Line: RV Roof Magic delivers professional results for DIYers. Its proven track record, compliance, and performance justify the investment. Highly recommended for RV owners seeking durable, long-lasting roof protection.
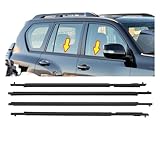
2. Compatible for Toyota Land Cruiser 200 2008-2021 2020 2019 2018 Car Window Outside Layering Exterior Accessories Sealant Strip(Left and Right(4 Pcs)

Overview: This four-piece window sealant strip kit is engineered specifically for Toyota Land Cruiser 200 models from 2008-2021. Designed as a complete replacement solution for all side windows, these exterior accessories address common issues associated with aging factory seals, including water intrusion, air leaks, and excessive cabin noise.
What Makes It Stand Out: The comprehensive kit includes both left and right side seals, providing a complete solution in one package. The manufacturer emphasizes easy installation that average car owners can complete without professional assistance, potentially saving hundreds in labor costs. The high-quality materials promise extended service life beyond OEM specifications.
Value for Money: At $476.03 for the complete four-piece set, the price reflects premium positioning. However, when compared to dealership parts and installation fees that can exceed $800, the kit offers substantial savings. The DIY-friendly design eliminates labor costs entirely, while the durable construction reduces future replacement frequency, delivering long-term value for Land Cruiser owners.
Strengths and Weaknesses: Strengths include OEM-compatible fitment, comprehensive coverage, noise reduction capabilities, and straightforward installation. The product effectively stabilizes cabin temperature and reduces air conditioning dependency. Weaknesses involve the high upfront cost, potential quality variance from genuine Toyota parts, and limited to specific model years. Single-piece availability would benefit those needing only partial replacement.
Bottom Line: This complete sealant kit is a worthwhile investment for Land Cruiser 200 owners experiencing multiple window seal failures. The combination of DIY installation and comprehensive coverage justifies the premium price, though budget-conscious buyers might seek individual pieces.
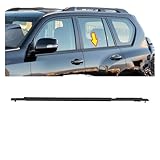
3. Compatible for Toyota Land Cruiser 200 2008-2021 2020 2019 2018 Car Window Outside Layering Exterior Accessories Sealant Strip(Front Right(1 Pcs))

Overview: This individual front right window sealant strip serves Toyota Land Cruiser 200 models from 2008-2021. Designed as a targeted replacement solution, this single piece allows owners to address specific seal failures without purchasing a complete kit. The exterior accessory matches OEM specifications for the front passenger side window.
What Makes It Stand Out: The availability of individual pieces provides flexibility for owners dealing with isolated seal deterioration. Like the full kit, it promises easy installation without professional help, featuring high-quality materials engineered for extended durability. The product specifically targets common issues including air leakage, water intrusion, and noise penetration.
Value for Money: Priced at $196.88 for a single piece, the per-unit cost appears steep compared to the four-piece kit. However, for owners with only one failing seal, it’s significantly cheaper than buying the complete set. When weighed against dealership pricing for a single OEM seal plus installation, it remains cost-effective. The DIY approach eliminates labor expenses, making it practical for targeted repairs.
Strengths and Weaknesses: Strengths include precise fitment for specific window location, straightforward installation, and effective resolution of leakage and noise issues. The material quality ensures longevity and improved cabin comfort. Weaknesses center on the high price per piece and limited value if multiple seals require replacement. The product description lacks specific material composition details, raising questions about long-term performance.
Bottom Line: This single seal is ideal for Land Cruiser owners needing front right window repair only. While expensive individually, it avoids unnecessary spending on unused parts. Consider the complete kit if multiple windows show wear.
4. Compatible for Toyota Land Cruiser 200 2008-2021 2020 2019 2018 Car Window Outside Layering Exterior Accessories Sealant Strip(Rear Right(1 Pcs))

Overview: This rear right window sealant strip is designed specifically for Toyota Land Cruiser 200 models manufactured between 2008-2021. As a single-piece replacement, it addresses seal degradation on the rear passenger side window without requiring purchase of a full kit. The exterior layering strip restores factory-level sealing performance.
What Makes It Stand Out: The product’s primary advantage lies in its specific fitment for the rear right position, allowing precise replacement of failed seals. Installation requires no specialized tools or expertise, enabling average vehicle owners to complete the repair independently. The high-quality construction targets common problems like wind noise, water leaks, and air infiltration that plague aging Land Cruisers.
Value for Money: At $196.88, this individual piece carries a premium price point. While expensive on a per-unit basis, it costs less than acquiring a complete four-piece set when only one seal needs replacement. Compared to dealership parts and service charges, the DIY installation provides meaningful savings. The investment proves worthwhile if it prevents interior water damage or reduces cabin noise significantly.
Strengths and Weaknesses: Strengths encompass OEM-style fitment, effective noise and leak reduction, temperature stability improvement, and user-friendly installation. The durable materials resist weathering and maintain flexibility. Weaknesses include the high cost for a single strip, ambiguous material specifications, and limited applicability to one specific window. Purchasing multiple individual pieces becomes cost-prohibitive versus the complete kit.
Bottom Line: This rear right seal serves Land Cruiser 200 owners with isolated seal failure perfectly. Though pricey, it solves specific problems effectively. Evaluate the condition of all window seals before purchasing to determine if a complete kit offers better value.
5. Compatible for 2010-2023 2022 2021 2020 Toyota Land Cruiser Prado 150 Car Window Outside Layering LC150 Exterior Accessories Sealant Strip(Rear Left(1 Pcs))
Overview: This rear left window sealant strip is engineered for Toyota Land Cruiser Prado 150 models from 2010-2023. As a single-piece replacement, it provides targeted restoration of the rear driver-side window sealing. The exterior accessory is designed to match OEM specifications while offering enhanced performance characteristics over original equipment, making it ideal for addressing specific wear issues.
What Makes It Stand Out: Beyond standard seal replacement, this product emphasizes multi-functional benefits including windproofing, dustproofing, soundproofing, and shock absorption. The high-density weatherstripping demonstrates superior deformation resistance and corrosion protection. Its direct replacement design eliminates complex modifications, enabling straightforward installation for DIY enthusiasts.
Value for Money: Priced at $163.99, this Prado-specific seal is slightly more affordable than Land Cruiser 200 equivalents. The cost remains justified when considering dealership alternatives and professional installation fees. For Prado owners experiencing rear left window leaks or noise, it offers a precise solution without investing in unnecessary components. The energy-saving benefits through improved climate control provide ongoing value.
Strengths and Weaknesses: Strengths include comprehensive sealing capabilities, high-performance material construction, corrosion and wear resistance, and impact absorption properties. The product effectively reduces energy consumption while enhancing driving comfort. Weaknesses involve model-specific limitation, unclear brand authenticity, and premium pricing for a single strip. The description’s generic nature raises questions about manufacturing origin and exact material composition.
Bottom Line: This seal is an excellent choice for Land Cruiser Prado 150 owners needing rear left window repair. Its performance features and reasonable pricing (relative to alternatives) make it a smart purchase. Verify compatibility with your specific model year before ordering.
6. Compatible for Toyota Land Cruiser Prado 150 2010-2023 Car Window Outside Layering LC150 Exterior Accessories Sealant Strip(Front Left(1 Pcs))

Overview: This front left window sealant strip is designed specifically for Toyota Land Cruiser Prado 150 models from 2010-2023. It serves as both a protective and decorative exterior accessory, promising to enhance your vehicle’s aesthetic appeal while guarding against daily wear and tear. The manufacturer emphasizes its lightweight yet durable construction, positioning it as a premium upgrade for discerning Prado owners who want to maintain their SUV’s refined appearance without compromising on practicality.
What Makes It Stand Out: The product’s primary distinction lies in its dual-purpose design philosophy. Unlike purely functional seals, this item balances decorative enhancement with practical protection. The manufacturer explicitly markets it as an atmosphere-improving accessory that makes your vehicle “more classy and refined.” The claim of being “highly consistent with the curvature of the car body” suggests precise molding for the Prado 150’s specific geometry, potentially offering better integration than universal alternatives that often require trimming or leave unsightly gaps.
Value for Money: At $113.51 for a single front-left piece, this sits in the mid-to-high range for individual trim components. The price reflects specialized fitment rather than bulk value. Compared to generic weatherstripping, you’re paying approximately 3-4x more for model-specific design and aesthetic integration. For Prado owners prioritizing OEM-plus appearance over cost, this represents a reasonable investment, though budget-conscious buyers might find better value in multi-piece sets or aftermarket universal options.
Strengths and Weaknesses: Strengths:
- Precise fitment for Prado 150 (2010-2023) ensures seamless integration
- Combines protective function with aesthetic enhancement
- Corrosion-resistant and colorfast materials for longevity
- Tool-free installation process accessible to DIY enthusiasts
Weaknesses:
- Premium pricing for a single piece may deter some buyers
- Decorative focus might compromise maximum sealing performance
- Limited to front left position only, requiring separate purchases for complete coverage
Bottom Line: This front left sealant strip is ideal for Prado owners seeking a factory-integrated look with moderate protection. While priced at a premium, its model-specific design and dual-purpose functionality justify the cost for those prioritizing appearance. Consider purchasing if you need to replace a damaged original trim or want to upgrade your vehicle’s side profile aesthetics without undertaking a full replacement.
7. Compatible for 2010-2023 2022 2021 2020 Toyota Land Cruiser Prado 150 Car Window Outside Layering LC150 Exterior Accessories Sealant Strip(Left and Right(4 Pcs)
Overview: This comprehensive four-piece window sealant strip set provides complete coverage for both sides of your Toyota Land Cruiser Prado 150 manufactured between 2010-2023. Designed as a direct replacement solution, the kit includes all necessary pieces for front and rear windows on left and right sides. The manufacturer positions this as a time-saving, cost-effective bundle for owners looking to refresh their entire vehicle’s weather sealing and exterior appearance in one coordinated purchase.
What Makes It Stand Out: The complete set approach immediately distinguishes this product from single-piece offerings. At $282.67 for four pieces, it delivers a coordinated solution with emphasis on functional performance over mere decoration. The features highlight practical benefits like windproofing, soundproofing, and shock absorption—addressing real driving comfort issues. The energy-saving claim, while unusual for automotive trim, suggests enhanced climate control efficiency through improved sealing, a tangible benefit for owners in extreme weather regions who rely heavily on heating and cooling systems.
Value for Money: This set offers the best per-piece value at approximately $70.67 per strip, representing a 35-40% savings compared to purchasing four individual pieces separately. The bundled pricing makes financial sense for comprehensive refurbishment or preventive maintenance. DIY installation promises additional savings on labor costs that can exceed $100 at dealerships. While still premium-priced compared to universal weatherstripping, the model-specific fitment and complete coverage justify the investment for dedicated Prado enthusiasts planning a full refresh.
Strengths and Weaknesses: Strengths:
- Complete four-piece set ensures uniform appearance and performance
- Superior value per unit compared to individual purchases
- Multi-functional: windproof, dustproof, soundproof, and shock-absorbing
- High-density weatherstripping resists deformation over time
Weaknesses:
- Higher upfront cost may exceed casual owners’ budgets
- Requires replacing all pieces simultaneously for best results
- Overkill if only one section needs replacement
Bottom Line: This four-piece set is the smart choice for comprehensive window seal replacement on your Prado 150. The bundle pricing offers genuine savings while ensuring consistent performance across all windows. Recommended for owners planning a full restoration or wanting to address multiple aging seals in one efficient upgrade, rather than those seeking a single-piece fix.
8. Compatible for Toyota Land Cruiser Prado 150 2010-2023 Car Window Outside Layering LC150 Exterior Accessories Sealant Strip(Rear Left(1 Pcs))

Overview: This rear left window sealant strip targets Toyota Land Cruiser Prado 150 owners needing to replace or upgrade the specific rear-left quarter window trim. Positioned as both a protective and decorative element, it mirrors the design philosophy of its front counterpart with emphasis on aesthetic enhancement. The product addresses the often-neglected rear window areas, which are equally susceptible to UV damage, scratches, and seal degradation over time, potentially leading to increased cabin noise and water intrusion.
What Makes It Stand Out: The rear-specific positioning is this product’s defining characteristic. Many owners focus exclusively on front windows, but rear seals deteriorate similarly and affect overall cabin comfort. The manufacturer’s emphasis on “beautiful atmosphere” and making the car “more classy” suggests this isn’t merely functional—it’s an appearance upgrade. The claim of being “durable and not deformed” addresses a common failure point where aging seals warp and create unsightly gaps that compromise both visual appeal and weatherproofing performance.
Value for Money: Priced at $111.83, this rear strip is slightly less expensive than the front left equivalent, reflecting potentially smaller dimensions or reduced material usage. The value proposition centers on targeted replacement rather than economy. For owners with specific rear window damage, this avoids purchasing unnecessary pieces and allows for incremental upgrades. However, the per-unit cost remains high compared to universal options. It’s best suited for meticulous owners addressing localized wear or completing a piece-by-piece upgrade strategy without committing to a full set upfront.
Strengths and Weaknesses: Strengths:
- Addresses often-overlooked rear window sealing needs
- Maintains consistent aesthetic with front pieces from same line
- UV-resistant and colorfast materials prevent fading
- Simple peel-and-stick installation requires no specialized tools
Weaknesses:
- Single-piece purchase lacks bundle discount advantages
- Decorative marketing may oversell actual sealing performance
- Requires careful alignment during installation for proper fit
Bottom Line: This rear left strip serves a niche but important role in comprehensive Prado maintenance. Purchase it if you’re experiencing specific rear window seal failure or completing a meticulous, position-by-position upgrade. For most owners, bundling with other pieces offers better overall value, but this excels for targeted repairs and maintaining factory appearance standards on a budget-conscious, incremental basis.
9. Compatible for Toyota/Land Cruiser/Prado 150 2010-2023 2022 2021 2020 Car Window Outside Layering LC150 Exterior Accessories Sealant Strip(Front Left(1 Pcs))

Overview: This premium front left window sealant strip positions itself at the top tier of Prado 150 exterior accessories, commanding the highest price point for a single piece. The manufacturer emphasizes advanced material engineering and all-weather performance, targeting owners who demand maximum durability and sealing effectiveness. This product moves beyond aesthetic claims to focus on technical superiority, promising stable performance in harsh conditions from scorching deserts to freezing mountain environments where inferior materials would crack or lose flexibility.
What Makes It Stand Out: The explicit focus on “excellent flexibility and deformation resistance” differentiates this from decorative-oriented alternatives. The premium material claim suggests a more sophisticated polymer compound that maintains sealing integrity across extreme temperature ranges. The super-strong sealing performance, specifically mentioned for keeping out rain, dust, and sand, addresses real concerns for Prado owners who actually take their vehicles off-road or into challenging environments rather than merely cruising city streets, making it purpose-built for adventure.
Value for Money: At $167.90, this commands a 48% premium over the basic front left option. The justification rests on material quality and performance longevity. For serious off-road enthusiasts or owners in extreme climates, the additional cost translates to tangible benefits: fewer replacements, better cabin protection, and maintained resale value. However, for urban drivers, this premium may be difficult to rationalize. The value emerges only if you genuinely need maximum environmental sealing rather than cosmetic improvement, making it a specialist purchase.
Strengths and Weaknesses: Strengths:
- Superior flexibility and temperature resistance
- Exceptional sealing against water, dust, and sand intrusion
- Maintains performance in extreme weather conditions
- Premium materials ensure extended service life
Weaknesses:
- Highest price point may be prohibitive for budget-conscious buyers
- Performance benefits may be overkill for urban-only vehicles
- Single-piece limitation requires separate purchases for other positions
Bottom Line: This premium front left strip is engineered for serious adventurers and extreme climate owners. The price premium is justified by superior material performance and durability. Choose this if you regularly expose your Prado to harsh conditions; otherwise, more economical options deliver adequate results for normal use, making this a specialized rather than universal recommendation.
10. Compatible for 2010-2023 2022 2021 2020 Toyota Land Cruiser Prado 150 Car Window Outside Layering LC150 Exterior Accessories Sealant Strip(Front Right(1 Pcs))

Overview: This front right window sealant strip completes the symmetrical pairing for Toyota Land Cruiser Prado 150 models, offering the same performance-focused features as its front left counterpart but for the opposite side. Positioned as a functional upgrade rather than purely decorative trim, it emphasizes comprehensive environmental protection. The product targets owners who prioritize cabin comfort through effective sealing against wind, dust, and noise intrusion, making it ideal for both daily drivers and expedition-ready vehicles that see mixed-use scenarios.
What Makes It Stand Out: The performance-oriented feature set immediately distinguishes this from basic decorative strips. The manufacturer explicitly lists windproof, dustproof, and soundproof capabilities alongside shock absorption—addressing multiple real-world driving issues simultaneously. The high-density weatherstripping construction suggests a more robust design than standard trim pieces. The claim of helping “keep your room cool in summer and warm in winter,” while oddly phrased, indicates serious attention to thermal insulation and climate control efficiency, a rarely-mentioned benefit in automotive trim that can impact fuel consumption.
Value for Money: At $163.99, this front right piece is priced nearly identically to other performance-oriented single strips, representing the market rate for premium functional trim. The cost is justified through multi-benefit performance rather than aesthetics alone. While expensive compared to generic alternatives, the model-specific fitment and comprehensive sealing properties deliver measurable improvements in cabin comfort. For owners replacing a failed original seal, this restores factory performance. For upgraders, it enhances the driving experience in tangible ways that decorative-only pieces cannot match, making it a functional investment.
Strengths and Weaknesses: Strengths:
- Multi-functional design addresses wind, dust, noise, and thermal insulation
- High-density construction resists compression set and deformation
- Direct replacement saves professional installation costs
- Corrosion-resistant materials ensure longevity
Weaknesses:
- Premium pricing limits accessibility for some owners
- Performance claims lack independent verification
- Single-side purchase requires matching left side for uniform results
Bottom Line: This front right strip is an excellent choice for performance-focused Prado owners seeking tangible improvements in cabin comfort and protection. The price aligns with its multi-functional capabilities. Purchase this when you need genuine sealing performance, not just visual enhancement, and pair it with a matching left side piece for optimal results and consistent vehicle appearance.
Understanding Layering Sealants for Automotive Protection
Layering sealants involves applying multiple compatible coatings in a specific sequence to build enhanced protection, depth, and longevity. Unlike traditional single-application methods, this approach leverages different chemical properties at each layer to create a composite barrier that addresses multiple failure modes simultaneously.
The Science Behind Multi-Layer Protection
Each layer in a properly designed system serves a distinct purpose. Base layers typically prioritize adhesion to the clear coat and contain high concentrations of UV inhibitors. Intermediate layers focus on building thickness and chemical resistance. Top layers emphasize hydrophobicity and sacrificial protection against minor marring. The magic happens through cross-layer bonding, where partially cured layers create interpenetrating polymer networks that resist delamination far better than a single thick coat could.
How Layering Differs from Traditional Single-Coat Applications
Single-coat applications rely on one product to do everything—adhere, protect, and shine. This forces compromises in formulation. Layering eliminates these trade-offs by assigning specialized tasks to optimized products. A single ceramic coating might last two years, but a properly layered system of synthetic polymer base, ceramic intermediate, and graphene topcoat can push durability beyond three years while maintaining better performance characteristics throughout its life.
Why Durability Should Be Your Primary Focus
The difference between a sealant that lasts six months versus one that survives two years isn’t just convenience—it’s economics and paint preservation. Every time you strip and reapply, you risk introducing micro-marring and consume hours of labor. Durable layers minimize these cycles, keeping your clear coat thicker and your weekends free.
The Real Cost of Frequent Reapplication
Consider the hidden expenses: clay barring annually removes micrometers of clear coat. Polishing to remove water spot etching gradually thins your paint. Durable layered systems reduce these maintenance procedures from quarterly to semi-annually, preserving factory paint thickness where it matters most—on hoods and horizontal panels that face the harshest exposure.
How Environmental Assaults Break Down Single Layers
UV radiation initiates polymer degradation through free radical formation. Acid rain neutralizes alkaline components in sealants. Road salt and industrial fallout create microscopic pits that compromise hydrophobicity. A single layer must combat all these simultaneously, leading to uniform degradation. Layered systems distribute the workload—UV protection in the base, chemical resistance in the middle, hydrophobicity refreshed at the surface.
Types of Sealants That Excel in Layered Systems
Not every sealant formulation benefits from layering. Some create incompatible chemical barriers that prevent subsequent adhesion. Understanding which chemistries stack successfully is fundamental to building durable systems.
Synthetic polymer sealants
These resin-based formulations create flexible, thermoplastic layers that bond tenaciously to clear coats. Their moderate curing temperatures and solvent-based carriers make them ideal base layers. They typically contain 20-30% active polymers that crosslink with paint surfaces, creating a foundation that subsequent layers can mechanically and chemically adhere to. Look for versions with high glass transition temperatures (Tg) above 60°C for better heat resistance.
Ceramic-Infused Sealant Technologies
Containing silicon dioxide (SiO2) or silicon carbide (SiC) nanoparticles suspended in polymer carriers, these bridge the gap between traditional sealants and full ceramic coatings. They cure harder than pure polymer sealants but remain more flexible than 100% ceramics, making them excellent intermediate layers. The nanoparticles create a crystalline structure within the polymer matrix, enhancing scratch resistance without compromising interlayer bonding.
Hybrid Wax-Synthetic Blends
While pure carnauba wax makes a poor layering candidate due to its low melting point and organic nature, modern hybrids incorporate synthetic polymers that stabilize the wax component. These work exceptionally well as sacrificial top layers, providing warm gloss and contaminant release while being easy to strip and refresh every few months without disturbing the more durable layers beneath.
Graphene-Enhanced Formulations
Graphene oxide additives create an electrically conductive network that reduces static charge on the vehicle surface, minimizing dust attraction. These formulations typically exhibit exceptional water spot resistance due to their thermal conductivity, which helps water evaporate more evenly. As top layers, they provide unique benefits but require precise application over fully cured base layers to prevent agglomeration.
Key Durability Factors to Evaluate
When selecting sealants for layering, specific performance metrics predict real-world longevity far better than marketing claims. Learn to read technical data sheets with a critical eye.
Crosslinking Technology and Chemical Bonding
True durability stems from covalent bonding between layers. Look for terms like “polyazane crosslinking” or “siloxane bonding” in product descriptions. These indicate chemical reactions that create Si-O-Si or Si-C bonds rather than weaker van der Waals forces. Products that cure through moisture activation (common in ceramics) require controlled humidity during application but yield superior bond strength.
UV Inhibitor Concentration
Premium layering sealants contain multiple UV stabilizer types: UV absorbers that convert radiation to heat, and hindered amine light stabilizers (HALS) that scavenge free radicals. The concentration, measured in percentage by weight, should exceed 3% for base layers that will bear the brunt of solar exposure. Products listing “UV protection” without specifying inhibitor types likely rely on simple opaque fillers that degrade quickly.
Hydrophobic Properties and Water Spot Resistance
Water contact angles above 110° indicate excellent hydrophobicity, but static angle measurements don’t tell the full story. Dynamic behavior—how quickly water sheeting occurs—matters more for real-world performance. Additionally, evaluate mineral content resistance. Sealants with acid-resistant functional groups repel calcium and magnesium deposits, preventing the etching that plagues lesser products in hard water areas.
Temperature Resistance Range
Durability means surviving both summer heat and winter freeze-thaw cycles. Quality layering sealants maintain flexibility down to -20°C without cracking and resist softening up to 150°C. This is particularly critical for dark-colored vehicles in sunny climates, where hood temperatures can exceed 80°C regularly. Check for thermal cycling test data in product specifications.
Surface Preparation: The Foundation of Longevity
Even the most advanced sealant system will fail prematurely on a poorly prepared surface. Preparation determines adhesion strength more than any other factor.
Decontamination Protocols
Start with a chemical decontamination using iron removers and tar dissolvers before touching the paint. Mechanical decontamination with clay bars or clay mitts should follow, but use minimal pressure and plenty of lubrication to avoid marring. For layered systems, consider a final wipe-down with isopropyl alcohol (IPA) diluted 1:10 with distilled water. This removes polishing oils and surfactants that interfere with chemical bonding, but work quickly—IPA can swell clear coat if left to dwell.
Paint Correction Considerations
Layering sealants over imperfect paint locks in defects and reduces gloss. Perform at least a single-stage polish to remove oxidation and light swirls. For maximum durability, aim for 85% defect removal—chasing perfection removes unnecessary clear coat. After correction, conduct a final IPA wipe to ensure a pristine bonding surface. Some professionals prefer panel wipe solvents specifically formulated for coating preparation, which evaporate more completely than IPA.
Surface Energy Optimization
Clear coats have varying surface energies depending on age, previous treatments, and manufacturing variances. Lower surface energy promotes better sealant spreading and adhesion. You can temporarily raise surface energy with final wipe solutions containing mild abrasives or chemical etchants, but this is advanced technique. Most enthusiasts achieve excellent results through thorough cleaning alone.
Application Techniques for Maximum Layer Adhesion
How you apply each layer dramatically impacts the final system’s durability. Technique errors account for more failures than product quality issues.
The “Thin Over Thick” Principle
Always apply thinner layers over thicker, more heavily loaded base coats. Heavy base layers provide structure; thin subsequent layers cure more completely and bond better. A base layer applied at 2-3 microns wet thickness might cure to 1 micron. The next layer should be applied at 1-2 microns wet, and any top layer at just 0.5-1 micron. This prevents solvent entrapment and ensures complete crosslinking throughout the stack.
Flash Time Management Between Layers
“Flash time” refers to the period when solvents evaporate but the coating hasn’t fully cured. Applying the next layer during the tack-cure phase—when the surface feels slightly grabby but doesn’t transfer residue to a gloved finger—creates the strongest interlayer bonds. This window typically occurs between 30 minutes and 2 hours after application, depending on temperature and humidity. Applying too early causes solvent entrapment; too late requires mechanical abrasion for adequate adhesion.
Environmental Conditions During Application
Ideal conditions are 65-75°F (18-24°C) with 40-60% relative humidity. Temperatures below 60°F slow curing and may prevent proper crosslinking. Above 80°F, solvents flash too quickly, causing application marks and poor leveling. Control dust with air filtration and avoid application in direct sunlight, which creates temperature gradients across panels that lead to uneven curing and potential delamination.
Applicator Pad Selection
Use foam applicators with fine, closed-cell structures for base layers to ensure even product distribution. Microfiber applicators work for intermediate layers, providing slight mechanical agitation that promotes bonding. For top layers, suede microfiber wrapped around a foam block gives the most controlled, streak-free application. Never reuse pads between different product chemistries—cross-contamination introduces incompatible components that cause crawling or fisheyes.
Curing Mechanics: What Happens Between Layers
Understanding the curing process prevents the most catastrophic layering failures. Different sealant types cure through distinct mechanisms that must be respected.
Solvent Evaporation vs. Chemical Curing
Polymer sealants primarily cure through solvent evaporation, leaving behind a thermoplastic film. Ceramic-infused sealants undergo moisture-activated condensation reactions, forming a three-dimensional siloxane network. When layering these, the base polymer must be fully solvent-cured before applying the ceramic, or the ceramic’s moisture activation will be disrupted. Conversely, applying a polymer over a ceramic too soon can soften the ceramic’s developing network.
Full Cure vs. Tack Cure Timelines
Tack cure occurs when the surface is dry to touch but the underlying film remains reactive—typically 1-4 hours. Full cure, when maximum hardness and chemical resistance develop, may take 24-72 hours. For layering, you want to apply subsequent coats at tack cure but avoid water exposure or washing until full cure is achieved. Parking the vehicle in a climate-controlled garage during this period prevents dew or rain from compromising the curing layers.
Layer Intermixing Risks
If solvents from a fresh layer dissolve components of the underlying layer, you get intermixing instead of discrete strata. This weakens the entire system. Prevent it by ensuring each layer reaches tack cure before proceeding and by using progressively less aggressive solvents in each subsequent product. For example, follow a toluene-based polymer base with an isopropanol-based ceramic intermediate, then a water-based graphene top.
Building Your Layering Strategy
Randomly stacking products yields unpredictable results. A systematic approach based on complementary chemistries ensures each layer contributes to overall durability.
Base Layer Selection Criteria
Your base layer should prioritize adhesion and UV protection above all else. Choose products with documented long-term performance on bare clear coat. Look for formulations containing benzotriazole UV absorbers and high molecular weight polymers. The base layer should be the most durable, hardest-to-remove component of your system since it’s intended to last the full service interval.
Intermediate Build Layers
One or two intermediate layers add measurable thickness and specific performance attributes. This is where you might incorporate a ceramic-infused sealant for chemical resistance or a polymer with high filler content for scratch masking. These layers should be compatible with both the base and top layers, acting as a chemical bridge if the outer chemistries differ significantly.
Sacrificial Top Layer Functions
The top layer takes the abuse so lower layers don’t have to. It should excel at contaminant release, water beading, and gloss enhancement while being easy to refresh every 3-6 months without stripping the entire system. Hybrid wax-synthetic blends or dedicated spray sealants work perfectly here. They contain mild cleaners that remove surface contamination while depositing fresh protection.
How Many Layers Are Actually Beneficial?
The law of diminishing returns hits hard after three layers. A base, intermediate, and top layer provide 90% of possible benefits. Adding more intermediate layers increases thickness but creates internal stress that can lead to cracking or delamination. Four layers might be justified for show cars or extreme climates, but five or more layers rarely improve durability enough to justify the product cost and application time.
Common Layering Mistakes That Compromise Durability
Even experienced detailers fall prey to these pitfalls. Recognizing them saves you from stripping and starting over.
Incompatible Chemistry Stacking
Never layer silicone-based dressings under polymer sealants—the silicone acts as a release agent. Avoid applying oil-based products beneath ceramic coatings; the oils prevent moisture activation. Always check product data sheets for compatibility statements. When in doubt, test on a small, inconspicuous area like the door jamb and check adhesion after 24 hours with adhesive tape.
Insufficient Flash Time Errors
Impatience kills durability. Applying layers too quickly traps solvents, which later outgas and create microscopic channels through the film. These channels become pathways for water and contaminants, accelerating failure. Use a timer and resist the urge to rush. Remember, the tack-cure window is your friend—waiting too long is better than not waiting long enough.
Overloading Product Quantity
Thicker is not better. Excess product doesn’t cure properly and remains soft, attracting dirt and washing away prematurely. It also leads to high spots—areas of uneven thickness that appear as streaks or rainbow effects. Apply just enough to achieve thin, even coverage. The product should self-level within 30 seconds of application; if it’s pooling or sagging, you’ve applied too much.
Contaminated Application Tools
Using the same microfiber towel for wipe-off that you used for polishing introduces oils that compromise layer adhesion. Wash all applicators and towels in dedicated, fragrance-free detergent without fabric softeners. Store them in sealed containers after drying. Even better, color-code your towels—one color for paint correction, another for sealant application, a third for removal.
Maintenance Protocols for Layered Sealant Systems
Proper maintenance extends layered system life by 50-100%. Treat your layered protection as a delicate surface, not armor plating.
Safe Washing Techniques
Adopt a two-bucket method with grit guards, but consider a three-bucket system for layered protection: one for wheels, one for rinse, one for wash. Use pH-neutral car shampoo—alkaline cleaners strip top layers, while acidic wheel cleaners can etch through to the base layer if used improperly. Wash in straight lines, not circles, to minimize swirl introduction. Foam cannons are excellent for pre-washing, but keep pressure below 1200 PSI to avoid forcing water under edges.
Drying Methods That Preserve Hydrophobics
Forget chamois leather—it drags contaminants across the surface. Use plush microfiber drying towels with a pat-and-pull technique. For maximum safety, employ a forced-air dryer that blows water off without contact. If you must use a towel, spray a quick detailer or drying aid containing lubricants and sealant-safe polymers to reduce friction and replenish the top layer.
Topper Application Without Stripping
Every 3-4 months, apply a compatible spray sealant or quick detailer as a maintenance top. These products contain mild surfactants that clean surface contamination while depositing fresh polymers. They bond to the existing top layer rather than stripping it. Avoid “ceramic boosters” unless they’re specifically formulated for your top layer chemistry—some contain alcohols that can attack wax components.
Inspection and Spot Repair
Monthly inspections under LED lighting reveal high spots, contamination, or failure areas. For minor issues, spot-correct with a dual-action polisher using a finishing pad and light polish, then reapply just that layer to the corrected area. Feather the edges to blend with surrounding layers. Catching problems early prevents cascading failures that require full system removal.
Environmental Considerations for Product Selection
Your local climate dictates optimal sealant selection more than any other factor. A system perfect for Arizona sun will fail in Florida humidity.
Climate Zone Implications
Desert environments demand UV resistance and thermal stability above all. Humid coastal regions require exceptional water spot resistance and anti-corrosion additives. Northern climates with road salt need chemical resistance and flexibility at low temperatures. Mountainous areas with temperature swings need sealants with high thermal cycle tolerance. Match your product stack to your primary environmental threats.
Seasonal Application Timing
Spring and fall offer the most stable temperatures and humidity for application. Summer’s heat accelerates curing but increases flash time management difficulty. Winter application is possible in heated garages but requires extended cure times. In humid climates, avoid application during rainy seasons when atmospheric moisture can interfere with curing. Plan your major layering projects for periods of stable weather.
Indoor vs. Outdoor Storage Factors
Garaged vehicles face fewer UV and contaminant challenges, allowing you to prioritize gloss and water behavior over extreme durability. Daily drivers parked outside need robust UV protection and contamination resistance as primary concerns. If you alternate between indoor and outdoor storage, design your system for the worst-case scenario—outdoor exposure.
Professional vs. DIY Layering Approaches
While layering is accessible to enthusiasts, certain situations justify professional application. Understanding the trade-offs helps allocate your detailing budget wisely.
When to Invest in Professional Application
Consider professional installation if your vehicle requires extensive paint correction before layering, if you lack a climate-controlled workspace, or if you’re applying a system with more than three layers. Professionals use controlled environments and infrared curing lamps that ensure optimal crosslinking. The cost premium often pays for itself in extended durability and avoided reapplication labor.
Essential Tools for Home Enthusiasts
Minimum requirements include: a dual-action polisher for correction, LED inspection lights, a digital hygrometer/thermometer, quality foam and microfiber applicators, and pH-neutral maintenance products. Optional but valuable: a forced-air dryer, paint thickness gauge to monitor clear coat health, and a contact angle meter for scientific performance verification. Invest in tools before buying premium sealants—poor tools waste good product.
Learning Curve Expectations
Your first layering attempt will take 8-12 hours including preparation. With experience, you’ll reduce this to 4-6 hours. Expect to make mistakes—high spots, streaking, or insufficient flash times. Start with a less visible panel like the roof to refine technique. Document each layer’s product, application time, and flash time in a logbook. This becomes invaluable for troubleshooting and maintenance scheduling.
Evaluating Performance: Testing Your Layered Protection
Objective testing validates your work and identifies when maintenance is needed before visible failure occurs.
Water Behavior Analysis
Freshly applied quality sealants exhibit water contact angles above 110° and immediate sheeting behavior. Test monthly by spraying distilled water on horizontal panels. If beads become smaller and taller (higher contact angle), contamination is present. If water stops beading and begins to sheet slowly, the top layer is failing. Document with photos to track degradation over time.
Contamination Release Assessment
Spray a light mist of isopropyl alcohol on the surface. If it spreads and wets the paint, your hydrophobic layer is intact. If it beads up, contamination has compromised the surface. Alternatively, sprinkle talcum powder on a dry panel and blow it off with compressed air. Easy, clean removal indicates good contaminant release; sticking powder suggests it’s time for a maintenance top.
Gloss and Depth Measurement
While subjective visual inspection under LED lights reveals most issues, gloss meters provide quantifiable data. A quality layered system should maintain 85+ GU (gloss units) on a 60° angle measurement for at least 12 months. More telling is the distinction between “sharp” gloss (clear reflections with defined edges) and “soft” gloss (blurry reflections). Sharpness indicates intact, smooth layers; softness suggests microscopic degradation or contamination buildup.
Cost-Benefit Analysis of Premium Layering Systems
Premium sealants command premium prices, but the investment calculus extends beyond initial purchase cost.
Price Per Month of Protection
Calculate by dividing product cost by expected months of protection. A $150 three-layer system lasting 30 months costs $5/month. A $50 single sealant requiring reapplication every 4 months costs $12.50/month when you factor in your time. Layering systems with quality products typically achieve 40-60% lower monthly costs despite higher upfront investment.
Time Investment Calculations
A full three-layer application takes 6-8 hours but protects for 24-36 months. Quarterly application of a single sealant takes 2-3 hours each time, totaling 16-24 hours over the same period. Layering saves 10-16 hours of labor while providing superior protection. Your time has value—factor it into product decisions.
Diminishing Returns Threshold
The jump from one to two layers provides approximately 40% more durability. Two to three layers adds another 25%. Beyond three layers, each additional layer adds less than 10% more protection while exponentially increasing failure risk from internal stress. For most vehicles, three layers represent the sweet spot of cost, time, and performance.
Frequently Asked Questions
How long should I wait between applying layers of different sealants?
Wait for the tack-cure phase, typically 30 minutes to 2 hours depending on temperature and humidity. The surface should feel slightly grabby but not transfer residue to a gloved finger. Avoid waiting longer than 4 hours, as full cure may require light abrasion for the next layer to bond properly.
Can I layer any sealant, or do I need specific “layering” products?
Not all sealants are designed for layering. Look for products explicitly stating compatibility with additional coats or those within the same product family. Avoid layering silicone-based dressings, oil-based products, or pure carnauba waxes under modern polymer or ceramic sealants, as they act as release agents.
Will layering sealants make my paint look thicker or “plastic”?
Properly applied layers totaling 3-5 microns won’t alter paint appearance negatively. In fact, the optical clarity of quality sealants enhances depth and gloss. Problems arise only when excessive product is applied, creating high spots that refract light unevenly. Thin, even coats maintain a natural appearance.
How do I know if I’ve applied too much product?
If the sealant doesn’t self-level within 30 seconds, pools in panel crevices, or creates visible streaks that don’t buff out easily, you’ve over-applied. High spots appear as rainbow-colored patches under direct light. Remove excess immediately with a clean microfiber, or if cured, polish lightly and reapply correctly.
Can I layer sealants over existing wax or ceramic coating?
Never layer over old wax—it must be completely stripped with a wax-removing shampoo or IPA wipe. You can layer certain sealants over existing ceramic coatings if they’re labeled as “coating toppers” or “maintenance sprays.” Standard sealants won’t bond properly to fully cured ceramics without mechanical abrasion first.
What’s the ideal number of layers for a daily driver?
Three layers: a durable polymer base for UV protection, a ceramic-infused intermediate for chemical resistance, and a sacrificial synthetic top layer for easy maintenance. This stack balances protection, appearance, and refreshability for vehicles facing real-world conditions.
How does temperature affect layered sealant durability?
Extreme heat accelerates UV degradation and can soften polymer layers, reducing their protective qualities. Cold makes layers brittle and prone to cracking from impacts. Quality layered systems maintain performance from -20°C to 150°C. Garage-stored vehicles in moderate climates see 2-3x longer durability than daily drivers in Arizona or Minnesota.
Should I clay bar between layers?
No—claying between layers will remove or mar the previous layer. Complete all decontamination and correction before the first layer. If you notice contamination after starting, you’ve either applied in a dirty environment or waited too long between layers. In either case, strip and restart rather than attempting intermediate claying.
Can I apply a graphene sealant as a base layer?
Graphene sealants function best as top layers due to their unique thermal and electrical properties. As base layers, their benefits are wasted beneath other products. Additionally, their formulation often assumes application over cured polymer or ceramic layers for proper orientation of graphene platelets. Use them as your sacrificial top layer for maximum effect.
How do I remove a layered sealant system when it’s time to reapply?
Use a dedicated coating remover or heavy-cut polish with a wool pad to break through the layers. Work one panel at a time, checking progress frequently. Multiple layers require more aggressive removal than single coats—expect to spend 2-3 hours on removal versus 1 hour for a single sealant. Always follow removal with thorough decontamination before reapplication.