Your vehicle’s undercarriage faces a relentless assault from road salt, moisture, stone chips, and corrosive debris. While factory undercoating offers basic protection, it often deteriorates within years, leaving critical components vulnerable to rust and premature failure. Enter brush-on polyurethane coatings—a game-changing approach that’s revolutionizing how car enthusiasts and professional detailers protect their investments. Unlike aerosol alternatives that create thin, inconsistent layers, brush-applied formulations allow for precise, buildable protection that conforms to every contour of your vehicle’s complex underbody geometry.
This comprehensive guide dives deep into the world of brush-on undercoating systems, exploring the technical specifications, application methodologies, and long-term performance characteristics that separate exceptional results from disappointing failures. Whether you’re restoring a classic muscle car or protecting a daily driver through harsh winters, understanding these critical factors will help you achieve professional-grade underbody protection that lasts for decades.
Top 10 Herculiner Brush-on Undercoating
Detailed Product Reviews
1. Rusfre RUS-1013 Brush-on Rubberized Undercoating, 1-gallon, black

Overview: The Rusfre RUS-1013 is a budget-friendly, brush-on rubberized undercoating designed for automotive underbody protection. This one-gallon black coating provides a straightforward solution for DIY enthusiasts looking to shield their vehicle from rust, road salt, and minor abrasions without investing in expensive spray equipment.
What Makes It Stand Out: Its brush-on application method offers precise control for hard-to-reach areas and allows for targeted touch-ups without overspray concerns. The rubberized formula creates a flexible, sound-dampening barrier that adheres well to clean metal surfaces, making it particularly valuable for restoration projects or winterizing older vehicles.
Value for Money: At $36.04, this represents exceptional value for those willing to invest elbow grease. Professional undercoating services can cost $150-300, making this gallon-sized option economical for multiple vehicles or reapplication over time. However, the labor-intensive nature means your time investment is significant.
Strengths and Weaknesses: Strengths include affordability, no special equipment needed, precise application control, and decent corrosion resistance. Weaknesses involve tedious brush-on process, potentially inconsistent thickness, longer application time versus spraying, and limited durability compared to professional-grade polyurea coatings. The product information is also sparse regarding cure times and chemical resistance.
Bottom Line: Ideal for budget-conscious DIYers prioritizing cost savings over convenience. It delivers adequate protection for daily drivers in moderate climates but requires patience and thorough surface preparation to achieve best results.
2. Herculiner Spray On Bed Liner Kit - Professional Grade, 1 Gallon Spray-On, Black
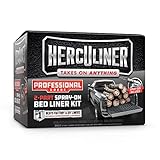
Overview: The Herculiner Professional Grade Bed Liner Kit is a two-component polyurethane system engineered for superior durability that rivals professionally installed liners. This comprehensive kit includes everything needed to transform an 8-foot truck bed with a single coat application, offering both spray and roll-on methods for user flexibility.
What Makes It Stand Out: The included spray gun sets this kit apart from DIY alternatives, delivering a textured, factory-like finish with minimal effort. Its impressive coverage capability—coating a full-size truck bed in one pass—saves significant time and material. The rapid cure schedule (4 hours dry-to-touch, 24 hours full cure) minimizes vehicle downtime, while the dual application options accommodate different skill levels and weather conditions.
Value for Money: At $139.99, this kit occupies a sweet spot between basic DIY products and $500+ professional installations. The professional-grade formulation and included spray equipment justify the premium, offering long-term protection that preserves truck resale value. For serious truck owners, the investment pays dividends in durability and appearance.
Strengths and Weaknesses: Strengths include professional spray gun inclusion, single-coat coverage, fast curing, versatile application methods, and exceptional durability. Weaknesses involve higher price point, requiring careful surface prep, potential learning curve for spraying, and sensitivity to temperature during application.
Bottom Line: A top-tier choice for truck owners demanding professional results without professional pricing. The spray gun inclusion and robust formulation make it worth every penny for long-term bed protection.
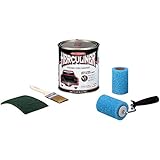
3. Herculiner Original DIY Truck Bed Liner Kit – Textured Polyurethane Coating, Black, 1 Gallon with Brush & Rollers – Durable Skid-Resistant Protection for Wood, Metal, Fiberglass, and More

Overview: The Herculiner Original DIY Kit provides a complete brush-and-roll solution for protecting truck beds and countless other surfaces. This one-gallon polyurethane coating kit includes rollers, handle, and brush, delivering a textured, skid-resistant finish that bonds to wood, metal, concrete, fiberglass, and even plastic surfaces.
What Makes It Stand Out: Remarkable versatility is this kit’s hallmark—extending far beyond truck beds to trailers, boat decks, toolboxes, and outdoor equipment. The flexible, repairable coating can be touched up years later without compatibility issues, while the three-step application process requires no professional experience. Its ability to prevent rust, chips, and peeling while providing a gloss black finish makes it a multi-project powerhouse.
Value for Money: Priced at $94.99, this kit offers excellent value for DIYers tackling multiple projects. The multi-surface capability effectively replaces several specialized products, while the included application tools eliminate hidden costs. Compared to $300+ professional bed liners, it delivers 80% of the performance at 30% of the price.
Strengths and Weaknesses: Strengths include incredible surface versatility, complete tool inclusion, easy reparability, user-friendly application, and strong adhesion. Weaknesses involve brush/roller limitations for complex shapes, potentially thinner coverage versus spray systems, longer application time, and requiring multiple coats for heavy-duty use.
Bottom Line: Perfect for creative DIYers seeking one product for countless applications. While not a professional spray system, its versatility and reparability make it an outstanding value for home improvement enthusiasts.
4. Air Undercoating Spray, Pneumatic Automotive Paint with Gauge, for herculiner, Rubberized Undercoat, Chip Guard, Proofing

Overview: This pneumatic undercoating spray gun is a specialized tool designed for applying automotive protective coatings, including rubberized undercoatings, chip guards, and sprayable truck bed liners. Its aluminum alloy construction and pressure gauge provide controlled, even application for DIY enthusiasts and automotive restorers working with products like Herculiner.
What Makes It Stand Out: Universal compatibility with 90% of chassis coatings and bed liner products makes this an exceptionally versatile investment. The gun handles varying viscosities and textures—from thin underbody waxes to thick polyurethane liners—without clogging. Its lightweight aluminum design reduces fatigue during extended undercarriage work, while the included gauge ensures consistent pressure for professional-looking results.
Value for Money: At just $23.97, this spray gun delivers remarkable value, paying for itself after one use compared to professional application fees or equipment rentals. For DIYers planning multiple projects, it transforms brush-on products into sprayable solutions, expanding product options and improving finish quality dramatically.
Strengths and Weaknesses: Strengths include broad product compatibility, durable construction, even spray pattern, affordability, and lightweight design. Weaknesses require owning an air compressor, potential overspray mess, learning curve for novices, and limited information about nozzle sizes or cleaning requirements.
Bottom Line: An essential tool for serious automotive DIYers. The compatibility with most coating products and affordable price point make it a smart purchase for anyone planning multiple undercoating or bed liner projects.
5. Herculiner HCL0B8 Liquid Black Truck Bed Liner 1 Gallon Brush and Roller Kit
Overview: The Herculiner HCL0B8 Liquid Truck Bed Liner Kit delivers professional-grade polyurethane protection through traditional brush and roller application. This one-gallon black coating system includes application tools designed to create a durable, skid-resistant surface on truck beds and other utility surfaces requiring robust, long-lasting protection.
What Makes It Stand Out: As a dedicated brush-and-roll kit from Herculiner’s trusted line, it offers precise thickness control and accessibility to tight corners that spray systems often miss. The formulation balances durability with flexibility, preventing cracks and chips while maintaining a textured grip surface. Its optimized viscosity reduces drips and sagging during vertical application, a common issue with many DIY coatings.
Value for Money: At $128.33, this kit positions itself between basic DIY options and premium spray systems. The price reflects Herculiner’s established reputation and quality formulation while remaining significantly cheaper than $400+ professional installations. For users preferring brush application, it eliminates spray equipment costs and cleanup complexity entirely.
Strengths and Weaknesses: Strengths include trusted brand reliability, controlled application, excellent corner coverage, reduced overspray risk, and durable textured finish. Weaknesses involve labor-intensive application, slower process than spraying, no included spray option, and higher price than entry-level kits. Limited documentation on cure times and chemical resistance is also notable.
Bottom Line: A reliable choice for meticulous DIYers who prioritize precision over speed. The brush application demands patience but rewards users with consistent, professional-looking protection that lasts.
Understanding Herculiner Brush-On Coatings for Underbody Protection
What Makes Brush-On Systems Different from Traditional Undercoatings
Brush-on undercoating represents a fundamental shift from conventional petroleum-based or rubberized spray products. These advanced formulations typically combine polyurethane resins with rubber granules, creating a flexible yet incredibly tough barrier that chemically bonds to properly prepared metal surfaces. Unlike wax-based undercoatings that remain somewhat soft and can wash away over time, brush-on systems cure to form a permanent, non-porous membrane that actively repels water and resists chemical degradation.
The application method itself provides unique advantages. Brushing forces the coating into seams, crevices, and around fasteners—areas where spray applications inevitably miss or build up unevenly. This mechanical working of the material ensures complete wetting of the surface, eliminating air pockets that become future rust starting points. For vehicles with existing factory undercoating, brush-on products can seamlessly integrate with and reinforce these older layers, rather than simply sitting on top.
The Science Behind Polyurethane-Rubber Hybrid Formulations
The effectiveness of modern brush-on undercoatings stems from their sophisticated chemical engineering. Polyurethane provides the backbone structure—excellent adhesion, UV resistance, and flexibility across extreme temperature ranges. When combined with suspended rubber particles, the formulation gains impact-absorbing capabilities that prevent stone chips from penetrating to the metal substrate below.
These coatings cure through solvent evaporation and cross-linking polymerization. As the carrier solvents flash off, the polyurethane molecules form long chains that create a three-dimensional network. This process continues for up to 7-14 days, even though the surface may feel dry to the touch within hours. The final cured film exhibits elongation properties of 300-400%, meaning it can stretch significantly without cracking when your chassis flexes during aggressive driving or when impacted by road debris.
Key Benefits of Brush-On Undercoating Applications
Superior Adhesion Characteristics
Proper adhesion is the non-negotiable foundation of effective undercoating. Brush-on systems achieve exceptional bonding through multiple mechanisms. First, the physical brushing action works the coating into microscopic surface irregularities, creating a mechanical interlock. Second, the polyurethane resin system is specifically formulated to etch slightly into properly prepared metal, forming chemical bonds at the molecular level.
This dual-action adhesion becomes critical when water inevitably finds its way underneath. Unlike traditional undercoatings that can delaminate in sheets when moisture penetrates at a single point, quality brush-on coatings maintain their grip, preventing the catastrophic failure cascade that exposes large areas of bare metal to corrosion.
Customizable Thickness and Coverage
One of the most significant advantages of brush application is the ability to build variable thickness exactly where needed. High-impact areas behind wheels, along rocker panels, and on forward-facing surfaces of control arms can receive 40-60 mils (1-1.5mm) of protection, while enclosed areas like inside frame rails might only need 15-20 mils. This strategic material placement optimizes both protection and cost.
The controlled application also prevents the overspray waste inherent in aerosol or spray gun methods. Professional detailers report using 30-40% less product to achieve superior coverage compared to spray applications, with the added benefit of keeping coating material out of sensitive areas like brake rotors, exhaust sensors, and rubber bushings.
Cost-Effectiveness for DIY Enthusiasts
From a financial perspective, brush-on systems deliver exceptional value. A single gallon typically covers 100-125 square feet at recommended thickness—sufficient for complete underbody protection of two mid-sized sedans. When amortized over the 10-15 year service life of a quality application, the annual cost of protection drops to less than the price of a single professional car wash.
The minimal equipment investment further enhances the value proposition. Unlike spray systems requiring compressors, regulators, spray guns, and extensive masking, brush application needs only quality brushes, mixing containers, and basic personal protective equipment. This accessibility democratizes professional-grade underbody protection, allowing enthusiasts to achieve results that rival or exceed commercial services costing $800-1,500.
Critical Features to Evaluate Before Application
Viscosity and Self-Leveling Properties
The ideal brush-on undercoating strikes a delicate balance between viscosity and flow characteristics. Too thick, and the material won’t level properly, leaving brush marks that reduce coverage efficiency. Too thin, and it will sag on vertical surfaces or fail to build adequate film thickness in a single coat.
Look for formulations with a viscosity between 2,000-4,000 centipoise at application temperature. This range allows the coating to hold vertical surfaces while still possessing enough self-leveling capability to eliminate brush strokes within 30-45 minutes. Premium products include thixotropic agents that cause the coating to thin under the mechanical shear of brushing, then thicken back up once applied—perfect for achieving smooth, consistent coverage on complex geometry.
Dry Time and Curing Mechanisms
Understanding the difference between dry time and full cure is critical for project planning. Surface dry (tack-free) typically occurs within 2-4 hours at 70°F with 50% relative humidity, allowing for careful handling and second coat application. However, the coating remains vulnerable to damage from water exposure for at least 24 hours.
Full chemical cure develops over 7-14 days, during which the coating achieves its final hardness, chemical resistance, and adhesion strength. Planning your application around a dry garage period of at least 72 hours ensures the coating can withstand unexpected rain or morning dew. Some advanced formulations include moisture-cure mechanisms that actually accelerate final curing when exposed to atmospheric humidity, a beneficial feature for applications in less-than-ideal conditions.
Flexibility and Impact Resistance Ratings
Technical specifications should include ASTM test results for flexibility (mandrel bend test) and impact resistance (falling dart test). A quality brush-on undercoating should withstand a 1/8" mandrel bend without cracking and resist impacts of 60+ inch-pounds without fracture. These metrics translate directly to real-world performance when gravel strikes your undercarriage at highway speeds or when your chassis twists on aggressive off-road trails.
The rubber content significantly influences these properties. Formulations with 20-30% rubber solids by volume provide optimal impact absorption while maintaining structural integrity. Higher rubber content can make the coating too soft, leading to gouging and premature wear in high-abrasion areas.
Pre-Application Vehicle Preparation Protocols
Underbody Cleaning and Degreasing Standards
Preparation quality directly determines final results—there are no shortcuts in this phase. Begin with a thorough pressure washing, focusing on removing all loose dirt, mud, and previous undercoating flakes. Follow with a dedicated degreasing step using a water-based, biodegradable degreaser applied with a pump sprayer. Work in sections, scrubbing with stiff-bristled brushes to break down petroleum residues from oil leaks and road grime.
The critical, often-missed step is the final wipe-down with a solvent-based pre-paint cleaner on all bare metal surfaces. This removes the invisible hydrophilic film that water-based cleaners leave behind, which can cause adhesion failure. Use lint-free cloths, changing them frequently to prevent recontamination. The “white glove test”—wiping a clean white cloth across the surface and seeing zero discoloration—confirms readiness for coating application.
Rust Treatment and Conversion Requirements
Any existing rust must be addressed before encapsulation, as brush-on coatings are not rust converters. For light surface rust (less than 5% surface coverage), mechanical removal with wire wheels or abrasive pads is sufficient. Follow with a phosphoric acid-based metal prep solution that etches the surface and deposits a zinc phosphate coating, providing enhanced corrosion resistance and improved adhesion.
Heavy scaling rust requires more aggressive treatment. Use needle scalers or media blasting to remove all loose material until you reach sound metal. Deep pitting should be filled with an epoxy-based filler designed for automotive underbody use, sanded smooth before coating application. Never apply brush-on undercoating over active, flaking rust—the coating will simply encapsulate moisture and accelerate hidden corrosion.
Masking Strategies for Sensitive Components
Proper masking protects components that shouldn’t be coated while ensuring clean, professional edges. Use high-temperature automotive masking tape (rated to 250°F+) for areas near exhaust components. Cover brake lines, ABS sensors, and rubber bushings with aluminum foil, which conforms to complex shapes and won’t absorb coating material like paper or plastic can.
Pay special attention to drain holes in frame rails and body cavities—these must remain open to prevent water trapping. Insert foam earplugs or specially designed drain hole plugs before application. For bolt threads and grease fittings, apply a light coating of anti-seize compound before masking; any accidental coating overspray will peel away easily after curing.
Professional Application Techniques
Brush Selection and Tool Quality Considerations
The brush makes all the difference in achieving professional results. Use natural bristle brushes for solvent-based formulations—synthetic bristles can dissolve or shed into the coating. A 2-inch angled sash brush provides excellent control for edges and seams, while a 3-inch flat brush covers broad panels efficiently. For intricate areas, dedicate a cheap chip brush that you can dispose of after use.
Brush quality directly affects finish quality. Cheap brushes shed bristles that become permanently embedded in the coating, creating potential moisture entry points. Invest in professional-grade brushes with epoxy-set bristles and sealed ferrules. Before first use, precondition brushes by soaking them in the recommended reducer for 10 minutes, then spinning out excess—this softens the bristles and improves paint pickup and release.
Ideal Temperature and Humidity Conditions
Environmental conditions during application dramatically affect results. The optimal range is 65-75°F with relative humidity between 40-60%. Temperatures below 60°F slow curing and can prevent proper adhesion, while temperatures above 85°F cause the coating to skin over too quickly, trapping solvents and leading to bubbling.
Humidity control is equally crucial. High humidity (above 70%) can cause blushing—a milky appearance in the cured film—as moisture gets trapped in the coating. Low humidity (below 30%) accelerates solvent evaporation, reducing flow and leveling. If conditions are marginal, consider using a retarder solvent (5-10% by volume) to slow curing and improve flow, especially when working in direct sunlight or breezy conditions.
Multi-Layer Application Strategies
Professional results require multiple thin coats rather than a single heavy application. The first coat should be a “tack coat”—thinned 10-15% and applied thinly to penetrate seams and establish adhesion. This coat will appear translucent but serves as the critical foundation.
After 2-4 hours of flash time, apply the second “build coat” at full viscosity, targeting 15-20 mils wet film thickness. Use cross-hatching brush strokes (alternating direction by 90 degrees between coats) to ensure complete coverage. A third coat on high-impact areas brings total thickness to 40-60 mils, providing optimal protection. Each coat should be applied before the previous coat fully cures to achieve chemical bonding between layers—typically within 4-6 hours.
Common Application Pitfalls and Prevention
Sagging and Runs: Causes and Solutions
Sagging occurs when coating is applied too thickly on vertical surfaces or when environmental conditions are too cold, slowing solvent release. Prevention starts with proper viscosity—if the coating drips off a stir stick in continuous streams, it’s too thin. Apply in multiple thin passes, allowing each to flash off for 5-10 minutes before adding more material.
If runs occur, resist the urge to immediately brush them out—this creates thin spots and texture issues. Instead, let the run partially set for 15-20 minutes until it’s firm but still pliable, then carefully slice it off with a sharp putty knife and feather the edges with a dry brush. For severe sagging, allow the coat to fully cure, sand smooth with 80-grit paper, and reapply a thin corrective coat.
Inadequate Coverage Identification
Missing spots is easy when working under a vehicle in poor lighting. Use a bright LED work light positioned at a low angle to cast shadows across the surface—this reveals thin areas and missed spots that disappear under direct overhead lighting. Another professional trick is to dust talcum powder lightly over the cured first coat; it adheres only to wet or tacky areas, highlighting where additional material is needed.
Pay obsessive attention to forward-facing edges and lower surfaces of components—these areas receive the highest impact and abrasion. A common mistake is coating the easy-to-reach flat surfaces while neglecting the critical edges that actually need the most protection. Develop a systematic pattern, working from front to back and top to bottom, to ensure complete coverage.
Contamination Issues During Curing
Dust, insects, and airborne debris landing on wet coating create permanent defects and potential failure points. Minimize contamination by working in a clean garage, wetting the floor beforehand to settle dust, and using a fan with a furnace filter taped to the intake side to create positive air pressure, pushing airborne contaminants away from the vehicle.
If contamination occurs on the wet coat, carefully pick off debris with tweezers, then lightly feather the area with a solvent-dampened brush. For contamination on a tack-free but uncured coat, wait until fully cured, sand the affected area with 220-grit paper, and apply a thin touch-up coat. Never try to wipe contamination from a partially cured surface—this smears the coating and creates a larger repair area.
Performance Metrics That Matter
Salt Spray Resistance Testing
The gold standard for undercoating evaluation is ASTM B117 salt spray testing. Quality brush-on systems should demonstrate no undercutting or blistering after 1,000+ hours of continuous salt fog exposure. This translates to 10+ years of real-world protection in severe winter road salt environments. When evaluating products, look for third-party test data rather than manufacturer claims—reputable brands publish detailed test reports showing performance metrics.
The salt spray performance depends heavily on film thickness. At 20 mils, most quality coatings provide adequate protection for 5-7 years. Increasing thickness to 40-60 mils extends protection to 10-15 years, with the added benefit that even if the surface becomes mechanically damaged, sufficient material remains to prevent substrate exposure.
Stone Chip Protection Effectiveness
Real-world stone chip resistance involves more than just hardness—the coating must absorb impact energy without cracking or delaminating. Laboratory testing using a gravelometer (SAE J400 specification) quantifies this performance by bombarding coated panels with standardized gravel at high velocity. Premium brush-on systems maintain integrity after 50+ impacts, while traditional undercoatings often fail after 10-15 impacts.
The rubber content plays a crucial role here. As an object strikes the coating, the rubber particles deform, distributing force over a larger area and preventing stress concentration. This elasticity also allows the coating to “heal” slightly, with minor indentations gradually recovering rather than becoming permanent stress risers that propagate cracks.
Noise Dampening Capabilities
Beyond corrosion protection, quality undercoating significantly reduces road noise and vibration. The viscoelastic properties of polyurethane-rubber composites convert mechanical vibration energy into low-level heat through internal friction (damping). Independent testing shows properly applied brush-on undercoating can reduce interior cabin noise by 3-5 decibels in the 200-500 Hz range where tire roar and road drone are most noticeable.
Thickness directly correlates with acoustic performance. A 40-mil coating provides optimal damping without adding excessive weight. For maximum noise reduction, consider applying the coating to the inside of wheel wells and the underside of floor pans, where direct sound transmission occurs. The coating’s mass also helps block airborne noise, functioning as a constrained layer damper when applied to thin sheet metal panels.
Long-Term Maintenance and Inspection
Annual Underbody Assessment Procedures
Even the best undercoating requires periodic inspection. Perform a comprehensive underbody review each spring, using a bright light and inspection mirror to examine all coated surfaces. Look for changes in texture—glossy areas becoming matte may indicate surface erosion from salt and sand. Check edges and seams for lifting or cracking, particularly where factory undercoating meets your brush-on application.
Document your inspection with photos, focusing on high-stress areas. This creates a baseline for tracking degradation over time. Pay special attention to areas where stone chips have visibly removed coating. These spots need immediate touch-up, as exposed metal can develop surface rust within weeks in salty environments, undermining the surrounding coating’s adhesion.
Touch-Up Application Best Practices
Touch-ups require the same meticulous preparation as the initial application, albeit on a smaller scale. Use a wire brush to remove any rust that has formed, feather the edges of the existing coating with 180-grit sandpaper to create a smooth transition, and clean the area with solvent. Apply thin coats, building to match the surrounding thickness.
For best color and texture matching, save leftover material from the original application in a sealed, air-tight container. If using new material, be aware that slight color variations may occur due to pigment settling or reformulation. For small chips, use a fine artist’s brush for precision application. On larger damaged areas (bigger than a quarter), consider using a small foam roller for the base coats, then feathering the edges with a brush.
Signs of Coating Degradation
Understanding normal aging versus failure is crucial. Slight chalking—the formation of a fine powder on the surface after 5-7 years—is normal and actually protective, as it indicates the coating is sacrificing its surface to protect the bulk material. Simply wash off chalk with soap and water; if the coating underneath remains intact and well-adhered, no action is needed.
Concerning signs include cracking that extends through the full film thickness, large-scale delamination where you can peel off sections of coating, or soft, gummy areas indicating chemical breakdown from oil contamination. These failures require complete removal and reapplication in the affected areas. Catching problems early allows for spot repairs rather than full stripping, saving enormous time and expense.
Comparing Application Methods: Brush vs. Spray vs. Roll
Precision Advantages of Brush Application
Brush application excels in precision and control, particularly for vehicles with complex underbody geometry. Modern unibody vehicles feature numerous access holes, reinforcements, and enclosed sections that spray applications simply cannot reach effectively. A brush allows you to physically push coating into these hidden areas, ensuring complete protection.
The tactile feedback of brushing also provides quality control. You can feel when the coating is properly worked into a seam or when a surface hasn’t been adequately covered. This direct interaction prevents the thin spots and holidays (missed areas) that plague spray applications, where the operator often can’t see the actual surface being coated due to overspray fog.
Time Investment Comparisons
While brush application is more time-intensive upfront, the total project time often rivals spray methods when you factor in masking and cleanup. A typical sedan requires 6-8 hours of actual brushing time but needs minimal masking—perhaps 1-2 hours. Spray applications might coat the accessible areas faster but require 4-6 hours of meticulous masking to protect sensitive components.
The real time savings come in rework. Brush application has a significantly lower defect rate, meaning less time spent fixing runs, thin spots, or overspray contamination. For DIYers working on weekends, spreading the application over two days (preparation day one, coating day two) is more manageable than the compressed timeline spray applications demand to maintain wet edges and avoid contamination.
Accessibility to Complex Underbody Geometry
Vehicles with fully boxed frames, extensive crossmembers, or integrated skid plates present significant challenges for spray equipment. The spray pattern cannot negotiate sharp angles or penetrate narrow gaps between components. Brushes, however, can be angled, bent, or even attached to extension poles to reach virtually any area.
For inside frame rails, use a radiator brush (a long, thin brush with a flexible handle) to apply coating several feet into enclosed sections. Behind brake backing plates and suspension components, use a “grout brush” with stiff, short bristles to work coating into tight spaces. This adaptability ensures no area is left unprotected, regardless of how complex your vehicle’s underbody architecture may be.
Environmental and Safety Considerations
VOC Content and Ventilation Requirements
Modern brush-on undercoatings have significantly reduced volatile organic compound (VOC) content compared to older formulations, typically ranging from 250-400 grams per liter. However, this still requires adequate ventilation. When working in a garage, use a box fan exhausting outward to create negative pressure, pulling fresh air in through doors or windows. This arrangement prevents solvent vapors from concentrating and migrating into living spaces.
For enclosed areas like inside frame rails, consider using a low-VOC formulation or water-reducible product. These sacrifice some cure speed and ultimate hardness but eliminate the health concerns and fire hazards associated with solvent exposure in confined spaces. Always check local air quality regulations; some areas restrict VOC content for consumer applications, and professional-grade products may not be legal for DIY use in those jurisdictions.
Personal Protective Equipment Essentials
Brush application might seem less hazardous than spraying, but the same PPE standards apply. Chemical-resistant nitrile gloves (minimum 8-mil thickness) are non-negotiable—polyurethane coatings contain isocyanates that can sensitize skin, causing permanent allergic reactions upon subsequent exposure. Wear a NIOSH-approved respirator with organic vapor cartridges and P100 particulate filters; vapors concentrate under the vehicle, creating a hazardous breathing zone even without visible overspray.
Protective clothing should cover all exposed skin. Disposable coveralls prevent coating transfer to your skin and clothing. Safety glasses with side shields protect against drips and splashes, which are surprisingly common when working overhead. Keep a bottle of the appropriate reducer or cleanup solvent nearby for immediate skin contact—once the coating cures, removal requires harsh solvents or mechanical abrasion.
Disposal Protocols for Leftover Materials
Never pour leftover coating or solvents down drains or onto soil. Cured polyurethane is inert and can be disposed of as regular household waste, but liquid materials require special handling. Many municipalities operate household hazardous waste collection facilities that accept paint and solvents. If none are available, solidify small amounts by mixing with cat litter or sawdust until completely absorbed, then seal in a plastic bag for trash disposal.
For brushes and tools, clean immediately after use. Soak in the appropriate reducer, then wash with soap and water. Dispose of used solvent by allowing it to settle, pouring off the clear top layer for reuse, and solidifying the sludge for disposal. Never reuse cleaning solvent for thinning coating, as contamination affects cure and performance.
Vehicle-Specific Application Challenges
Modern Unibody Construction Considerations
Today’s unibody vehicles present unique challenges with extensive use of galvanized steel, aluminum panels, and advanced high-strength steels. Galvanized surfaces require aggressive abrasion to remove the zinc oxide layer that forms over time—use 80-grit sandpaper or a wire brush until the surface appears bright and metallic. Aluminum requires a dedicated etch primer before undercoating application, as polyurethane doesn’t adhere well to the naturally forming aluminum oxide layer.
High-strength steel panels are often thinner and more flexible than traditional mild steel, requiring undercoating with superior flexibility to prevent cracking. Test your chosen coating on a small, inconspicuous area first, then flex the panel manually (if accessible) to check for adhesion. Some modern vehicles also incorporate structural adhesives in body construction—avoid coating these areas, as undercoating can interfere with designed flex characteristics and noise/vibration/harshness (NVH) tuning.
Classic Car Frame Rail Treatment
Classic vehicles with fully boxed frames require special attention to the inside surfaces, where moisture collects and rust begins unseen. Use a borescope to inspect internal condition before coating. If significant rust is present, consider using a frame blaster—air-powered tools that shoot abrasive media through access holes to clean interior surfaces.
For application inside frame rails, thin the first coat 25% to improve penetration and flow into seams. Use a radiator brush to apply, working from multiple access holes. The goal is to coat all internal surfaces, but avoid creating pools of material at the bottom of frame rails, which can trap moisture. Drill additional 1/4" drain holes at the lowest points if none exist, coating the edges of these holes to prevent rust from starting there.
Electric Vehicle Battery Pack Protection
Electric vehicles introduce new considerations—battery packs are typically sealed units, but their mounting structures and cooling lines need protection. However, some EV manufacturers warn against applying additional undercoating near battery packs due to thermal management concerns. The coating can act as an insulator, potentially affecting battery cooling.
Before coating any EV underbody, consult manufacturer technical service bulletins. If coating is approved, avoid direct application to battery pack housings and keep coating at least 2 inches away from any cooling lines or vents. Focus on frame components, suspension parts, and body panels. The added weight of undercoating (approximately 10-15 pounds for a complete application) has negligible impact on EV range but verify that you’re not exceeding any vehicle weight restrictions for specific components.
Cost Analysis and Value Proposition
Material Coverage Calculations
Accurately estimating material needs prevents mid-project shortages or expensive over-purchasing. Measure your vehicle’s underbody using a simple formula: length × width × complexity factor. A typical sedan underbody is approximately 8 feet long × 5 feet wide (40 square feet). Multiply by a complexity factor of 1.5-2.0 to account for suspension components, frame rails, and irregular geometry, yielding 60-80 square feet of actual coating area.
At typical coverage rates of 100 square feet per gallon at 20 mils thickness, one gallon suffices for a single coat. However, achieving 40-60 mils in high-impact areas while maintaining 20 mils elsewhere requires approximately 1.5 gallons for a two-coat system. Always purchase 10-15% extra to account for material left in brushes, containers, and spillage. The incremental cost is minimal compared to the inconvenience of running short.
Tool Investment Requirements
Quality tools represent a modest but necessary investment. Budget approximately $50-75 for professional-grade brushes in various sizes, $20-30 for mixing containers and measuring tools, and $30-40 for proper PPE if you don’t already own it. A decent LED work light on a tripod ($40-60) dramatically improves visibility and results.
These tools are reusable for future projects with proper care. Brushes cleaned immediately after use can last for multiple vehicles. Amortized over several applications, the tool cost per vehicle drops to under $20. Compare this to professional undercoating services at $800-1,500, and the DIY approach delivers compelling value, especially for enthusiasts who plan to maintain multiple vehicles over time.
Professional Service Cost Comparisons
Professional undercoating services using brush-on systems typically charge $150-200 per hour for labor, with most vehicles requiring 8-12 hours of work plus materials. This reflects the painstaking preparation and application quality required for lasting results. While expensive, professional services offer advantages: climate-controlled facilities, experience with complex vehicles, and warranty coverage.
The decision between DIY and professional often comes down to vehicle value and your own skill level. For a $50,000+ vehicle, professional application provides peace of mind and documented service history that may benefit resale. For older vehicles or those with existing rust issues, DIY allows you to invest more time in preparation and apply thicker coats exactly where needed. Many enthusiasts choose a hybrid approach: DIY application on daily drivers and older projects, professional service for show cars and high-value collectibles.
Troubleshooting Post-Application Issues
Bubbling and Blistering Remediation
Bubbles typically indicate trapped solvents, moisture contamination, or application over an incompatible existing coating. Small bubbles (pinhead size) often outgas during cure and flatten without intervention. Larger bubbles require attention. If discovered while the coating is still soft, prick with a pin, gently press out trapped air, and smooth with a solvent-dampened brush.
For bubbles discovered after full cure, use a sharp utility knife to cut an “X” shape, peel back the flaps, and inspect the substrate. If clean and dry, apply a thin coat of coating into the cavity, press the flaps back down, and top with additional material to seal. If moisture or rust is present, remove all compromised coating, treat the substrate properly, and reapply. Never simply puncture and fill bubbles without investigating the root cause—they’re symptoms of underlying problems that will recur.
Adhesion Failure Root Cause Analysis
When coating peels or delaminates, the failure mode reveals the cause. If coating pulls away cleanly from bare metal, the issue is inadequate surface preparation—likely grease, rust inhibitor residue, or poor metal profiling. If coating comes off with a layer of original undercoating attached, the problem is intercoat adhesion—applying over an incompatible or poorly prepared existing coating.
Edge peeling around chips indicates inadequate thickness or a too-brittle formulation for the application. Large-scale lifting across an entire panel suggests extreme flexibility mismatch—either the coating is too rigid for the substrate or the substrate is flexing beyond design parameters (common with rust-weakened panels). Understanding these failure modes guides corrective action, preventing repeat failures.
Color Fading and UV Stability Concerns
Most brush-on undercoatings are black, but some formulations include UV inhibitors to prevent surface chalking and color fade when exposed to sunlight through wheel wells or during underbody inspections. Significant fading after 2-3 years indicates inadequate UV protection, though this is primarily cosmetic and doesn’t necessarily compromise corrosion protection.
If appearance matters (show vehicles, visible frame components), apply a UV-resistant topcoat specifically designed for underbody use. These clear or pigmented topcoats add 5-10 mils of thickness and contain benzotriazole or hindered amine light stabilizers (HALS) that absorb UV radiation before it can degrade the underlying coating. Reapply the topcoat every 3-5 years to maintain appearance and UV protection.
Seasonal Application Timing Strategies
Optimal Weather Windows by Region
Geographic location dictates optimal application timing. In the Northeast and Midwest, late spring (May-June) offers moderate temperatures, low humidity, and minimal pollen. The coating cures completely before winter salt season while avoiding summer’s high humidity and extreme heat. In the South, early fall (September-October) provides similar conditions after the humid summer but before cooler winter temperatures slow curing.
The Pacific Northwest’s dry summer months (July-August) are ideal, though morning dew can be problematic—start applications mid-morning after dew has evaporated. Desert Southwest regions can apply nearly year-round but must avoid summer afternoons when temperatures exceed 90°F, causing rapid skinning and solvent entrapment. Mountain states should target June-August, avoiding afternoon thunderstorms that introduce humidity spikes.
Indoor vs. Outdoor Application Trade-offs
Indoor garage application offers environmental control but introduces ventilation challenges. Even with doors open, solvent vapors can concentrate to hazardous levels. Use multiple fans creating cross-ventilation, and consider a temporary exhaust fan in a window or door opening. The advantage is protection from wind-borne debris, insects, and unexpected rain.
Outdoor application solves ventilation concerns but introduces contamination risks. Work under a canopy or tarp to shield from direct sun and falling debris. Morning applications are best—dew has evaporated, temperatures are rising but not extreme, and wind is typically calmer. Avoid windy days entirely; even light breezes carry dust and pollen that ruin the finish. If outdoor application is your only option, consider building a temporary spray booth using PVC pipe and plastic sheeting to create a clean microenvironment.
Winter Preparation Application Schedules
If protecting a vehicle before its first winter, timing becomes critical. Apply coating at least 2-3 weeks before roads are salted to ensure full cure. This allows time for inspection, touch-ups, and for the coating to develop maximum chemical resistance. Applying in early October for a November salt season start provides this buffer.
For vehicles already exposed to salt, an intensive cleaning is mandatory before application. Salt residue buried in seams and inside frame rails can contaminate the coating and cause premature failure. Use a pressure washer with hot water if available, and consider a salt-neutralizing wash product designed for marine applications. Multiple rinse cycles may be necessary—test runoff with a conductivity meter; when readings match your tap water, the underbody is sufficiently salt-free for coating.
Frequently Asked Questions
How long does brush-on undercoating typically last before requiring reapplication?
With proper preparation and application thickness of 40-60 mils, quality brush-on undercoating provides 10-15 years of effective protection in severe winter salt environments. Annual inspections and prompt touch-ups of any damaged areas can extend this to 20+ years. The key is maintaining film integrity—once the coating is breached and moisture reaches the metal, localized failure accelerates.
Can I apply brush-on undercoating over existing factory undercoating or rust?
You can apply over intact factory undercoating after thorough cleaning and light abrasion to create a mechanical profile. However, never apply over active, flaking rust. All loose rust must be removed, and the surface should be treated with a rust converter or primer designed for rusty metal. Encapsulating rust without proper treatment traps moisture and accelerates hidden corrosion.
What’s the ideal temperature range for applying brush-on undercoating?
The optimal range is 65-75°F with relative humidity between 40-60%. Temperatures below 60°F significantly slow curing and can prevent proper adhesion, while temperatures above 85°F cause the coating to skin over too quickly, trapping solvents. If you must apply outside this range, use appropriate solvents—retarder for hot conditions, accelerator for cool conditions—but stay within the manufacturer’s recommended temperature window.
How much material do I need for a typical sedan or SUV?
A mid-sized sedan requires approximately 1.5 gallons for a complete two-coat application with extra thickness in high-impact areas. A full-size SUV or truck needs 2-2.5 gallons due to larger surface area and more complex suspension components. Always purchase 10-15% extra to account for waste, touch-ups, and material left in containers and brushes.
Will brush-on undercoating affect my vehicle’s warranty?
Most manufacturers allow additional undercoating, but some specifically prohibit it near certain components (exhaust systems, EV battery packs, advanced driver-assistance sensors). Check your owner’s manual and any existing warranty documentation. Dealers sometimes deny corrosion warranty claims if they determine aftermarket undercoating contributed to failure, though this is rare with quality application. Document your preparation and application process with photos as evidence of proper installation.
How does brush-on undercoating compare to rubberized spray products for noise reduction?
Brush-on polyurethane-rubber hybrids typically outperform traditional rubberized undercoatings for noise damping. The viscoelastic properties convert vibration energy to heat more efficiently, reducing interior noise by 3-5 decibels compared to 1-2 decibels for spray products. The ability to build thicker, more consistent films in critical areas like floor pans further enhances acoustic performance.
Can I use brush-on undercoating on suspension components and brake lines?
Yes for most suspension components, with caveats. Avoid coating rubber bushings, ball joint boots, and any moving surfaces. Brake lines can be coated but must be meticulously cleaned first—any contamination affecting brake fluid is dangerous. Never coat flexible brake hoses. Some enthusiasts prefer to wrap brake lines in protective tape before coating, allowing future removal for inspection. Always verify coating compatibility with your specific brake line material (steel, copper-nickel, or stainless).
How do I handle undercoating removal if I need to make repairs?
Brush-on undercoating removal is labor-intensive but straightforward. Use a heat gun to soften the coating, then scrape with a putty knife. For large areas, a pneumatic needle scaler works efficiently. Chemical strippers specifically designed for polyurethane can help but are messy and environmentally problematic. Once removed, repair the underlying issue, then reapply using the same multi-coat process. The repaired area may be slightly thicker but will blend in visually after curing.
Is brush-on undercoating safe for vehicles with aluminum or galvanized components?
Aluminum requires special preparation—a dedicated aluminum etch primer must be applied first, as polyurethane doesn’t bond well to aluminum oxide. Galvanized surfaces need aggressive abrasion to remove the zinc oxide layer that forms over time. Some modern vehicles use extensive aluminum underbody panels; always verify compatibility and follow manufacturer preparation specifications for each substrate type.
What should I do if I discover missed spots after the coating has cured?
Touch-up is straightforward. Clean the area thoroughly, feather the edges of the existing coating with sandpaper, and degrease. Apply thin coats, building to match surrounding thickness. If the missed spot is larger than a few square inches, consider scuffing the entire panel and applying a thin additional coat to ensure uniform appearance and protection. Small touch-ups blend invisibly; large patches may remain slightly visible but provide equal protection if properly applied.