Cloudy, yellowed headlights aren’t just an eyesore—they’re a serious safety hazard that can reduce nighttime visibility by up to 80%. While professional detailing shops charge anywhere from $75 to $150 per vehicle for headlight restoration, the right professional-grade kit empowers you to achieve the same crystal-clear results at a fraction of the cost. Whether you’re a weekend warrior looking to elevate your car care game or a mobile detailer building your service menu, understanding what separates true professional kits from drugstore disappointments is critical.
This comprehensive guide dives deep into the world of professional headlight restoration kits, exploring the science behind headlight degradation, the non-negotiable components that define pro-level quality, and the application techniques that separate showroom results from amateur hour. No product pitches here—just unbiased, expert-level insights to help you make an informed decision and execute a restoration that lasts.
Top 10 Headlight Restoration Kit
Detailed Product Reviews
1. CERAKOTE® Ceramic Headlight Restoration Kit – Guaranteed To Last As Long As You Own Your Vehicle – Brings Headlights Back to Like New Condition - No Power Tools Required - 10 Wipe Kit

Overview: The Cerakote Ceramic Headlight Restoration Kit positions itself as a premium, long-term solution for cloudy headlights. This kit leverages ceramic coating technology—traditionally used in automotive paint protection—to create a durable bond with plastic lenses. Designed for vehicle owners who want a one-and-done solution without investing in power tools, it promises lifetime UV protection through a simple three-step wipe application process.
What Makes It Stand Out: Unlike conventional kits that rely on temporary sealants, Cerakote’s ceramic coating chemically bonds to the headlight surface, creating a protective barrier that won’t wash away. The “lasts as long as you own your vehicle” guarantee is a bold claim backed by aerospace-grade coating technology. The complete tool-free design eliminates risks of paint damage from overspray or drill slip-ups, making it accessible to complete beginners. The three-step system (oxidation remover, sanding, ceramic coating) addresses restoration and protection simultaneously.
Value for Money: At $17.95, this kit sits in the mid-range but delivers premium technology. Competing ceramic coatings alone cost $30-50, making this an exceptional value when you factor in the included restoration materials. Compared to $100+ professional services or $200+ headlight replacements, the investment pays for itself immediately. The lifetime protection claim means you won’t need to reapply annually like cheaper wax-based alternatives.
Strengths and Weaknesses: Strengths include genuine ceramic technology requiring no power tools, comprehensive UV protection, straightforward wipe-based application, and impressive durability claims. The three-step process is intuitive even for novices. Weaknesses involve more manual effort than drill-based systems for severely oxidized lenses, and the ceramic coating’s permanence means mistakes during application are less forgiving. Heavy oxidation may require additional sanding beyond the included materials.
Bottom Line: For DIYers seeking professional-grade, lasting results without equipment investment, this kit delivers exceptional value. The ceramic technology justifies the modest price premium over basic kits, making it ideal for owners planning long-term vehicle retention.
2. 3M Ultra Headlight Restoration Kit, Contains Masking Tape, Light Sanding Discs, Wax Protectant and More, Use on Plastic Lenses Headlights, Taillights and More, Easy Heavy-Duty Restoration (39195)

Overview: The 3M Ultra Headlight Restoration Kit represents the professional approach to headlight restoration, leveraging the company’s renowned abrasive technology. Designed for use with a standard household drill, this kit provides a comprehensive sanding progression from heavy oxidation removal to fine polishing. It’s aimed at DIY enthusiasts comfortable with power tools who want shop-quality results on severely degraded lenses.
What Makes It Stand Out: This kit’s standout feature is its systematic abrasive progression: 500-grit Gold discs tackle heavy yellowing, 800-grit White finishing discs smooth the surface, and the 3000-grit Trizact refining disc creates a polished clarity. The included disc pad holder transforms your drill into a professional restoration tool. The addition of masking tape and wax protectant demonstrates 3M’s attention to detail, protecting paintwork and sealing results. This is genuine 3M abrasive technology—the same used in body shops.
Value for Money: Priced at $14.50, this kit offers exceptional professional-grade value. Individual 3M sanding discs retail for $2-3 each, so the included materials alone exceed the kit price. When compared to $100+ professional services, the savings are substantial. The ability to restore multiple sets of lights with leftover materials further increases value.
Strengths and Weaknesses: Strengths include professional-grade 3M abrasives, efficient drill-powered operation, systematic multi-stage process, and versatility across all plastic lenses. The masking tape inclusion shows thoughtful design. Weaknesses center on requiring a drill and some skill to avoid damaging lenses or paint. The process generates dust and takes longer than wipe-on solutions. Wax protectant is less durable than ceramic alternatives.
Bottom Line: For power tool users seeking professional results on heavily oxidized headlights, this kit is unmatched. The 3M quality and comprehensive approach justify the learning curve, making it ideal for serious DIYers.
3. Botou 2026 New Headlight Restoration Polish, Automotive Headlight Cleaner Oxidized and Yellowed Head Light Restoring Kit, with Coating Agent, Towel and Sponge (1Set)

Overview: The Botou 2026 Headlight Restoration Kit takes a radically simplified approach with its spray-on application. Marketed toward drivers wanting immediate improvement without elaborate procedures, this kit promises results in minutes through a chemical cleaning action. The generous 180ml fluid volume suggests multiple applications, making it suitable for maintaining multiple vehicles or reapplying over time.
What Makes It Stand Out: The spray application format is this kit’s primary differentiator, eliminating the tedious sanding process entirely. Simply shake, spray, wait, and wipe—no tools, no mess. The fast-acting formula claims to dissolve oxidation chemically rather than mechanically abrading it away. The inclusion of both restoration fluid and a separate coating agent provides a two-stage approach within a simplified system. The large volume at this price point is unusual.
Value for Money: At $16.99 with 180ml of restoration fluid, this kit offers excellent volume value. Comparable spray products cost $15-20 for half the quantity. For vehicles with mild to moderate oxidation, the efficiency and speed create strong value. However, the absence of mechanical sanding means severely yellowed lights may not achieve full clarity, potentially requiring purchase of a more comprehensive kit anyway.
Strengths and Weaknesses: Strengths include incredibly simple spray application, rapid results, generous product volume, and suitability for all headlight types. The process is virtually foolproof for beginners. Weaknesses involve questionable durability compared to ceramic or UV-cured coatings, potential overspray mess without careful masking, and limited effectiveness on heavily oxidized lenses. The Botou brand lacks the recognition of 3M or Sylvania.
Bottom Line: Perfect for quick cosmetic improvement or maintenance on lightly oxidized headlights. While convenient and well-priced, serious restoration needs may outpace its chemical-only approach. Ideal for first-time users wanting minimal effort.
4. Sylvania Headlight Restoration Kit - Long-Lasting Headlight Repair Kit for Restoring to Like-New Condition - Surface Activator, Exclusive UV Coating, Clarifying Compound & More - No Tools Required

Overview: The Sylvania Headlight Restoration Kit leverages the lighting giant’s century of expertise to deliver a comprehensive chemical restoration system. As the most expensive option at $22.75, it targets discerning vehicle owners who trust the Sylvania name for all lighting needs. The kit combines mechanical and chemical processes with an exclusive UV-blocking clear coat, providing a complete solution without requiring power tools.
What Makes It Stand Out: Sylvania’s reputation in automotive lighting lends immediate credibility. The kit’s exclusive UV block clear coat is specifically formulated for headlights, not generic protectants. The surface activator penetrates oxidation chemically before sanding, reducing required elbow grease. This thoughtful two-stage chemical approach (activator then clarifying compound) demonstrates lighting-specific expertise. The no-tools-required design makes professional results accessible to anyone.
Value for Money: At $22.75, this is the premium option, but the price reflects brand trust and specialized formulation. Professional headlight restoration averages $75-150, making this still a bargain. The exclusive UV coating’s durability likely exceeds cheaper wax-based alternatives, reducing reapplication frequency. For vehicles with expensive HID or LED assemblies, this investment protects much larger assets.
Strengths and Weaknesses: Strengths include Sylvania’s trusted brand heritage, specialized UV-blocking coating, surface activator technology, comprehensive materials, and tool-free operation. The process is well-documented and reliable. Weaknesses are the highest price point in this comparison and potentially more manual effort than drill-based systems for severe cases. The coating requires careful application to avoid streaking.
Bottom Line: The best choice for quality-conscious buyers who trust the Sylvania name. While pricier, the specialized UV protection and lighting expertise justify the premium for long-term vehicle owners.
5. 3M Auto Restore and Protect Headlight Restoration Kit, Use On Plastic Lenses, Headlights, Taillight, Fog Lights and More, Includes Sanding Discs, Headlight Clear Coat Wipes, Foam Pad and Glove (39194)

Overview: The 3M Auto Restore and Protect Kit is the budget-friendly entry point into 3M’s professional-grade headlight restoration lineup. At just $9.83, it provides essential tools for drill-assisted restoration without compromising on the brand’s renowned abrasive quality. This streamlined kit focuses on the core process: sanding with 3M Trizact technology and protecting with clear coat wipes, making it ideal for cost-conscious DIYers who already own a drill.
What Makes It Stand Out: This kit’s primary appeal is delivering genuine 3M Trizact abrasives at an unbeatable price point. The inclusion of both 1000-grit and 3000-grit Trizact discs provides the crucial final polishing steps that differentiate professional results from amateur attempts. The disposable glove is a small but thoughtful addition that protects hands during the messy sanding process. It’s the most affordable way to access 3M’s precision-shaped grain technology.
Value for Money: At $9.83, this represents exceptional value—often less than the cost of two individual Trizact discs. For drill owners, it’s the cheapest path to professional results. While less comprehensive than the Ultra kit, it contains the essential elements for effective restoration. The savings can be applied toward purchasing additional sanding discs for multiple vehicles.
Strengths and Weaknesses: Strengths include unbeatable price for 3M quality, effective Trizact abrasive technology, inclusion of protective glove, and straightforward two-stage process. The drill-powered approach is efficient. Weaknesses involve fewer sanding discs than the Ultra kit, lack of masking tape, and requirement for a drill. The process may need supplemental materials for heavily oxidized headlights.
Bottom Line: The best value proposition for drill owners seeking professional results on a budget. While basic, the 3M core technology delivers where it matters most, making it perfect for first-time restorers.
6. Meguiar’s Ultimate Headlight Restoration Kit - The Perfect Headlight Repair Kit to Remove Yellowing and Cloudiness from Headlights - Easy to Use and Seals Headlights with 18 Plus Months of Protection
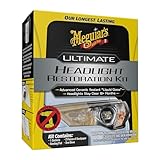
Overview: Meguiar’s Ultimate Headlight Restoration Kit represents the gold standard for DIY headlight restoration from one of automotive care’s most trusted names. This comprehensive system tackles mild to severe oxidation through a manual wet-sanding process followed by protective sealing, delivering professional-grade clarity without requiring power tools.
What Makes It Stand Out: The kit’s 18+ month UV protection sealant sets it apart from competitors offering 6-12 month coverage. The two-stage sanding approach (1000 and 3000 grit) ensures thorough defect removal before the pre-saturated sealing wipes create a durable, crystal-clear barrier. Meguiar’s reputation for quality means you’re getting proven formulations rather than experimental chemicals.
Value for Money: At $22.56, this sits in the mid-premium range. The price is justified by the extended protection period and brand reliability. While cheaper kits exist, the cost of premature reapplication makes this more economical long-term. You’re essentially getting a professional detailer’s approach for less than a single professional service.
Strengths and Weaknesses: Strengths include comprehensive instructions, effective sanding discs, long-lasting UV protection, and no power tool requirement. The manual sanding process, while effective, demands significant elbow grease and time. The kit may be overkill for lightly oxidized lenses, and beginners might find the multi-step process intimidating.
Bottom Line: This is the ideal choice for car owners seeking durable, professional-quality results and willing to invest effort for 18+ months of clarity. Perfect for moderately to heavily oxidized headlights where long-term protection matters.
7. WenFeng Headlight Restoration Kit – Automotive Headlamp Restoration Fluid Kit for Oxidized and Yellowed,Car Headlight Cleaner for All Vehicles That Restores Clarity
Overview: The WenFeng Headlight Restoration Kit offers a streamlined, spray-on solution for drivers seeking quick headlight improvement without complex procedures. This budget-friendly kit promises to restore clarity in minutes using a simple application method that works on both plastic and glass lenses across all vehicle types.
What Makes It Stand Out: Its spray-and-wipe simplicity is the primary differentiator. Unlike sanding-based kits, this requires no abrasive work—just shake the 180ml restoration fluid, spray, wipe with the included microfiber cloth, and apply the protective coating. The versatility for plastic and glass lenses adds uncommon flexibility, and the rapid application saves significant time.
Value for Money: At $16.99, this is one of the more affordable options. The price reflects the simplified approach, making it accessible for casual users. However, the trade-off is likely shorter protection duration and less effectiveness on severe oxidation compared to sanding kits. It’s economical for maintenance but may require frequent reapplication.
Strengths and Weaknesses: Strengths include extreme ease of use, speed, material versatility, and low cost. The kit is perfect for busy car owners or those intimidated by multi-step processes. Weaknesses involve limited effectiveness on heavy yellowing, lack of sanding for deep restoration, and unspecified protection duration that likely falls short of premium kits.
Bottom Line: Best suited for lightly oxidized headlights and regular maintenance rather than heavy restoration. If you want quick, effortless improvement and don’t mind more frequent applications, this offers excellent convenience.
8. XPERTCHEMY Headlight Restoration Kit-Headlight Cleaner Removing The Heavy-Duty Yellowing, Clouding and Stains, Even Buffs Out Unsightly Hairline Scratches,No Power Tools Needed

Overview: XPERTCHEMY positions itself as a professional-grade solution with an emphasis on advanced ceramic protection. This kit targets heavy-duty restoration needs while incorporating modern ceramic coating technology, providing a comprehensive package that addresses severe oxidation, clouding, and even fine scratches through manual application.
What Makes It Stand Out: The exclusive ceramic UV protector is the star feature. Unlike traditional sealants, this ceramic coating chemically bonds with the headlight resin, creating a harder, more durable barrier. The kit’s completeness—including masking tape, multiple glove pairs, and both P2000 and P3000 sanding discs—demonstrates attention to detail. The chemical bonding process eliminates sticky residue concerns.
Value for Money: At $14.99, this offers exceptional value for a ceramic-based system. Ceramic coatings typically command premium prices, yet this kit provides 18 months of protection comparable to systems costing twice as much. The inclusion of all accessories eliminates hidden costs, making it a budget-friendly entry into premium headlight care.
Strengths and Weaknesses: Strengths include the advanced ceramic technology, comprehensive component list, clear three-step instructions, and impressive protection duration. The sanding process ensures thorough restoration. Weaknesses involve the multi-step complexity that may challenge absolute beginners, and the requirement for completely dry surfaces between steps demands patience and ideal conditions.
Bottom Line: Outstanding value for DIY enthusiasts wanting ceramic-level protection without professional pricing. Ideal for moderate to heavily damaged headlights where long-term UV defense is prioritized.
9. WAZNFYV Headlight Restoration Kit, Automotive Headlight Cleaner Oxidized and Yellowed Head Light Restoring Kit for All Vehicle Types (400, Grams)

Overview: The WAZNFYV Headlight Restoration Kit markets itself as a universal solution for instant headlight clarity. This spray-based system targets oxidation, discoloration, and yellowing through a straightforward three-step process designed for DIYers of all skill levels across cars, trucks, and SUVs.
What Makes It Stand Out: The universal compatibility and 400-gram quantity suggest generous product volume for multiple applications. The three-step process—spray, wipe, dry—eliminates complexity, making it accessible to users intimidated by sanding or multi-component kits. The instant results claim appeals to those wanting immediate improvement without lengthy procedures.
Value for Money: At $16.99, this sits in the budget-friendly category. The larger volume potentially offers multiple applications, increasing value for vehicles needing regular treatment or for maintaining multiple cars. However, the vague description of included components and protection duration raises questions about long-term cost-effectiveness compared to more detailed competitor offerings.
Strengths and Weaknesses: Strengths include simplicity, universal vehicle compatibility, protective layer addition, and potentially generous product quantity. The kit excels as a maintenance product. Weaknesses involve lack of specific protection duration claims, absence of sanding components for severe cases, and limited transparency about included materials, which may indicate a less comprehensive approach.
Bottom Line: A convenient option for quick touch-ups and regular maintenance across various vehicles. Best for drivers with light to moderate oxidation who prioritize simplicity over heavy-duty restoration capabilities.
10. Meguiar’s Two Step Headlight Restoration Kit, Headlight Cleaner Restores Clear Car Plastic and Protects from Re-Oxidation, Includes Headlight Coating and Cleaning Solution - 4 Count (1 Pack)

Overview: Meguiar’s Two Step Headlight Restoration Kit simplifies the restoration process for car owners seeking trusted brand quality without complex procedures. This streamlined system removes oxidation and yellowing using abrasive pads and a specialized cleaning solution, followed by a protective coating that guards against re-oxidation for up to one year.
What Makes It Stand Out: The two-step simplicity is the key differentiator from Meguiar’s own Ultimate kit and competitors. By eliminating sanding discs and replacing them with abrasive pads, the process becomes more approachable while maintaining effectiveness for moderate oxidation. The Meguiar’s brand reputation ensures reliable formulations, and the no-drill requirement makes it accessible to all skill levels.
Value for Money: At $21.93, this offers a slight savings over the Ultimate kit while delivering comparable initial results. The 12-month protection period, though shorter than the Ultimate’s 18+ months, still exceeds many budget competitors. For users with moderately oxidized headlights who prefer simplicity, this represents excellent brand-value balance.
Strengths and Weaknesses: Strengths include trusted brand backing, simplified two-step process, effective abrasive pads, and year-long protection. The kit is perfect for those wanting better-than-budget results without intensive labor. Weaknesses involve less effective heavy oxidation removal compared to sanding kits, shorter protection than the Ultimate version, and limited component count that may require careful application.
Bottom Line: An excellent middle-ground option for Meguiar’s fans wanting simplicity without sacrificing quality. Ideal for moderately oxidized headlights where ease of use matches importance with durability.
Why Headlight Restoration Matters for Vehicle Safety and Value
Your headlights are your vehicle’s eyes, and when they’re compromised, every nighttime drive becomes a calculated risk. Oxidized lenses scatter light instead of projecting it, creating a dim, unfocused beam that fails to illuminate road hazards, pedestrians, and animals. Beyond safety, cloudy headlights instantly age your vehicle’s appearance and can trigger failed inspections in states with stringent safety standards. A proper restoration doesn’t just improve aesthetics—it restores original optical clarity, maximizing the performance of your bulbs and potentially increasing resale value by hundreds of dollars.
What Makes a Headlight Restoration Kit “Professional Grade”?
Professional-grade kits aren’t just consumer products with fancier packaging. They represent a complete system engineered for durability, efficiency, and results that withstand years of UV exposure and environmental assault. These kits typically feature industrial-strength abrasives, professional polishing compounds with diminishing abrasives, and critically, ceramic-based or true UV-blocking hard coats that chemically bond to the lens surface. The difference lies in the chemistry and construction—pro kits use higher concentrations of active ingredients, more precise grit progressions, and coatings that cure to a hardness rivaling factory finishes.
The Science Behind Headlight Degradation
Modern headlight lenses are manufactured from polycarbonate plastic—a material chosen for its impact resistance and moldability. However, polycarbonate is naturally porous and susceptible to UV degradation. Manufacturers apply a factory UV hard coat, but after 5-7 years of sun exposure, this coating breaks down, allowing oxidation to attack the raw plastic beneath. The yellowing and cloudiness you see is actually microscopic pitting and chemical breakdown of the polycarbonate surface. Simply polishing this away without replacing the protective layer is like painting a car without primer—the results are temporary at best.
Professional vs Consumer-Grade: Key Differentiators
Consumer kits often rely on single-step polishing and a thin, silicone-based “sealant” that washes away within weeks. Professional systems take a multi-stage approach: aggressive sanding to remove the failed UV layer, progressive refinement to restore optical clarity, and finally, a true UV-curing or chemically bonding protective coating. Pro kits also include higher-quality backing pads that won’t delaminate under heat, foam polishing pads with proper density, and enough product volume to service multiple vehicles—essential for anyone performing restorations regularly.
Key Components Every Professional Kit Should Include
A legitimate professional kit functions as an integrated system where each component builds upon the last. Missing any critical element forces improvisation that compromises results. Here’s what should be in the box:
Sanding Abrasives: Grit Progression Explained
Professional restoration requires a minimum three-grit progression: 800-grit to level severe oxidation, 1500-grit to refine the sanding scratches, and 3000-grit to prepare for polishing. Some advanced kits include 500-grit for heavily damaged lenses or 5000-grit for ultra-fine finishing. The key is waterproof sanding discs with durable backing that won’t tear during wet sanding. Paper-backed abrasives are a red flag—professional kits use film-backed discs that resist edge fraying and maintain consistent cutting power.
Polishing Compounds: What the Pros Use
The polishing stage demands a compound with diminishing abrasives—particles that break down into smaller sizes as friction increases. This allows one product to perform heavy cutting and fine polishing simultaneously. Professional compounds contain no fillers that mask defects; they physically refine the surface to optical clarity. Look for kits offering 8-16 ounces of compound, as smaller quantities suggest consumer-grade dilution. The compound should work with both rotary and dual-action polishers without drying out or dusting excessively.
UV Sealants: The Most Critical Step
This is where professional kits truly separate themselves. The best options feature two-part ceramic coatings or UV-curing acrylic resins that create a new hard coat measuring 2-5 microns thick. These products contain benzotriazole or hindered amine light stabilizers (HALS) that actively absorb UV radiation before it reaches the polycarbonate. Avoid kits with “wipe-on” sealants that air-dry—they’re essentially waxes that offer minimal protection. Professional coatings require 12-24 hour cure times and often include catalysts or accelerators for proper cross-linking.
Understanding Different Restoration Methods
Not all professional kits follow the same protocol. Understanding the methodology helps you choose a system that matches your skill level, equipment, and time constraints.
Wet Sanding Technique
The gold standard for professional results, wet sanding uses water as a lubricant and cooling agent, preventing sandpaper from loading with polycarbonate residue. This method produces the most consistent scratch pattern and minimizes the risk of melting the lens surface through friction heat. Professional wet sanding kits include a spray bottle or hose attachment and require working in a shaded area to prevent water spots. The technique demands patience—rushing through grits leaves deep scratches that become visible after polishing.
Dry Sanding Systems
Some professional kits utilize dry sanding with specialized coated abrasives designed to resist loading. While faster and less messy, dry sanding generates significant heat and requires constant movement to prevent lens distortion. These systems work best for experienced detailers using rotary tools with variable speed control. The advantage is portability—no water source needed, making them ideal for mobile operations. However, the dust created is a respiratory hazard, requiring proper ventilation and N95 masks.
All-In-One Polish-Only Kits
While not truly “professional” for severe degradation, polish-only kits serve a niche for maintaining recently restored lenses or addressing very light hazing. These skip the sanding stage entirely, using heavy-cut compounds with advanced abrasives to polish away superficial oxidation. They’re faster and lower-risk but ineffective on lenses with deep pitting or yellowing. Consider these as maintenance tools rather than full restoration systems.
Essential Features to Evaluate Before Buying
When comparing professional kits without brand bias, focus on these technical specifications that directly impact performance and longevity.
Abrasive Quality and Variety
Examine the abrasive material—silicon carbide cuts polycarbonate more effectively than aluminum oxide. Check if the kit includes foam interface pads between the sanding disc and backing plate; these conform to lens curvature and prevent “pigtails” (deep circular scratches). The best kits provide 10-15 discs per grit, allowing you to replace loaded abrasives frequently—a key to professional speed and quality.
UV Protection Longevity
Read the fine print on UV protection claims. “Lifetime guarantee” is marketing fluff without specific data. Professional coatings should specify expected longevity: 1-year, 2-year, or 3-year protection based on SAE J576 weathering tests. Ceramic-infused coatings typically outperform acrylics, with some achieving 3+ years of clarity. The kit should include enough coating to apply two thin layers—single-layer applications often fail at edges and corners.
Tool Compatibility and Power Requirements
Will the kit work with your existing tools? Professional sanding discs use hook-and-loop (Velcro) backing in standard diameters (3-inch, 5-inch, or 6-inch). Check if the kit includes a backing plate or requires separate purchase. For polishing, confirm the compound is rated for your polisher’s speed range—some compounds break down under high RPM. Kits designed for rotary polishers may not perform optimally with dual-action random orbital machines.
Kit Completeness: What’s Included vs What You’ll Need
A true professional kit should be a complete system. However, some assume you own certain tools. Create a checklist: does it include masking tape, microfiber towels, spray bottle, backing plates, polishing pads, and protective gloves? Hidden costs add up quickly. The best value kits bundle everything except the power tools themselves, while minimalist kits may save money initially but require $50+ in additional supplies.
Professional Application Techniques
Owning a professional kit doesn’t guarantee professional results. Technique accounts for 70% of the outcome. Here’s the methodology that delivers consistent, lasting clarity.
Surface Preparation Steps
Start with a thorough cleaning using a degreasing soap to remove silicone, wax, and road film. Dry completely, then mask surrounding paint and trim with 1.5-inch automotive-grade masking tape. Apply two layers at the panel edge for paint protection. Inspect the lens for cracks—these cannot be fixed by restoration and require replacement. Finally, wipe the lens with isopropyl alcohol to eliminate any remaining contaminants that could cause sanding scratches.
The Multi-Stage Sanding Process
Begin with the finest grit that effectively removes oxidation—don’t jump to 800-grit if 1000-grit will work. Use a spray bottle to keep the surface flooded, applying light pressure with the polisher at 800-1200 RPM. Work in 6-inch sections, moving slowly across the lens. After each grit, wipe the lens dry and inspect under LED light—any remaining deep scratches mean you haven’t sanded enough. Spend 80% of your time on the first grit; subsequent stages refine, they don’t remove damage.
Achieving a Flawless Polish
Attach a firm foam cutting pad to your polisher and apply three pea-sized drops of compound. Spread at low speed, then increase to 1200-1800 RPM for rotary or speed 5-6 for dual-action. Keep the pad flat and work until the compound becomes transparent and begins to dust slightly. Wipe with a clean microfiber, then inspect. If haze remains, repeat with a softer pad. The final polish should use a finishing pad and minimal compound, creating a glass-like surface ready for coating.
UV Coating Application
This is the make-or-break step. Professional coatings require a contamination-free environment—work indoors if possible. Apply the coating in a thin, even layer using the provided applicator, overlapping strokes by 50%. Edges and corners need extra attention as they oxidize first. Most professional coatings flash within 30-60 seconds; any longer and they’re too thick. Apply a second layer after the recommended interval (usually 1-4 hours). Avoid water exposure for 24 hours and direct sunlight for 48-72 hours during curing.
Common Mistakes That Ruin Restorations
Even with professional kits, these errors lead to premature failure and customer complaints. First, insufficient sanding—stopping before completely removing the old UV layer means the new coating adheres to failing material and peels within months. Second, polishing residue contamination—any compound left in lens texture prevents coating bonding. Always wipe with a 50/50 alcohol-water solution before coating.
Third, applying UV sealant too thickly creates a soft, gummy layer that yellows quickly. Professional coatings work best as thin, hard layers. Fourth, working in direct sunlight during any stage causes uneven curing and heat buildup. Finally, neglecting edge treatment—restoring only the central visible area while leaving yellowed edges creates an unprofessional appearance and allows oxidation to creep back.
Cost Analysis: Investment vs Professional Service Fees
A quality professional kit ranges from $60 to $150, servicing 5-10 vehicles depending on severity. Compare this to $75-$150 per vehicle at a shop, and the kit pays for itself after the first two uses. Factor in your time (2-3 hours for a first-timer, 45-60 minutes with experience) and the value proposition strengthens. For mobile detailers, offering headlight restoration at $75 per vehicle generates $375-$750 in revenue from a single $100 kit investment—a 275% to 650% return before labor costs.
Hidden costs include replacement sanding discs ($15 per 50-pack), polishing pads ($10 each, lasting 5-10 vehicles), and protective supplies. Budget $5-8 in consumables per vehicle. Even with these costs, the profit margin remains exceptional, making professional kit mastery a high-ROI skill for any car care business.
Maintenance Tips to Extend Your Restoration
A professional restoration should last 2-3 years with proper care. Wash headlights regularly with pH-neutral car shampoo, never abrasive cleaners. Apply a silica-based spray sealant every 3 months to reinforce the UV coating—think of it as wax for your headlights. Park facing away from direct sun when possible, and consider applying paint protection film (PPF) over the lens after restoration for ultimate longevity.
Avoid automatic car washes with harsh chemicals—they degrade UV coatings faster than anything else. If you notice water beading disappear from the lens surface, it’s time for a maintenance polish and UV sealant touch-up. Catching oxidation early prevents the need for full restoration.
Safety Considerations and Protective Gear
Professional kits contain chemicals and create hazards that demand respect. Always wear nitrile gloves—polycarbonate dust and chemical coatings can cause skin sensitization. A NIOSH-approved N95 respirator is non-negotiable during sanding, as polycarbonate particles are respiratory irritants. Safety glasses protect against splashing compounds and airborne debris.
Work in a well-ventilated area, especially when applying solvent-based UV coatings. Keep a fire extinguisher rated for chemical fires nearby—some compounds contain flammable solvents. Never smoke during application, and allow used rags to dry flat (not bunched) to prevent spontaneous combustion from curing chemicals. Finally, check local regulations—some municipalities classify coating waste as hazardous material requiring special disposal.
Frequently Asked Questions
1. How long does a professional headlight restoration typically last?
With proper application and a quality UV coating, professional restorations last 2-3 years. Longevity depends on sun exposure, maintenance, and whether you garage your vehicle. Ceramic-based coatings outperform acrylic sealants, with some achieving 4+ years in moderate climates.
2. Can I restore headlights without a power polisher?
Technically yes, but results won’t match professional standards. Hand polishing cannot generate the heat and consistent motion needed to refine sanding scratches. You’ll achieve 70% improvement versus 95%+ with a polisher. For mobile detailers, a compact 3-inch rotary polisher is a worthwhile investment.
3. What’s the difference between wet sanding and dry sanding for headlights?
Wet sanding uses water as lubricant, preventing heat buildup and paper loading, producing more consistent results. Dry sanding is faster and more portable but generates heat that can warp lenses and creates hazardous dust. Professional results heavily favor wet sanding for severe oxidation.
4. How do I know if my headlights are too far gone to restore?
If you can feel cracks, deep pits, or the lens is physically yellowed through its entire thickness (not just surface oxidation), replacement is necessary. Also, if sanding through 800-grit doesn’t reveal clear plastic, the damage may be permanent. Most cloudiness is surface-level and restorable.
5. Will restoring my headlights make them look brand new?
A professional restoration returns the lens to 90-95% of original clarity. Minor remaining swirl marks or micro-scratches may be visible under direct LED inspection, but won’t affect light output or appearance from 3+ feet away. The difference is night and day compared to yellowed lenses.
6. Can I use regular car wax to protect restored headlights?
No. Car waxes contain cleaners and silicones that can degrade UV coatings. They also lack UV inhibitors and wash away quickly. Use only dedicated headlight UV sealants or silica-based spray sealants designed for polycarbonate. Regular wax provides false security and can cause coating failure.
7. How many vehicles can I service with one professional kit?
Most professional kits contain enough material for 5-10 complete restorations. Heavy oxidation uses more abrasives and compound, while maintenance work uses less. Track your consumables usage—when sanding discs load quickly or polishing pads glaze over, it’s time to replace them for quality control.
8. Is headlight restoration profitable for a mobile detailing business?
Extremely. With a $100 kit investment and $5-8 in consumables per vehicle, charging $75-$100 per restoration yields 85%+ profit margins. It’s a high-value add-on service that takes under an hour once proficient, with minimal equipment beyond the kit itself.
9. Can I restore headlights in cold weather?
Temperature affects coating cure times. Most UV sealants require 60-80°F for proper application and curing. Below 50°F, coatings may not cross-link properly, leading to premature failure. Work indoors or use infrared lamps to maintain surface temperature during cold weather applications.
10. Why do my restored headlights haze over again after a few months?
This indicates UV coating failure, usually from insufficient surface prep, applying over remaining oxidation, or using a low-quality sealant. The old UV layer must be completely removed, and the new coating needs proper cure time. Re-do the restoration, focusing on thorough sanding and using a ceramic-based UV blocker.