There’s nothing quite like the crystal-clear clarity of freshly coated automotive glass—that hydrophobic brilliance that repels rain and road grime like magic. But here’s what many car enthusiasts learn the hard way: even the most premium glass coatings have a finite lifespan. Whether you’re dealing with a failing DIY application, preparing for a fresh coat, or correcting a professional job gone wrong, removing an old glass coating isn’t as simple as washing it away. The wrong approach can leave your windshield with micro-scratches, optical distortion, or worse—permanent damage that compromises both aesthetics and safety.
This is where glass coating removal polishes enter the picture, serving as the critical bridge between compromised clarity and pristine glass. Unlike standard glass cleaners or even traditional polishing compounds, these specialized formulations are engineered to break down stubborn silica-based bonds without attacking the glass itself. Understanding their nuances, capabilities, and proper application techniques can mean the difference between a showroom-worthy finish and an expensive windshield replacement. Let’s dive deep into everything you need to know about selecting and using these powerful tools in your car care arsenal.
Top 10 Glass Coating Removal Polish
Detailed Product Reviews
1. Invisible Glass 91411 Glass Stripper – Hard Water Spot Remover – Strips Coatings, Waxes, Oils & Road Film – Preps Windshields for Rain Repellent & Ceramic Coating – 4 Fl Oz

Overview:
The Invisible Glass 91411 Glass Stripper is a specialized 4-ounce solution designed to prepare automotive glass for protective coatings. This powerful formula strips away waxes, silicones, oils, tar, and road film while tackling hard water spots and mineral deposits. Manufactured in the USA, it restores glass to pristine condition before applying rain repellents or ceramic coatings.
What Makes It Stand Out:
Unlike general glass cleaners, this product specifically preps surfaces for coating adhesion. Its ability to dissolve contaminants that interfere with bonding makes it unique. The concentrated formula works efficiently, and the brand’s satisfaction guarantee demonstrates confidence in its performance. It’s particularly effective for removing stubborn water spots that standard cleaners leave behind.
Value for Money:
At $10.99 for 4 ounces ($2.75/fl oz), it’s moderately priced for a specialty prep product. While the bottle is small, the concentrated formula means a little goes a long way. Compared to all-purpose cleaners that can’t properly prep surfaces, it offers targeted value. For those investing in ceramic coatings, this prep step ensures maximum coating longevity.
Strengths and Weaknesses:
Strengths include excellent contaminant removal, coating prep specialization, and American manufacturing. It effectively removes water spots and restores clarity. Weaknesses are the small bottle size for larger projects and its inability to remove etched-in water spots. It’s also a single-purpose product rather than an all-in-one solution.
Bottom Line:
Perfect for enthusiasts applying rain repellents or ceramic coatings who need proper glass preparation. It’s a worthwhile investment for ensuring coating adhesion, though those with etched glass damage will need a more aggressive polish.
2. 3D Glass Polish – Cerium Oxide Glass Scratch Remover for Car Windows – Restores Clarity & Removes Wiper Marks, Swirls, Water Spots - 16oz

Overview:
The 3D Glass Polish is a professional-grade cerium oxide formula designed for serious glass correction. This 16-ounce bottle tackles etched water spots, wiper marks, fine scratches, and swirl marks on automotive glass. Engineered for use with rotary polishers, it delivers optical clarity restoration that DIY cleaners can’t match, making it ideal for enthusiasts seeking showroom results.
What Makes It Stand Out:
Its professional cerium oxide composition provides genuine corrective power rather than just cleaning. The extended open time allows for maximum workability without drying out, reducing product waste. It doubles as the perfect prep step for ceramic coatings, creating an impeccably smooth surface that enhances coating bonding and durability significantly.
Value for Money:
At $32.99 for 16 ounces ($2.06/fl oz), it’s priced for serious users. While more expensive than basic cleaners, its correction capabilities justify the cost for damaged glass. Compared to professional detailing services, it offers substantial savings. The larger size provides enough product for multiple vehicles, improving long-term value.
Strengths and Weaknesses:
Strengths include genuine scratch removal, professional-grade results, coating prep functionality, and excellent workability. It restores severely neglected glass effectively. Weaknesses include requiring a rotary polisher and felt pad for best results, representing additional investment. The learning curve may intimidate beginners, and it’s overkill for lightly soiled glass.
Bottom Line:
Ideal for automotive enthusiasts with moderate to severe glass imperfections and access to polishing equipment. If you’re serious about glass restoration and coating prep, this delivers professional results that justify the price and effort.
3. Cerium Oxide Glass Polishing Kit - Remove Scratches, Water Spots & Restore Clarity | Windshield Scratch Remover with Polish & Sealant | Complete DIY Kit
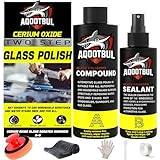
Overview:
This Cerium Oxide Glass Polishing Kit offers a complete DIY solution for restoring automotive and household glass. The $25.99 kit includes professional-grade cerium oxide polish, protective sealant, a manual polishing tool, microfiber cloth, gloves, scraper, and protective tape. Everything needed for scratch and water spot removal arrives in one package, eliminating guesswork for beginners.
What Makes It Stand Out:
The all-in-one convenience is unmatched—no need to source individual components. The manual polishing tool makes professional results accessible without expensive rotary equipment. The three-step process (Clean, Polish, Seal) is straightforward, while the included sealant provides six months of hydrophobic protection against future water spots and contaminants.
Value for Money:
Exceptional value at $25.99 for a complete system. Purchasing components separately would cost significantly more. The kit handles multiple projects, making it economical for households with several vehicles. For beginners, avoiding the cost of a power polisher while achieving professional results represents tremendous savings.
Strengths and Weaknesses:
Strengths include comprehensive component inclusion, beginner-friendly manual tool, protective sealant, and clear instructions. It removes scratches and water spots effectively without equipment investment. Weaknesses involve more physical effort than machine polishing, and the manual tool may struggle with deeply etched damage. Serious enthusiasts might eventually outgrow the manual applicator.
Bottom Line:
The best choice for DIY beginners tackling their first glass restoration project. It provides everything needed for professional results without equipment investment, making it an unbeatable value for occasional use and moderate correction tasks.
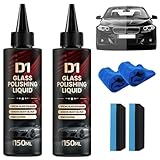
4. Glass Polishing Liquid D1,Car Glass Oil Film Remover,Glasses Polishing Compound,Car Glass Cleaner & Polish,Anti-Fog Hydrophobic Coating Spray,Removes Swirls, Scratches,Wiper Marks & Oil Film(2PCS)
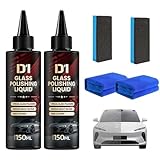
Overview:
The Glass Polishing Liquid D1 offers budget-friendly glass maintenance in a convenient two-pack for $8.99. This formula targets oil film buildup, minor scratches, wiper marks, and claims anti-fog and hydrophobic properties. Designed for easy application with included accessories, it promises to restore clarity while providing lasting protection for all automotive glass types, including tinted windows.
What Makes It Stand Out:
The ultra-low price point makes regular glass maintenance accessible to everyone. Its versatility across all glass types, including tinted surfaces, removes compatibility concerns. The combination of cleaning, polishing, and protective properties in one product simplifies the process. The two-pack configuration provides backup product for multiple vehicles or reapplications.
Value for Money:
Outstanding value at $8.99 for two bottles. It’s the most economical option for maintaining clean, clear glass. While it may lack the heavy correction power of premium polishes, the price allows for frequent application. For drivers primarily dealing with oil film and light contamination rather than etched damage, it delivers acceptable results without financial commitment.
Strengths and Weaknesses:
Strengths include unbeatable price, tinted-glass safety, easy application, and protective properties. It’s ideal for routine maintenance. Weaknesses involve limited correction capability for serious scratches or etched water spots. The unknown brand reputation compared to established names may concern some buyers, and durability claims are modest compared to premium alternatives.
Bottom Line:
Perfect for budget-conscious drivers seeking basic glass maintenance and oil film removal. Don’t expect professional-grade scratch removal, but for routine cleaning and light defect removal, it delivers remarkable value and convenience.
5. Griot’s Garage Fine Glass Polish, Car Window, Windshield Polishing Cleaner for Automotive and Home, Removes Stains and Water Spots, 11017, 16 oz

Overview:
Griot’s Garage Fine Glass Polish is a trusted 16-ounce solution for maintaining automotive and household glass. Priced at $27.99 ($1.75/fl oz), this gentle yet effective formula removes mild water spots, stains, and contamination while extending wiper blade life. Its versatility makes it suitable for windshields, sunroofs, side glass, shower doors, and patio windows.
What Makes It Stand Out:
The reputable Griot’s Garage brand ensures consistent quality and customer support. Its unique wiper-life extension benefit comes from creating a smoother glass surface that reduces blade wear. The formula balances effective cleaning with gentle action, allowing regular use without glass damage. It works effectively with both dual-action random orbital polishers and manual application.
Value for Money:
Excellent value at $1.75 per ounce from a premium brand. The 16-ounce bottle provides ample product for multiple vehicles and household applications. Compared to professional detailing services, it offers significant savings for ongoing maintenance. The multi-surface versatility increases its overall value proposition beyond just automotive use.
Strengths and Weaknesses:
Strengths include brand reputation, gentle formulation, wiper-life extension, multi-surface versatility, and excellent cost-per-ounce value. It delivers consistent results for mild contamination. Weaknesses include limited correction power for severe scratches or heavily etched water spots. It may require multiple applications for stubborn buildup, and optimal results need specific Griot’s pads.
Bottom Line:
An excellent maintenance polish for enthusiasts who trust established brands. Ideal for regular upkeep and mild defect removal across automotive and household glass. For severe damage, pair with a more aggressive compound, but for routine care, it’s outstanding.
6. 2PCS Bianca Glass Polishing Liquid D1,Bomini Car Glass Polishing Compound Windshield Cleaner Glasses Oil Film Remover, Anti-Fog Hydrophobic Coating Spray,Removes Swirls,Scratches,Wiper Marks
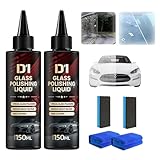
Overview: The Bianca Glass Polishing Liquid D1 offers a dual-action solution for automotive glass maintenance, combining cleaning and protective properties in a two-pack bundle. This compound targets stubborn oil films, wiper marks, water stains, and minor scratches while depositing an anti-fog and hydrophobic coating for enhanced visibility.
What Makes It Stand Out: Unlike basic glass cleaners, this product functions as both a polish and protective treatment. The included hydrophobic barrier repels water and dirt long after application, while the anti-fog properties combat condensation in humid conditions. The tool-free application with an included sponge makes it accessible for DIY enthusiasts, and its compatibility with tinted and non-tinted glass adds versatility.
Value for Money: At $12.99 for two bottles, this represents solid mid-range value. Competing single-application products often cost $8-15 each, making this bundle economical for multi-vehicle households or periodic reapplication. The protective coating extends intervals between treatments, reducing long-term maintenance costs.
Strengths and Weaknesses: Strengths include dual cleaning/protection capability, ease of use, tinted-window safety, and comprehensive contaminant removal. Weaknesses involve limited effectiveness on deep scratches, requiring elbow grease for heavy buildup, and potential variability in coating longevity depending on environmental exposure.
Bottom Line: An excellent choice for drivers seeking an all-in-one glass maintenance solution. It effectively restores clarity while providing lasting protection, making it ideal for regular upkeep rather than heavy restoration work.
7. Glass Polish (3’’) Glass Scratch Removal Kit for use with a Drill on All Glass Surfaces

Overview: This drill-activated glass polishing kit transforms your power drill into a professional-grade glass restoration tool. Designed for serious scratch removal, it tackles everything from light scuffs to deep graffiti etching on automotive and household glass surfaces.
What Makes It Stand Out: The 3-inch pad system delivers three times faster results than manual methods, making it a DIY alternative to expensive professional services. Its versatility across laminated, tempered, and mirrored surfaces sets it apart, while the comprehensive instruction guide with images demystifies the process for beginners.
Value for Money: At $39.97, this kit costs less than a single professional glass repair service while offering multiple uses. Considering windshield replacement can exceed $300, this represents exceptional value for vehicles with significant scratch damage. The durable components withstand repeated applications.
Strengths and Weaknesses: Strengths include rapid material removal, professional-level results, comprehensive damage treatment capability, and clear instructions. Weaknesses involve requiring a drill (additional cost if not owned), risk of novice users causing more damage, and being overkill for minor maintenance needs.
Bottom Line: Best suited for vehicles with noticeable scratches or etching where manual methods fall short. While it demands careful technique, this kit provides professional results at a fraction of service costs, making it a smart investment for serious DIY detailers.
8. Bianca Glass Polish, D1Car Glass Polish, D1Windshield Cleaner, Glass Film Remover, Anti-Fog Hydrophobic Coating Spray, Removes Scratches, Wiper Marks and Film (2 Pack)
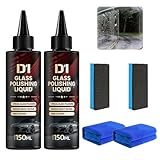
Overview: This two-pack glass polishing system offers professional-grade glass restoration with an emphasis on protective coatings. The D1 formula removes oil films, wiper marks, and minor imperfections while leaving behind anti-fog and water-repellent properties for enhanced driving safety.
What Makes It Stand Out: The product’s dual-phase action—cleaning and coating—distinguishes it from conventional cleaners. Its hydrophobic layer actively repels rain and dirt, while the anti-fog component prevents interior condensation. The inclusion of an application sponge and endorsement by detailing professionals suggests reliable performance.
Value for Money: At $9.99 for two bottles, this is among the most economical options available. Single-application competitors typically retail for $10-15, making this bundle particularly attractive for budget-conscious consumers or those maintaining multiple vehicles. The concentrated formula extends coverage per bottle.
Strengths and Weaknesses: Strengths include aggressive pricing, professional formulation, multi-surface compatibility, and comprehensive protection. Weaknesses comprise inconsistent branding (Bianca vs. Rowgins), limited impact on deeper scratches, and the need for thorough surface prep to maximize coating adhesion.
Bottom Line: A cost-effective solution for routine glass maintenance and light restoration. While the branding may cause confusion, the performance-to-price ratio is compelling for drivers wanting protective benefits without premium costs.
9. CARPRO Eraser Polish & Oil Remover - Ceramic Coating Prep, Complete Removal of Polishing Oils for Application of CQUARTZ Ceramic Coat, Anti-Static, Dust Free, No Silicone - 500mL (17oz) and Sprayer

Overview: CARPRO Eraser is a specialized surface preparation solution designed to eliminate polishing oils and residues before ceramic coating application. While primarily intended for paintwork, its anti-static, silicone-free formula makes it highly effective as an advanced glass cleaner that leaves surfaces surgically clean.
What Makes It Stand Out: The anti-static property prevents dust attraction during application—a unique feature among cleaners. Its ability to completely strip oils without leaving residue ensures optimal coating adhesion. The silicone-free formulation makes it safe for professional paint environments, while the included sprayer adds convenience.
Value for Money: At $23.68 for 500ml, it’s pricier than standard glass cleaners but justifiable for ceramic coating prep. Compared to isopropyl alcohol solutions that evaporate quickly, Eraser’s anti-static effect and controlled application reduce waste. Multi-surface versatility enhances its value proposition.
Strengths and Weaknesses: Strengths include exceptional oil removal, anti-static dust resistance, professional-grade purity, and versatility across glass and paint. Weaknesses are its specialized nature (overkill for basic cleaning), higher price point, and strong chemical odor requiring ventilation.
Bottom Line: Essential for ceramic coating applications and superior for those seeking pristine glass clarity. While not a traditional polish, it excels at contamination removal. Ideal for enthusiasts who prioritize perfect surface prep over abrasive correction.
10. 2PC D1 Glass Polishing Liquid - Liquid Glass Car Polish & Anti-Fog Hydrophobic Coating Spray,D1 Car Polishing Spray Compound to Remove Wiper Marks, Waterspots & Oil Film
Overview: This two-bottle D1 Glass Polishing Liquid kit combines restorative polishing with advanced protective technology. Formulated to eliminate wiper marks, water spots, and oil films, it simultaneously deposits a hydrophobic and anti-fog coating that enhances visibility in adverse weather conditions.
What Makes It Stand Out: The complete kit includes both a specialized scrubbing sponge and microfiber cloth, providing all necessary application tools. The proprietary hydrophobic shield creates dramatic water beading at speed, while the anti-fog treatment addresses interior condensation. The concentrated 150ml formula yields three full vehicle treatments per bottle.
Value for Money: Priced at $13.99 for two bottles with accessories, this offers strong mid-tier value. The included microfiber cloth eliminates additional purchases, and the concentrated formula reduces cost-per-use compared to ready-to-use sprays. Professional-level results without recurring service fees enhance long-term savings.
Strengths and Weaknesses: Strengths include comprehensive tool inclusion, concentrated formula efficiency, dual-action cleaning/coating, and suitability for tinted windows. Weaknesses involve limited deep scratch removal capability, potential coating inconsistency on heavily contaminated surfaces, and the need for thorough rinsing to avoid residue.
Bottom Line: A well-rounded package for drivers wanting both correction and protection. The included accessories and concentrated formula make it practical for regular maintenance. Best for those prioritizing water repellency and fog prevention alongside basic scratch reduction.
Understanding Glass Coatings and Why Removal Becomes Necessary
The Science Behind Modern Glass Coatings
Modern automotive glass coatings are essentially liquid glass infused with silicon dioxide (SiO2) nanoparticles that form a semi-permanent covalent bond with your windshield’s surface. These aren’t your grandfather’s Rain-X treatments—they’re sophisticated ceramic formulations that can last anywhere from six months to several years depending on quality and environmental exposure. The coating creates a microscopic layer of protection that’s chemically resistant to everything from bird droppings to harsh detergents, which is precisely why removal becomes such a technical challenge.
Signs Your Glass Coating Has Reached End of Life
You’ll know it’s time for removal when water stops beading properly, you notice patchy areas where the coating has worn thin, or you’re seeing increased glare during nighttime driving. Some coatings develop a hazy, iridescent appearance as they break down—a phenomenon called “coating fatigue” where UV exposure causes the silica matrix to fracture. Don’t wait until your wipers start chattering or leaving streaks; these are late-stage symptoms indicating the degraded coating is now interfering with wiper blade contact.
What Are Glass Coating Removal Polishes?
How Removal Polishes Differ from Standard Glass Polishes
Standard glass polishes contain mild abrasives designed to remove water spots and light contamination. Glass coating removal polishes, however, pack a more sophisticated punch. They feature engineered abrasive particles that are specifically sized to fracture and lift silica-based coatings without digging into the glass substrate. Think of it as the difference between sanding wood varnish versus sanding bare wood—you need just enough aggression to remove the top layer while preserving what’s underneath.
The Chemistry of Abrasive vs. Chemical Removal
The market offers two primary removal philosophies: abrasive mechanical removal and chemical degradation. Abrasive formulas use aluminum oxide or cerium oxide particles in a specific micron range (typically 1-3 microns for coating removal) to physically grind away the silica layer. Chemical removers employ alkaline agents that break down the SiO2 bonds through hydrolysis. The most effective products often use a hybrid approach—chemical softening followed by mechanical lifting—for maximum efficiency with minimal glass trauma.
Key Factors to Consider Before Choosing a Removal Polish
Assessing Your Coating’s Age and Condition
A six-month-old coating that’s already failing will require far less aggressive removal than a three-year-old professional-grade application that’s been baked on by countless summer sun cycles. Perform a simple water contact angle test—if water still beads somewhat, you’ve got significant coating remaining. If it’s completely sheeted but hazy, you’re dealing with degradation products that need a different approach. The older and more cured the coating, the more aggressive your removal polish needs to be.
Understanding Your Glass Type and Sensitivity
Not all automotive glass is created equal. Modern windshields are laminated safety glass with a soft inner PVB layer, while side windows are typically tempered glass with different surface hardness. Some high-end vehicles even feature acoustic glass with special interlayers that can be sensitive to aggressive polishing. Check your owner’s manual or consult a professional before applying any abrasive product. Tempered glass can typically handle more aggressive polishing than laminated windshields, where excessive heat or pressure could potentially affect the inner layer.
Matching Polish Aggressiveness to Coating Thickness
Professional ceramic glass coatings can build up to 5-7 microns thick, while consumer products might only reach 1-2 microns. Using a hyper-aggressive compound on a thin coating is like using a sledgehammer to crack a walnut—you’ll create unnecessary glass wear. Conversely, a mild polish on a thick professional coating will have you polishing for hours with minimal results. Most manufacturers rate their removal polishes on a scale from 1-10, with 1-3 being mild, 4-6 medium, and 7-10 heavy-cutting.
Types of Glass Coating Removal Polishes
Abrasive Compound-Based Removers
These are the workhorses of the removal world, featuring precisely milled abrasives suspended in a lubricating carrier. The best formulations use diminishing abrasives that break down into smaller particles as you work, essentially starting aggressive and finishing refined. Look for compounds that specify “coating removal” rather than “glass polishing”—the latter often lacks the initial cutting power needed. These typically work best with machine application, where consistent speed and pressure ensure uniform removal.
Chemical Degradation Solutions
Chemical removers trade abrasives for alkaline chemistry, typically with pH levels between 11-13. They work by attacking the siloxane bonds that hold the coating to glass. While gentler on the glass itself, they require careful application, thorough neutralization, and often multiple treatments. They’re ideal for thin, newer coatings or for detailers who want to minimize any risk of micro-scratching. The downside? They can be slow, sometimes requiring 20-30 minutes of dwell time per section, and may struggle with fully cured professional coatings.
Hybrid Formulations: Best of Both Worlds
The latest generation of removal polishes combines chemical softening agents with fine abrasives. These products first weaken the coating’s bond to the glass, then mechanically lift the degraded material away. They offer the speed of abrasive removal with reduced risk of glass damage. The key is finding a formula where the chemical and mechanical components are properly balanced—too much chemical and you’re just waiting around, too much abrasive and you’re grinding unnecessarily.
Essential Features to Look For
Cutting Power and Abrasive Technology
Pay attention to the abrasive type and size. Cerium oxide offers excellent glass compatibility but can be slow. Aluminum oxide cuts faster but requires more skill to avoid marring. The sweet spot for most coating removals is a compound featuring 1-2 micron aluminum oxide with a cerium oxide finishing component. Some advanced formulas use engineered “smart” abrasives that are harder than coating but softer than glass—a technological tightrope walk that requires sophisticated manufacturing.
Lubrication Agents and Workability
A removal polish without adequate lubrication is like sandpaper without backing—it’ll gum up, skip, and create heat spots. Quality formulations include glycerin-based lubricants that maintain a slick film even as the carrier evaporates. This extends working time and prevents dry polishing, which is the fastest path to glass damage. Test the lubrication by smearing a small amount on glass—if it stays slick for 60+ seconds without drying, you’re in good shape.
Residue and Dusting Characteristics
Cheap removal polishes dust excessively, creating a mess and potentially embedding abrasive particles in adjacent paintwork. Premium formulas produce minimal dust and wipe away cleanly without oily residues. This is crucial because any residue left behind can interfere with your next coating application. Look for water-based carriers rather than petroleum-based ones—they typically dust less and clean up easier.
pH Balance and Glass Safety
Even abrasive removal polishes have a pH level, and extreme acidity or alkalinity can etch glass over time. The safe zone is pH 6-8 for abrasive compounds. Chemical removers will be alkaline by necessity, but should include buffering agents to prevent runaway reactions. Always test the pH if you’re unsure, and never use a product that doesn’t specify its glass-safe credentials.
Application Methods and Tools
Hand Application vs. Machine Polishing
Hand polishing with a microfiber applicator can work for small areas or thin coatings, but it’s inconsistent and exhausting for full windshields. Dual-action polishers with a 3-inch or 5-inch glass-specific backing plate offer the best compromise between control and efficiency. Rotary polishers cut fastest but generate significant heat and require expert technique—one moment of inattention can create a permanent swirl pattern. For most DIYers, a forced-rotation dual-action polisher provides the safest, most consistent results.
Choosing the Right Pad for Removal Tasks
Foam pads are generally too soft for effective coating removal. You need microfiber or wool pads specifically designed for glass work. Microfiber cutting pads with a low pile (around 1/4 inch) provide excellent cutting ability while dissipating heat. Wool pads cut even faster but can leave micro-marring that requires a second polishing step. Always use a dedicated glass pad—never cross-contaminate with paint polishing pads, which may contain paint residue that can scratch glass.
Step-by-Step Application Process Overview
Start with a meticulous cleaning using a glass-specific degreaser. Clay the glass if necessary. Apply 3-4 pea-sized drops of removal polish to your pad, spread it at low speed, then work at medium speed with light to moderate pressure. Work in 2x2 foot sections, making 6-8 overlapping passes. The polish will turn clear when it’s ready to wipe off. Remove residue immediately with a clean microfiber, inspect under LED light, and repeat if haze remains. Never let removal polish dry on glass.
Professional vs. DIY Considerations
When to Call in Professional Detailers
If your vehicle has a heated windshield, embedded antenna lines, or advanced driver-assistance systems (ADAS) cameras mounted near the glass, professional removal is strongly recommended. These features create vulnerabilities that DIY polishing can compromise. Additionally, if you’re dealing with a coating that’s been on for 3+ years, has visible high spots, or if you’ve never machine-polished glass before, the learning curve may cost you more than a professional service.
Building Your DIY Removal Toolkit
For the committed DIYer, invest in a quality dual-action polisher with variable speed control (2,000-6,000 OPM), a glass-specific backing plate, at least two microfiber cutting pads, a LED inspection light, and a premium removal polish with excellent reviews in professional detailing forums. Don’t forget personal protective equipment—nitrile gloves, safety glasses, and a respirator if working in enclosed spaces. Your total investment should run $200-400, but you’ll have the tools for future maintenance.
Common Mistakes That Damage Glass
Over-Polishing and Heat Buildup
Glass doesn’t dissipate heat like paint—it retains it, and temperatures above 140°F can weaken the PVB layer in laminated windshields. The most common mistake is staying in one spot too long or using excessive pressure. A quality removal polish should allow you to complete a 2x2 foot section in 60-90 seconds. If you’re spending 3+ minutes per section, your polish isn’t aggressive enough, or your technique needs refinement. Always keep the pad moving and check surface temperature frequently with an infrared thermometer.
Using Incorrect Pad Pressure
More pressure doesn’t equal faster removal—in fact, it often reduces effectiveness by causing pad collapse and uneven abrasive distribution. The optimal pressure for most dual-action polishers is 5-10 pounds, just enough to keep the pad flat against the glass. Let the abrasives do the work. You’ll know you’re pressing too hard if the polisher slows significantly or if you see excessive dust generation. Practice on a small side window first to dial in your technique.
Skipping Critical Prep Steps
Never polish over contaminated glass. Road film, tree sap, and previous cleaning product residues will interfere with the removal polish and can cause it to skip, creating uneven removal. Always decontaminate with a glass-specific cleaner, clay the surface if it feels rough, and tape off adjacent paintwork and trim. Skipping these steps is like painting over rust—the underlying problems will sabotage your results.
Post-Removal Glass Care
Neutralizing Chemical Residue
Even after wiping away visible polish residue, microscopic chemical traces can remain. Follow any removal session with a 50/50 mix of distilled water and isopropyl alcohol (70% concentration) wiped across the glass with a clean microfiber. This neutralizes any alkaline residue and removes polishing oils that could interfere with adhesion of your next coating. For chemical removers, this step is non-negotiable—failure to neutralize can cause etching over time.
Preparing for Reapplication
Freshly polished glass is in its most pristine but also most vulnerable state. The microscopic peaks and valleys created by polishing provide excellent mechanical bonding sites for new coatings, but the surface is also highly reactive. Apply your new coating within 24-48 hours of removal, or protect the glass with a temporary sealant if you need more time. Never leave polished glass unprotected—contamination will bond more aggressively to the freshly abraded surface.
Protecting Exposed Glass Surfaces
If you’re not immediately recoating, apply a silica-based spray sealant as a stopgap measure. These products offer 2-3 months of protection and can be applied over freshly polished glass without interfering with future coating adhesion. Think of it as putting a bandage on a wound—temporary protection while you plan your long-term solution. Avoid wax-based products on glass; they can cause smearing and interfere with wiper performance.
Safety and Environmental Considerations
Proper Ventilation Requirements
Many removal polishes release volatile organic compounds (VOCs) during application, especially chemical-based formulas. Work in a well-ventilated area with at least 6 air changes per hour. If you’re in a garage, use a box fan to create positive airflow away from your work area. Never work in an enclosed space with a running vehicle—the combination of polish fumes and exhaust can be dangerous. A simple rule: if you can smell the product strongly, you need more ventilation.
Skin and Eye Protection Protocols
Alkaline chemical removers can cause chemical burns, and abrasive compounds can embed silica particles in your skin. Always wear nitrile gloves (not latex, which degrades with solvents) and safety glasses with side shields. If you have sensitive skin, consider a long-sleeve shirt. In case of eye contact, flush with water for 15 minutes and seek medical attention—silica particles can cause corneal abrasions. Keep a bottle of sterile eyewash in your workspace.
Eco-Friendly Disposal Methods
Never wash polish residue down the drain. Abrasive compounds contain heavy metals that can contaminate water systems, and chemical removers have high pH levels that disrupt wastewater treatment. Collect residue on microfiber towels, allow them to dry completely, then dispose of them as solid waste. For liquid waste, collect in a sealed container and take it to a household hazardous waste facility. Some eco-conscious detailers use biodegradable clay towels to absorb liquid waste before disposal.
Cost vs. Performance Analysis
Budget-Friendly Options for Occasional Use
If you’re only removing a coating every 2-3 years, a $30-50 consumer-grade removal polish offers acceptable performance. These products typically require more time and elbow grease but are formulated with wider safety margins for inexperienced users. The trade-off is efficiency—you might spend 3-4 hours on a windshield versus 90 minutes with a professional product. For many DIYers, the time savings don’t justify the higher cost of premium formulas.
Professional-Grade Investment Value
Professional removal polishes costing $80-120 per bottle offer concentrated formulas that go further and cut faster. They’re engineered for efficiency, often requiring half the product and half the time. If you’re detailing multiple vehicles or running a side business, the ROI is clear. These products also tend to have better lubrication and less dusting, which translates to better results and less cleanup time. The hidden value is in risk reduction—better products are more forgiving of minor technique errors.
Hidden Costs to Factor In
Your polish cost is just the entry fee. Factor in pad replacement (microfiber pads last 3-4 removal sessions), isopropyl alcohol for cleanup, protective tape, and potentially a new bottle of coating to reapply. A complete removal and recoat job might cost $150-200 in materials alone. If you’re hiring a professional, expect to pay $200-400 for removal and reapplication on a standard sedan. The DIY route saves money but invests time—typically 4-6 hours for a first-timer.
Troubleshooting Difficult Removal Scenarios
Dealing with Multi-Layered Coatings
Some enthusiasts layer different coatings, creating a sandwich of varying chemistries. These require a staged approach: start with a chemical remover to soften the top layer, then follow with an abrasive compound. You may need to repeat this cycle 2-3 times. Test a small corner first to gauge layer thickness. Multi-layered coatings are the most common cause of “immovable” coating problems—what you’re seeing is often the bottom layer of a failed topcoat.
Addressing High-Spot and Uneven Wear Areas
High spots—where coating pooled during application—are denser and require spot-treatment with a more aggressive polish or longer dwell time. Use a small 1-inch pad on a rotary tool for these stubborn spots. Conversely, areas where the coating has already worn thin need a lighter touch to avoid polishing bare glass unnecessarily. Map your windshield under LED light before starting, marking problem areas with painter’s tape to customize your approach.
Managing Overspray on Adjacent Surfaces
Coating removal polish on paintwork or trim can cause damage. Always tape off surrounding areas with 3M Fine Line tape or similar automotive-grade products. If you do get overspray, don’t panic—immediately wipe with a damp microfiber. If it’s dried, use a quick detailer spray to lubricate removal. For plastic trim, a pencil eraser can gently lift dried residue without scratching. Prevention is infinitely easier than correction here.
Maintaining Your Polishing Equipment
Cleaning and Storing Polishing Pads
After each use, clean microfiber pads in hot water with a dedicated pad cleaning solution—never use fabric softener, which coats fibers and reduces cutting ability. Air dry completely before storage. Store pads in sealed plastic bags to prevent dust contamination. A single contaminated pad can scratch your next windshield. Mark pads by aggressiveness level and never mix a pad used for removal with one used for finishing.
Extending the Life of Your Polishing Machine
Glass polishing is harder on machines than paint correction due to the rigid surface and higher friction. Clean your polisher’s air vents after each session to prevent motor overheating. Check carbon brushes every 20 hours of use—glass work wears them faster. Lubricate the backing plate bearing monthly if you polish frequently. Never lay your running polisher on its back; this allows dust to enter the motor housing and reduces tool life significantly.
When to Replace Your Removal Polish Stock
Removal polishes have a shelf life of 12-24 months once opened. The carrier can evaporate, thickening the formula, while abrasives can settle and clump. If your polish has separated and won’t remix to a smooth consistency, it’s time to replace it. Unopened bottles stored in a cool, dark place can last 3-5 years. Write the purchase date on the bottle with a permanent marker. Using expired polish is false economy—it performs poorly and risks inconsistent results.
Frequently Asked Questions
How do I know if my glass coating is actually failing or just dirty?
Perform a water contact angle test. Clean a small section thoroughly with isopropyl alcohol, then spray water. If it beads up in tight spheres, your coating is intact. If it sheets or forms flat droplets, the coating is compromised. You can also breathe on the glass—if condensation forms evenly, the coating is gone; if it beads, it’s still active.
Can I use paint correction compounds to remove glass coatings?
Absolutely not. Paint compounds use abrasives and lubricants formulated for clear coat, which is much softer than glass. They’ll dust excessively, cut unevenly, and may contain fillers that interfere with glass clarity. Glass-specific removal polishes use different abrasive types, sizes, and carriers optimized for glass’s unique hardness and thermal properties.
How long should a proper glass coating removal take?
For a standard sedan windshield using a dual-action polisher and quality removal polish, expect 60-90 minutes of active polishing time. Add another hour for prep, cleanup, and inspection. If you’re spending 3+ hours, either your polish isn’t aggressive enough or your technique needs refinement. Hand polishing can take 3-4 hours and rarely produces uniform results.
Will removal polishing remove existing scratches from my windshield?
Coating removal polishes are designed to remove coatings, not glass. They may improve the appearance of very fine scratches by cleaning them out, but they lack the aggressive cutting power needed for true glass scratch removal. For scratches you can catch with a fingernail, you’ll need a dedicated glass polishing kit with much more aggressive abrasives.
Is it safe to polish glass with ADAS cameras mounted behind the windshield?
Proceed with extreme caution. While the cameras themselves are protected, the mounting brackets and calibration can be affected by heat and vibration. If you must polish near ADAS components, use a chemical remover instead of mechanical polishing, keep temperatures low, and consider having the system recalibrated afterward. When in doubt, consult your dealership.
Can I remove glass coating in direct sunlight?
Never polish glass in direct sun. The heat causes rapid polish evaporation, leading to dry polishing and potential glass damage. It also makes it impossible to see your work clearly. Work in shade or indoors with temperatures between 60-75°F. If you must work outside, do it during early morning or late evening when the glass is cool to the touch.
How often can I safely polish my windshield?
Glass has a finite thickness, and each polishing session removes a microscopic amount of material. A conservative estimate is that you can safely polish a windshield 10-15 times over its lifetime before reaching concerning thinness. Since quality coatings last 2-3 years, this translates to polishing every 5-7 years being perfectly safe. Avoid annual polishing unless you’re correcting serious defects.
What’s the difference between coating removal and glass restoration?
Coating removal specifically targets the silica layer on top of the glass. Glass restoration addresses damage to the glass itself—scratches, water spot etching, acid rain damage. The abrasives used for restoration are significantly more aggressive and require different techniques. Using a restoration compound to remove a coating is overkill and risks unnecessary glass wear.
Should I polish side windows differently than the windshield?
Yes. Side windows are tempered glass and can handle more aggressive polishing, but they’re also thinner. Use the same techniques but reduce pressure by about 30%. Rear windows with defroster lines require extreme care—never polish directly over the lines as you can break the conductive traces. Polish around them carefully or use chemical removal only.
Can I apply a new coating immediately after removal?
Yes, but only after proper neutralization. Wipe the entire surface with a 50/50 isopropyl alcohol and distilled water solution to remove all polishing oils and residue. Allow it to flash dry completely (5-10 minutes), then apply your new coating. Applying over residue will cause bonding failure and potential high spots. Some detailers wait 24 hours to ensure complete solvent evaporation, but with proper IPA wipe-down, immediate application is safe.