Your vehicle’s undercarriage faces a constant assault from road salt, moisture, debris, and chemical contaminants that can transform a solid frame into Swiss cheese in just a few short years. While professional undercoating services charge premium prices for this essential protection, a new generation of professional-grade DIY kits has democratized access to the same industrial-strength formulations and application tools used by specialty shops. These aren’t the aerosol cans you find at the local auto parts store—they’re comprehensive systems designed for serious enthusiasts who understand that proper rust prevention requires more than a quick spray-and-pray approach.
Mastering the art of DIY undercoating with professional-level kits isn’t just about saving money; it’s about taking direct control of your vehicle’s longevity and potentially achieving results that exceed what you’d get from a rushed commercial job. The key lies in understanding what separates a true professional system from consumer-grade products, selecting the right formulation for your specific climate and driving conditions, and executing the application with the same methodology that certified technicians use. Let’s dive deep into the world of professional DIY undercoating and equip you with the knowledge to protect your investment for the long haul.
Top 10 diy undercoating kit
Detailed Product Reviews
1. U-POL Raptor Black Urethane Spray-On Truck Bed Liner Kit, Protective Paint with Spray Gun, for Tailgates & Trucks, Vehicle Undercoating, 4 Quart Kit

Overview: The U-POL Raptor Kit delivers professional-grade 2K urethane protection for truck beds and beyond. This comprehensive system combines a tough, flexible coating with a specialized spray gun, offering DIY enthusiasts access to commercial-quality results. The kit covers a standard 6-8 foot truck bed with a durable barrier against rust, scratches, and chemical damage while reducing road noise and vibration for improved cabin comfort.
What Makes It Stand Out: The 2K urethane chemistry sets this apart from basic rubberized coatings, creating a permanently flexible, UV-resistant finish that won’t fade or crack even under intense sun exposure. The rapid-drying formula allows multiple coats within an hour, while the included spray gun ensures proper atomization for a textured, professional appearance. Its ability to bond directly to OEM paint or primer simplifies preparation and ensures superior adhesion without extensive sanding.
Value for Money: At $142.98, this kit represents exceptional value compared to professional spray-in liners costing $500+. You receive both high-performance coating material and application equipment in one package. The 4-quart capacity handles most truck beds, and the reusable gun adds long-term utility for future touch-ups or additional vehicles, making it a cost-effective investment.
Strengths and Weaknesses:
- Pros: Professional urethane formula; complete all-in-one kit; UV and chemical resistant; rapid application; reusable spray gun; noise reduction properties; world leader in automotive coatings
- Cons: Requires substantial air compressor (8 CFM); involves precise chemical mixing; significant overspray potential; proper ventilation absolutely critical; not for casual users
Bottom Line: The U-POL Raptor Kit is the top choice for DIYers seeking permanent, professional-grade bed liner protection. The upfront investment saves hundreds over professional installation while delivering comparable durability and finish quality that lasts for years.
2. Gal NH Oil Undercoating, Pro Undercoating Gun, 2 Wands, 3 Quart Bottle, 50 Plugs

Overview: The Gal NH Oil Undercoating Kit provides premium corrosion protection through a specialized oil-based formula designed for harsh winter climates. This professional-grade system penetrates existing rust and creates a self-healing barrier against road salt and moisture. The comprehensive kit includes application gun, dual wands, and supplies for complete undercarriage treatment of cars, trucks, and SUVs suffering from or preventing rust.
What Makes It Stand Out: Unlike hard coatings, this oil-based formula creeps into seams and crevices where rust begins, providing active protection that displaces moisture and stops corrosion chemically. The included professional undercoating gun with two wand options ensures thorough coverage of frame rails, wheel wells, and hidden cavities. The 50 rust plugs allow for interior frame treatment through factory access holes, reaching areas other coatings cannot.
Value for Money: At $174.95, this kit commands a premium price but delivers annual protection that professional shops charge $150-200 per application for. The reusable gun and wands provide value over multiple treatments, and the 3-quart capacity handles most vehicles. Oil undercoating is the gold standard for salt-belt vehicle preservation, justifying the higher cost through superior protection.
Strengths and Weaknesses:
- Pros: Superior rust penetration; self-healing protection; ideal for harsh climates; professional application tools; reaches inaccessible areas; comprehensive accessory package
- Cons: Highest price point; requires annual reapplication; messy, slow-drying application; may drip after treatment; strong petroleum odor; not a permanent coating
Bottom Line: For vehicles in salt-belt regions, this oil undercoating kit offers the most effective long-term corrosion protection. The initial investment pays dividends in preserving your vehicle’s structural integrity against winter road chemicals and moisture intrusion for years.
3. Barrier Bond - Rubberized Undercoating Sound Deadener Kit, 28oz 4-Pack, Black Spray, Vehicle Undercoating, with Spray Gun
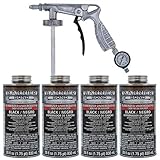
Overview: The Barrier Bond Rubberized Undercoating Kit offers a convenient, environmentally compliant solution for sound dampening and corrosion protection. This four-pack of 28-ounce cans provides ready-to-spray material compatible with most paint systems. The included spray gun and fast-drying formula make it accessible for DIY enthusiasts tackling undercarriage protection on cars, trucks, and SUVs without professional equipment.
What Makes It Stand Out: This kit’s 50-state VOC compliance ensures legal use nationwide, while its paintable nature allows color matching for visible areas like wheel wells. The rubberized formulation actively deadens road noise and vibration, adding comfort benefits beyond rust protection. The quick-dry formula enables efficient project completion without lengthy wait times between coats or before reassembly, saving valuable garage time.
Value for Money: At $114.99, this kit positions itself as a mid-range option balancing cost and performance. The four-can pack provides adequate coverage for a passenger car or truck undercarriage, and the included spray gun eliminates additional equipment purchases. Compared to professional undercoating services costing $100-150, it offers significant savings for the DIYer while delivering comparable results.
Strengths and Weaknesses:
- Pros: VOC compliant in all states; paintable finish; sound deadening properties; fast drying; includes spray gun; ready-to-spray convenience; good for beginners
- Cons: Less durable than 2K urethane; may require multiple kits for larger vehicles; not ideal for heavy abrasion areas; limited material volume per can; not for truck beds
Bottom Line: The Barrier Bond kit excels for DIYers seeking an environmentally friendly, easy-to-apply undercoating with sound dampening benefits. It’s ideal for moderate climates and drivers prioritizing noise reduction alongside rust protection without breaking the bank.
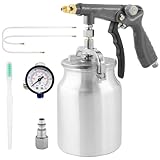
4. Pro Undercoating Spray Gun Kit with 2 Wands, 3 Empty Quart Bottles, and 50 Rust Plugs

Overview: The Pro Undercoating Spray Gun Kit provides professional-grade application equipment without included coating material. This package focuses on delivering durable, reusable tools for repeated undercoating treatments. The kit includes a specialized undercoating gun, two extension wands of different lengths, three empty quart bottles, and 50 rust plugs for comprehensive frame access and cavity treatment on various vehicles.
What Makes It Stand Out: This kit’s strength lies in its professional-quality application tools designed specifically for undercoating work. The dual wand system allows both broad coverage and precise cavity application, while the multiple bottles enable quick material changes or different coating types. The included rust plugs facilitate interior frame treatment through factory drain holes, a critical step professional shops perform that many DIYers overlook.
Value for Money: At $96.49, this kit offers solid value for those who already have coating material or prefer to purchase it separately. The reusable components provide years of service, making it economical for multi-vehicle households or annual reapplication needs. However, the total cost rises significantly when adding quality undercoating material, potentially exceeding all-in-one kit prices.
Strengths and Weaknesses:
- Pros: Professional-grade gun and wands; reusable for years; versatile for various coatings; includes rust plugs; multiple bottles for convenience; durable construction
- Cons: No coating material included; requires separate material purchase; initial setup cost higher than all-in-one kits; learning curve for proper adjustment and spray technique
Bottom Line: This gun kit suits experienced DIYers or professionals who demand quality application tools and prefer to select their own coating materials. It’s a smart long-term investment but less convenient for first-time users seeking a complete, ready-to-use solution.
5. InoKraft Undercoating Spray Gun with Suction Feed Cup, 360° & Straight Spray Hoses, for Truck Bed Liner Coating, Rubberized Undercoat, Rust Proofing

Overview: The InoKraft Undercoating Spray Gun delivers specialized application technology at an entry-level price point. This suction-feed spray gun features adjustable flow control, pressure regulation, and both 360-degree and straight extension wands for comprehensive coverage. The kit focuses on efficient, comfortable application without included coating material, making it a tool-only investment for occasional use.
What Makes It Stand Out: The adjustable flow rate increases efficiency by 60% for high-volume coverage while allowing precise control for detail work. The innovative 360-degree wand reaches deep into frame rails and cavities without requiring gun rotation. On-gun pressure regulation eliminates trips back to the compressor, while the snap-lock pot prevents spills during repositioning. The large opening simplifies refilling and cleaning.
Value for Money: At $49.99, this gun offers exceptional value for budget-conscious DIYers. The feature set rivals professional models costing twice as much, and the included accessories (cleaning brush, dual wands, manual, instructional videos) provide everything needed for immediate use. The suction-feed design works with most undercoating materials, offering versatility across projects.
Strengths and Weaknesses:
- Pros: Excellent price; adjustable flow and pressure; 360° wand access; spill-proof snap-lock pot; easy to clean; comprehensive accessories; instructional support
- Cons: Suction feed less reliable with thick materials; no coating included; potential durability concerns with heavy use; requires meticulous cleaning to prevent clogging
Bottom Line: The InoKraft gun is the best value for occasional undercoating projects. Its innovative features and adjustable controls make it ideal for DIYers wanting professional results without professional equipment costs, provided you purchase coating separately.
6. Raptor Tintable Urethane Spray-On Truck Bed Liner Kit, Protective Paint With Spray Gun, For Tailgates & Trucks, Vehicle Undercoating, 4 Quart Kit

Overview: The Raptor 4 Quart Kit delivers professional-grade 2K urethane protection for truck beds and undercarriages. This complete system includes everything needed to apply a durable, flexible coating that withstands extreme conditions while reducing road noise and vibration.
What Makes It Stand Out: The tintable formula sets this kit apart, allowing custom color matching beyond standard black. The included professional spray gun, designed for 8 CFM compressors, ensures proper atomization for a textured finish that bonds aggressively to OEM paint and self-etching primer. Its rapid-dry chemistry enables multiple coats within an hour, drastically reducing project time compared to conventional products.
Value for Money: At $1.07 per ounce, this kit costs significantly less than professional installation ($400-800) while delivering comparable results. The four-quart capacity perfectly covers 6-8 foot beds with sufficient material for proper thickness. While cheaper than Rhino Lining or Line-X services, you invest labor for substantial savings and the satisfaction of a DIY professional finish.
Strengths and Weaknesses: Strengths include exceptional durability, UV resistance, complete kit convenience, and versatile application (spray, roll, or brush). The flexible coating prevents cracking while resisting chemicals and corrosion. Weaknesses include requiring a high-CFM compressor, critical surface preparation needs, potential overspray issues, and limited coverage for larger trucks or mistakes. The tintable base also needs separate automotive tint, adding cost.
Bottom Line: For serious DIY enthusiasts seeking professional results on standard truck beds, this Raptor kit delivers outstanding value and performance. The learning curve is manageable, and the finish rivals commercial applications when properly applied.
7. Rust-Oleum Black Undercoating 15 oz. (12 Pack)

Overview: This twelve-pack of Rust-Oleum Black Undercoating offers an economical, convenient solution for vehicle underbody protection. Each 15-ounce aerosol can provides a straightforward way to apply a corrosion-resistant barrier without specialized equipment.
What Makes It Stand Out: The aerosol format eliminates compressor and spray gun requirements, making touch-ups and complete undercoating accessible to any DIYer. Rust-Oleum’s trusted reputation for adhesion and durability ensures reliable performance. The twelve-pack quantity provides sufficient material for most passenger vehicles while allowing for future maintenance applications.
Value for Money: At $0.45 per ounce, this represents exceptional value—among the most affordable undercoating options available. Twelve cans typically cover a standard vehicle undercarriage for less than half the cost of professional undercoating services. The low investment makes annual reapplication economically feasible for ongoing rust prevention.
Strengths and Weaknesses: Strengths include ease of use, no equipment requirements, trusted brand consistency, and excellent portability for spot treatments. The black finish provides clean, uniform coverage. Weaknesses include limited control versus spray guns, potential for uneven application, lower durability compared to 2K urethane systems, and environmental concerns with aerosol propellants. Multiple cans generate significant waste, and coverage varies with technique.
Bottom Line: Ideal for budget-conscious owners performing routine maintenance or touch-ups, this Rust-Oleum pack delivers reliable protection without complexity. For full undercoating jobs, invest in proper preparation time, but expect professional-grade results only from more advanced systems.
8. Tekton44 Undercoating for Vehicles, Automotive Black Undercoating Kit (8 Liter Cans + 1 Spray Gun + 1 Spray Wand)

Overview: The Tekton44 kit provides substantial volume for comprehensive undercoating projects, delivering eight liters of professional-grade corrosion protection. This system includes both spray gun and specialized wand for accessing frame rails and enclosed cavities.
What Makes It Stand Out: The massive volume addresses multiple vehicles or extensive commercial applications. Its permanently tacky formulation maintains flexibility in extreme cold, preventing the cracking common with rigid coatings. The included spray wand enables 360-degree coverage inside frame rails—a critical advantage for thorough rust prevention that most kits overlook.
Value for Money: At $0.74 per ounce, the upfront $199 investment yields excellent per-unit value for large-scale projects. While pricier than aerosol options, the included professional application equipment and substantial coverage (approximately four times standard kits) make it economical for fleet owners or restoration shops. The cost per vehicle drops significantly when coating multiple cars.
Strengths and Weaknesses: Strengths include exceptional coverage area, flexible permanently-tacky formula that resists cracking, professional spray equipment, and no-run consistency. The specialized wand accesses difficult areas effectively. Weaknesses include the “permanently tacky” characteristic potentially attracting road debris, higher initial cost for single-vehicle users, and limited brand recognition compared to Raptor or Rust-Oleum. The large containers may require stirring and thinning.
Bottom Line: Perfect for professionals or serious enthusiasts managing multiple vehicles, this kit offers industrial-scale protection and application versatility. Single-vehicle owners should consider smaller alternatives, but for comprehensive coverage, Tekton44 delivers professional results.
9. KCNKCN Undercoating Spray Gun with 1000ml Suction Feed Cup, 2 Wands - 360° & Straight Spray Hoses, Undercoat Gun for Truck Bed Liner Coating, Rubberized Undercoat, Rust Proofing
Overview: This specialized undercoating spray gun is designed for applying thick protective coatings to hard-to-reach vehicle areas. Unlike complete kits, this tool focuses on superior application control for users who already possess coating materials.
What Makes It Stand Out: The dual-wand system provides unmatched versatility—the 360-degree rotating nozzle thoroughly coats interior frame sections and boxed rails, while the straight wand targets specific areas. The 60% flow rate increase handles thick bed liner materials without dilution, and the precision pressure regulator allows on-the-fly adjustments without crawling from beneath the vehicle.
Value for Money: At $32.59, this gun offers exceptional value compared to $100+ professional undercoating guns. It enables DIYers to achieve professional application quality using purchased coatings like Herculiner or Raptor. The investment pays for itself on the first use versus paying for professional application services.
Strengths and Weaknesses: Strengths include the innovative dual-wand design, high-flow capability for thick materials, lightweight balanced construction, snap-lock paint cup preventing leaks, and affordable price point. The adjustable pressure regulator provides real-time control. Weaknesses include requiring a separate compressor (CFM unspecified), no included coating, potential clogging with improper cleaning, and uncertain long-term durability compared to premium brands. The 1000ml cup may require frequent refilling on large projects.
Bottom Line: An essential tool for serious DIY undercoating enthusiasts who value precision and versatility. Purchase this gun to elevate your application quality, but ensure you have compatible coatings and a sufficient compressor to maximize its capabilities.
10. Raptor Black Urethane Spray-On Truck Bed Liner Kit, Protective Paint With Spray Gun, For Tailgates & Trucks, Vehicle Undercoating, 8 Quart Kit

Overview: This 8-quart Raptor kit doubles the capacity of its 4-quart sibling, providing the same professional 2K urethane protection for larger trucks or multiple projects. The black formula delivers a durable, UV-resistant finish without custom tinting requirements.
What Makes It Stand Out: The expanded volume covers long-bed trucks up to 8 feet with generous material for rocker panels, tailgates, and undercoating. The included professional-grade spray gun ensures consistent texture application, while the rapid-dry formulation enables efficient multi-layer builds. Raptor’s world-leading automotive refinishing expertise guarantees a finish that resists stains, scratches, and extreme temperatures while dampening noise and vibration.
Value for Money: At $1.03 per ounce, this larger kit offers better value than the 4-quart version while maintaining massive savings over professional installation. The $278 investment protects an entire full-size truck for roughly one-third the cost of commercial services. Extra material accommodates application errors and allows coating of additional accessories like toolboxes or running boards.
Strengths and Weaknesses: Strengths include superior durability, complete professional system, UV-stable black finish, flexible impact resistance, and excellent coverage for large vehicles. The rapid recoat time accelerates project completion. Weaknesses include requiring a high-CFM compressor, critical surface prep requirements, higher upfront cost than smaller kits, and potential waste for short-bed trucks. Overspray management demands careful masking.
Bottom Line: The ideal choice for long-bed truck owners or enthusiasts tackling multiple vehicles. The 8-quart capacity eliminates material anxiety while delivering the same professional-grade protection that makes Raptor the industry leader for DIY applications.
What Defines a Professional-Grade DIY Undercoating Kit?
Professional undercoating kits occupy a completely different category than retail spray products. These systems deliver industrial-level protection through superior chemistry, comprehensive tooling, and application characteristics that mimic what you’d find in a dedicated rust-proofing facility. The distinction begins with solids content—professional formulations typically contain 60-70% solids compared to 30-40% in consumer products, meaning you’re depositing more protective material per pass rather than watching it evaporate into thin air.
Higher Solids Content and Build Quality
The solids percentage directly correlates to film thickness and durability. Professional kits create a robust, rubberized barrier that maintains flexibility while resisting chipping and abrasion. This build quality matters because undercoating isn’t just about creating a moisture barrier—it’s about establishing a self-healing, sound-dampening shield that can absorb impacts from gravel and road debris without compromising its protective integrity.
Professional Viscosity and Application Characteristics
The viscosity of professional-grade material requires specific application equipment to atomize properly. Unlike thin, watery consumer sprays, these formulations are engineered to cling to vertical surfaces and build thickness in a single coat. The material flows consistently through professional-grade wands and nozzles, allowing you to reach frame rails, inside rocker panels, and other critical areas without runs or sags that compromise protection.
Understanding Undercoating Chemistry: The Science of Rust Prevention
The chemical composition of your undercoating determines its effectiveness, longevity, and compatibility with your vehicle’s existing finishes. Professional kits leverage sophisticated formulations that go far beyond simple barrier protection, actively fighting corrosion at the molecular level.
Petroleum-Based vs. Water-Based Formulations
Petroleum-based undercoatings have dominated the professional market for decades due to their superior penetration into seams and their ability to displace existing moisture. These formulations create a hydrophobic layer that actively repels water while maintaining pliability in extreme temperatures. Water-based products have gained traction due to environmental regulations and lower VOC content, but they require more meticulous surface preparation and typically offer shorter service lives in harsh winter climates.
Rubberized Compounds and Flexibility Additives
The rubberized component in professional kits isn’t just for texture—it’s a critical performance feature. High-quality formulations use vulcanized rubber particles or synthetic elastomers that allow the coating to flex with your vehicle’s chassis without cracking. This flexibility proves essential when your frame twists during off-road articulation or when temperature fluctuations cause metal expansion and contraction.
Corrosion Inhibitors and Rust Converters
Premium professional kits often incorporate corrosion inhibitors like zinc phosphate, barium metaborate, or calcium sulfonate that actively neutralize oxidation processes. Some advanced formulations include rust converters that chemically transform existing surface rust into stable iron compounds, effectively halting corrosion progression without requiring complete rust removal down to bare metal.
Essential Components of a Complete Professional Kit
A true professional DIY kit should arrive as a comprehensive system, not just a bucket of coating material. The included components directly impact your ability to achieve shop-quality results and work efficiently.
Primary Coating Material Volume and Packaging
Professional kits typically provide 1-5 gallons of coating material, packaged in resealable containers that prevent skinning and contamination. Look for kits that calculate coverage based on proper film thickness (usually 60-125 mils wet) rather than optimistic square footage claims. The packaging should include clear batch numbers and expiration dates—fresh material flows and cures predictably.
Professional Application Wand System
The difference between a good and great undercoating job often comes down to wand reach. Professional kits include 24-36 inch flexible wands with multiple tip options. The wand should feature a comfortable grip, precise trigger control, and the ability to rotate the spray tip 360 degrees. Cheaper kits skimp here, leaving you unable to properly coat inside boxed frames or deep wheel wells.
Surface Preparation Solutions
Top-tier professional kits recognize that prep work determines 80% of the final result. They include dedicated degreasers, rust converters, and etching solutions formulated to work synergistically with the primary coating. These aren’t generic cleaners—they’re pH-balanced formulations that remove contaminants without leaving residues that interfere with adhesion.
Application Equipment: Guns, Wands, and Nozzle Technology
The hardware included with your kit transforms the coating from a liquid in a bucket into a precisely applied protective film. Understanding this equipment helps you evaluate kit quality before purchase.
Airless Spray Systems vs. HVLP Configurations
Most professional DIY kits utilize airless spray technology, which pumps material at high pressure (2000-3000 PSI) through a small orifice, atomizing it without compressed air. This system delivers thicker coatings faster and reaches into cavities more effectively. Some premium kits offer HVLP (High Volume Low Pressure) options that provide finer atomization and less overspray but require a substantial air compressor.
Wand Length and Flexibility Considerations
For full-size trucks and SUVs, a 36-inch wand proves essential for reaching the center of the underbody without crawling underneath repeatedly. The wand’s flexibility matters just as much as its length—too rigid, and you can’t navigate around brake lines and suspension components; too floppy, and you lose control of the spray pattern. Professional-grade wands use reinforced polymer hoses with just the right balance.
Nozzle Selection for Different Application Zones
Professional kits include multiple nozzle sizes measured in thousandths of an inch (e.g., 0.021", 0.025"). Smaller tips create narrower patterns for detailed work inside frame rails, while larger tips cover broad areas like floor pans quickly. The best kits also provide fan-pattern tips for edge work and round-pattern tips for cavity injection.
Surface Preparation Protocols for Lasting Adhesion
Even the most advanced undercoating will fail if applied over contaminated or unstable surfaces. Professional results demand professional preparation methodology that often takes longer than the actual coating application.
Power Washing and Degreasing Standards
Begin with a thorough pressure wash using a minimum of 2500 PSI and a 15-degree nozzle, focusing on removing packed mud, road tar, and loose scale. Follow with a petroleum-based degreaser applied with a pump sprayer, agitating with a stiff brush on heavily soiled areas. The degreaser must be completely rinsed and the surface dried—residual oils or moisture trapped under the coating create failure points.
Rust Removal and Conversion Procedures
For surface rust, use a needle scaler or wire wheel to remove loose scale, then apply a rust converter that chemically stabilizes remaining oxidation. Professional kits often include a phosphoric acid-based converter that turns rust black and creates a zinc phosphate coating. This step is non-negotiable—painting over active rust is like putting a bandage on an infected wound.
Masking and Protection Strategies
Protect components that shouldn’t be coated: rubber bushings, brake rotors, exhaust components, and drivetrain seals. Use heavy-duty aluminum foil for complex shapes like brake calipers and high-temperature masking tape for edges. Professional technicians remove wheels and often drop the spare tire for complete access—consider this level of disassembly essential for thorough coverage.
Professional Formulation Types and Their Applications
Not all undercoatings serve the same purpose. Professional kits target specific use cases, and selecting the wrong type for your environment wastes time and money.
Asphalt-Based Undercoatings
These traditional formulations offer maximum thickness and sound deadening, making them ideal for daily drivers in salt-belt states. They dry to a hard, textured finish that resists abrasion but can become brittle in extreme cold. Look for modified asphalt blends that include synthetic rubber for improved low-temperature flexibility.
Rubberized Asphalt Blends
Combining the build characteristics of asphalt with the flexibility of rubber, these hybrids represent the most popular professional choice. They provide excellent chip resistance, maintain elasticity across temperature ranges, and offer superior adhesion to properly prepared surfaces. The rubber component also improves self-healing properties when minor scratches occur.
Wax and Oil-Based Penetrating Coatings
Derived from lanolin or petroleum distillates, these formulations penetrate seams and crevices where sprays can’t reach. They never fully harden, remaining tacky to continuously creep into exposed areas. Professional-grade oil-based kits work exceptionally well for classic cars and vehicles with existing rust concerns, though they require annual reapplication in harsh climates.
Polyurethane and Polyurea High-Performance Options
For maximum durability, professional-grade polyurethane and polyurea formulations create a near-permanent barrier that resists chemicals, abrasion, and impacts. These two-component systems require precise mixing and application but deliver 10+ year protection. They’re overkill for daily drivers but essential for off-road vehicles and work trucks operating in extreme conditions.
Coverage Rates and Kit Sizing Calculations
Underestimating material needs leaves you with thin coverage or an incomplete job; overbuying wastes money and creates storage headaches. Professional sizing follows methodical calculations.
Calculating Your Vehicle’s Underbody Square Footage
Measure the wheelbase and track width, then multiply by a factor of 1.5 to account for suspension components, frame rails, and complex geometries. A mid-size sedan typically requires 80-100 square feet of coverage, while a full-size truck needs 150-180 square feet. Professional kits list coverage at specified film thickness—always calculate based on two coats at 60 mils each.
Layer Thickness Requirements
Professional applications target 100-125 mils dry film thickness for optimal protection. This requires two coats at 60-70 mils wet, as material shrinks 20-30% during curing. Use a wet film thickness gauge (included in premium kits) to verify each pass. Too thin, and you lose protection; too thick, and the coating may crack from internal stress during curing.
Multi-Vehicle and Touch-Up Kit Options
Some manufacturers offer “shop size” kits that provide enough material for 3-4 vehicles at a reduced per-vehicle cost. These make sense for car clubs or families with multiple vehicles. Additionally, evaluate whether the brand offers smaller touch-up kits with matching material—annual spot treatments significantly extend the life of the primary application.
Drying and Curing: The Timeline Pros Follow
Understanding the difference between drying and curing prevents premature use that damages your fresh undercoating. Professional formulations follow specific chemical processes that can’t be rushed.
Touch Dry vs. Full Cure Distinctions
Most professional undercoatings become touch-dry within 2-4 hours, meaning you can handle the surface without sticking. However, full cure—when the coating reaches maximum hardness and chemical resistance—requires 7-14 days depending on formulation and conditions. During this curing window, avoid heavy water exposure and extreme temperature fluctuations.
Temperature and Humidity Impact on Cure Rates
Asphalt-based coatings cure through solvent evaporation, accelerating in warm, dry conditions (ideal: 70-80°F, <50% humidity). Polyurethane systems are moisture-cured, actually requiring ambient humidity to harden properly. Applying in conditions outside the manufacturer’s specifications results in soft, tacky coatings that never achieve proper protection.
Safe Driving and Usage Timelines
While you can drive carefully after 24 hours, avoid pressure washing, off-roading, or exposing the undercoating to road salt for at least one week. Professional technicians often recommend parking the vehicle for 48-72 hours post-application when possible. During this period, the coating remains vulnerable to damage from rocks and debris.
Seasonal Application Strategies for Optimal Results
Timing your undercoating application impacts both ease of execution and long-term performance. Professional shops schedule applications strategically, and you should too.
Ideal Temperature Windows
Plan to apply when ambient temperatures remain between 65-85°F for at least 48 hours. Spring and early fall typically offer the most stable conditions. Avoid applying when temperatures will drop below 50°F within 24 hours—cold prevents proper flow and adhesion, leading to cracking and delamination.
Humidity Control in Different Climates
In humid climates, apply during morning hours when humidity is lower, and use fans to circulate air underneath the vehicle. Desert climates pose the opposite challenge—extremely low humidity can cause asphalt-based coatings to skin over before they level properly. In these conditions, lightly mist the surrounding area with water to raise ambient moisture.
Winter vs. Summer Application Considerations
While summer offers better curing conditions, winter applications are possible in heated garages. The key is maintaining 70°F for the entire cure period. Professional shops in cold climates often install temporary heating systems. Never apply undercoating to a vehicle brought in from freezing temperatures—condensation will form and cause immediate failure.
Safety Equipment and Ventilation Requirements
Professional-grade undercoating materials contain solvents and chemicals that demand respect. The safety gear included (or recommended) with quality kits reflects the serious nature of the task.
Respiratory Protection Standards
Standard dust masks provide zero protection against undercoating vapors. Professional kits require a NIOSH-approved respirator with organic vapor cartridges (P100 minimum). The respirator should fit-test properly—any gaps allow solvent vapors to bypass filtration. Replace cartridges after 40 hours of use or when you detect odors.
Skin and Eye Protection Protocols
Wear chemical-resistant nitrile gloves (minimum 8 mil thickness) and a full-face shield, not just safety glasses. Undercoating overspray can cause chemical burns, and solvents rapidly penetrate skin. Professional technicians wear disposable coveralls with hoods to prevent skin contact during overhead spraying.
Ventilation System Setup
Never apply undercoating in a completely enclosed space. Professional setups use explosion-proof fans to create cross-ventilation, exchanging garage air 3-4 times per hour. If working in a home garage, open all doors and use box fans positioned to blow fresh air across the work area. Some jurisdictions require professional-grade exhaust systems for commercial applications.
Critical DIY Mistakes That Compromise Professional Results
Even with professional-grade materials, technique errors can ruin your investment. Understanding common failures helps you avoid them.
Inadequate Surface Preparation
The number one cause of undercoating failure is insufficient cleaning. Skipping the degreasing step or applying over damp surfaces guarantees delamination within months. Professional results require removing all previous undercoating that’s loose or failing—new material won’t adhere to unstable substrates.
Improper Application Thickness
Applying too thick in a single coat traps solvents, leading to soft, uncured spots that never harden properly. Conversely, thin applications provide insufficient protection. Professional technique involves two medium coats, allowing flash time between passes. Use a wet film gauge religiously to verify thickness.
Coating Critical Components
Overspray on brake rotors, exhaust systems, and rubber components creates serious safety and performance issues. Professional technicians spend as much time masking as they do spraying. Remove wheels, mask brake components with foil, and stuff exhaust pipes with paper towels. Forgetting to protect these areas can cost hundreds in repairs.
Long-Term Maintenance and Reapplication Strategy
Professional undercoating isn’t a “set it and forget it” solution. A maintenance plan extends service life and maintains protection integrity.
Annual Inspection Checkpoints
Each spring, inspect the undercoating using a bright LED light and mirror. Look for chips, cracks, and thin spots, particularly behind wheels and along frame rails where debris impacts are heaviest. Use a screwdriver to gently probe suspicious areas—soft spots indicate moisture intrusion and require immediate attention.
Professional Touch-Up Techniques
Keep leftover material properly sealed and store it in a climate-controlled space. For touch-ups, wire brush any loose material, clean with wax-and-grease remover, and apply thin coats feathering into surrounding areas. Never apply new material over dirty or oily surfaces, even for small spots.
When Complete Stripping Becomes Necessary
If you discover widespread delamination or moisture entrapment, spot repairs won’t suffice. Complete removal using a chemical stripper or media blasting becomes necessary. This is a major undertaking that professional shops charge significantly for, but doing it yourself with proper equipment ensures it’s done thoroughly.
Cost-Benefit Analysis: Professional Shop vs. DIY Investment
Understanding the true cost comparison helps justify the initial investment in professional-grade DIY equipment and materials.
Breaking Down Professional Shop Pricing
Commercial undercoating services range from $800-$2,500 depending on vehicle size and service level. This price includes labor, materials, and facility overhead, but often uses faster, thinner applications to maximize throughput. Many shops apply a single coat at minimal thickness to complete more vehicles daily.
DIY Kit and Equipment Investment
A professional-grade DIY kit costs $200-$400, with quality spray equipment adding another $150-$300 if not included. While the initial outlay seems significant, the per-vehicle cost drops to $150-$200 after your first application, and you control the thickness and coverage quality. The equipment pays for itself by the second vehicle.
Hidden Value of DIY Application
Beyond cost savings, DIY application lets you address problem areas specific to your vehicle’s history. You can spend extra time on known rust spots, apply additional coats to high-impact areas, and ensure complete coverage of critical zones that rushed commercial jobs might miss. This customization adds value that isn’t reflected in simple price comparisons.
Environmental Regulations and Compliance
Professional-grade materials fall under stricter environmental regulations than consumer products. Understanding these rules keeps you compliant and environmentally responsible.
VOC Content and Regional Restrictions
Many professional undercoatings contain high VOC (Volatile Organic Compound) levels that exceed limits in California, New York, and other regulated states. Professional kits sold in these areas feature low-VOC formulations that meet CARB (California Air Resources Board) standards. Check local regulations before purchasing—using non-compliant products can result in significant fines.
Proper Disposal of Waste Materials
Never pour leftover undercoating or solvents down drains or into the ground. Professional shops collect waste as hazardous material. Your local household hazardous waste facility accepts these materials, often for free. Keep waste materials in original containers with labels intact for proper identification.
Indoor vs. Outdoor Application Laws
Some municipalities prohibit spray applications of high-VOC materials outdoors due to overspray and air quality concerns. Others require permits for commercial applications. While DIY home use often falls under exemptions, be a good neighbor—notify adjacent property owners and avoid spraying on windy days when overspray could affect their property.
Warranty and Insurance Implications
DIY undercoating can affect vehicle warranties and insurance claims if not documented properly. Professional shops provide paperwork that DIY applications lack, but you can create your own documentation trail.
Manufacturer Warranty Considerations
Federal law (Magnuson-Moss Warranty Act) prohibits manufacturers from denying warranty coverage simply because you performed DIY maintenance. However, they can deny claims if your undercoating directly causes a failure (e.g., coating a sensor or seal). Keep detailed records and photographs of your work to prove professional methodology.
Insurance Claim Documentation
In accident scenarios, insurance adjusters may question modifications. Maintain a logbook documenting the undercoating product used, application date, thickness measurements, and photographs of the process. This proves you used professional-grade materials and techniques, supporting claims that the undercoating added value and shouldn’t be dismissed as “owner modification.”
Professional Oversight and Certification Options
Some professional undercoating manufacturers offer certification programs where you submit photos of your work for review. While not required, this certification provides documentation that you followed approved procedures. Certain high-end kits even include a limited warranty against rust-through when applied according to their certified process and documented with their app.
Frequently Asked Questions
How long does a professional DIY undercoating kit typically last?
With proper application and annual maintenance, professional-grade undercoating provides 5-10 years of effective protection. Petroleum-based formulations typically last 5-7 years in salt-belt states, while polyurethane systems can exceed 10 years. Annual inspections and touch-ups of damaged areas are critical to achieving maximum lifespan.
Can I apply professional undercoating over existing rust?
Light surface rust can be treated with included rust converters that chemically stabilize oxidation before coating. However, heavy scaling rust with pitting must be mechanically removed down to sound metal. Applying over unstable rust guarantees failure—the coating will delaminate as rust continues expanding underneath.
What’s the minimum temperature for applying undercoating?
Most professional formulations require ambient temperatures between 60-85°F during application and for 48 hours afterward. Some low-VOC products work down to 50°F, but curing times extend dramatically. Never apply when temperatures will drop below freezing within 24 hours, as trapped moisture will freeze and cause immediate delamination.
Do I really need to remove my wheels for application?
Removing wheels is strongly recommended for professional results. It provides complete access to wheel wells, inner fender lips, and brake backing plates—areas that fail first from salt and debris. Professional shops always remove wheels; skipping this step results in incomplete coverage of the most vulnerable zones.
How do I dispose of leftover undercoating material?
Treat leftover undercoating as hazardous waste. Seal the container tightly and store in a cool, dry place for future touch-ups. For disposal, take to your local household hazardous waste collection facility. Never pour liquid or dried material into household trash or down drains, as solvents can contaminate groundwater.
Will undercoating affect my vehicle’s factory corrosion warranty?
Properly applied undercoating won’t void your factory warranty. The Magnuson-Moss Act protects your right to perform maintenance. However, coating certain components (like exhaust systems or sensors) that later fail could complicate claims. Document your application process thoroughly and avoid spraying heat-sensitive or moving parts.
Can I use a professional undercoating kit on a brand new vehicle?
Absolutely, and this is actually ideal timing. New vehicles have minimal surface contamination, requiring only light cleaning before application. Applying undercoating immediately prevents the initial corrosion that often begins within months of ownership. Just ensure the factory protective coatings are intact and not failing before you overcoat them.
How do I know if I’m applying the correct thickness?
Professional kits should include a wet film thickness gauge—a small metal comb you press into the fresh coating. For most formulations, target 60-70 mils wet per coat (two coats required). The gauge leaves teeth marks that show the exact thickness. Experienced applicators also judge by appearance: the coating should obscure the metal color but not sag or run.
Is breathing protection really necessary if I’m working outside?
Yes. Professional undercoating solvents are extremely concentrated, and even outdoor application creates high vapor concentrations around your face. A NIOSH-approved respirator with organic vapor cartridges is non-negotiable. The long-term health risks from solvent exposure include neurological damage and respiratory issues—this isn’t a corner to cut.
What’s the difference between undercoating and rustproofing?
Undercoating creates a physical barrier on exposed underbody surfaces, focusing on abrasion resistance and moisture exclusion. Rustproofing involves drilling access holes and injecting waxy, penetrating oils into enclosed cavities (doors, frame rails, rockers). Professional DIY kits primarily address undercoating; cavity rustproofing requires specialized equipment and different formulations for optimal results.