There’s something hypnotic about a perfectly polished chrome wheel spinning beneath a motorcycle frame—that mirror-like finish reflecting sunlight as you cruise down the highway isn’t just aesthetic; it’s a badge of honor. Unlike car wheels tucked behind fenders, motorcycle chrome lives front and center, exposed to every element, road debris, and judging glance at bike nights. Whether you’re rolling on vintage spoke wheels or modern billet chrome, maintaining that show-quality shine requires more than elbow grease and hope.
The world of chrome polishes is surprisingly complex, filled with formulations that range from gentle cleansers to aggressive compounds, each promising to restore that factory-fresh brilliance. But here’s the truth: not all chrome polishes are created equal, and what works for your car’s bumper won’t necessarily protect your motorcycle wheels from the unique abuse they face. This guide cuts through the marketing noise to equip you with the knowledge to evaluate chrome polishes like a professional detailer, understand the science behind the shine, and achieve results that’ll make your wheels the centerpiece of your ride.
Top 10 Chrome Polish For Motorcycle Wheels
Detailed Product Reviews
1. Mothers California Gold Chrome Polish, 12 oz. — Cleans & Brightens Chrome Bumpers, Wheels, Trim & Accessories, Protects Against Fingerprints, Rust & Corrosion, Safe on Glass & Mirrors (05212)
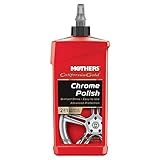
Overview: Mothers California Gold Chrome Polish represents decades of trusted automotive care expertise in a 12-ounce jar. This thick, creamy formula tackles tarnished chrome bumpers, wheels, and trim with reliable effectiveness. Its gentle yet thorough cleaning action removes oxidation while leaving behind a brilliant, streak-free shine that enthusiasts have depended on for years.
What Makes It Stand Out: The integrated polymer protection system sets this apart from basic polishes, creating a fingerprint-resistant barrier that actively prevents rust and corrosion. Unlike many competitors, it’s genuinely safe on glass and mirrors, making it exceptionally versatile for detailing entire vehicles without switching products. The rich consistency clings to vertical surfaces, reducing waste and ensuring thorough coverage.
Value for Money: At $7.70 for 12 ounces ($0.64 per fluid ounce), this polish delivers professional-grade results at entry-level pricing. It’s significantly cheaper than premium brands like 3D or 3M while offering comparable shine quality. The protective polymers add long-term value by extending intervals between applications, saving both time and product over months of use.
Strengths and Weaknesses: Strengths include exceptional affordability, multi-surface safety, trusted brand heritage, and built-in protective polymers. The thick formula provides excellent control during application. Weaknesses involve the smaller 12-ounce size running out quickly on large projects, and it may require more manual effort than heavy-duty professional formulas for severely oxidized surfaces.
Bottom Line: This is the smart choice for DIY enthusiasts seeking reliable performance without premium pricing. It balances effectiveness, versatility, and protection in one accessible package.
2. Chemical Guys SPI_404_16 Light Metal Polish (Works on Chrome, Stainless Steel, Aluminum & More), 16 fl oz
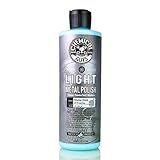
Overview: Chemical Guys Light Metal Polish brings the brand’s signature flair to metal restoration with a 16-ounce bottle designed for comprehensive care. This all-in-one formula promises to clean, polish, and protect multiple metal types in a single application, targeting wheels, bumpers, and trim across chrome, stainless steel, and aluminum surfaces with modern synthetic chemistry.
What Makes It Stand Out: The multi-metal compatibility eliminates the need for separate products, while the synthetic sealant technology provides UV and oxidation protection that extends beyond basic polishes. Chemical Guys markets this as a show-car solution that works efficiently by hand or machine, appealing to both weekend warriors and serious detailers who value streamlined processes.
Value for Money: Priced at $12.99 for 16 ounces ($0.81 per fluid ounce), it sits in the sweet spot between budget and premium options. The larger volume offers better per-ounce value than smaller competitors, and the all-in-one formulation reduces the need for separate protectants, potentially saving money on additional products.
Strengths and Weaknesses: Strengths include versatile metal compatibility, integrated sealant protection, strong brand recognition, and generous bottle size. The formula effectively removes moderate oxidation and grime. Weaknesses involve Chemical Guys’ sometimes overstated marketing claims, and it may struggle with heavily pitted or severely tarnished metals requiring more aggressive compounds.
Bottom Line: An excellent middle-ground choice for users wanting convenience, brand reliability, and protective features without stepping into premium pricing territory.
3. 3D Metal Polish – Heavy Duty Car Metal Polish for Aluminum, Chrome, Brass, Copper, Silver – Removes Oxidation, Tarnish & Stains – 16oz – Made in USA

Overview: 3D Metal Polish positions itself as the professional’s choice with a heavy-duty 16-ounce formula engineered for serious enthusiasts and detailing shops. This American-made product leverages 25 years of chemical innovation to remove oxidation, tarnish, and stains from aluminum, chrome, brass, copper, and silver without relying on traditional abrasive compounds.
What Makes It Stand Out: The proprietary chemical technology breaks down oxidation chemically rather than mechanically, preserving metal integrity while delivering a mirror finish. Its zero-harsh-chemical formulation eliminates foul odors and residue, making it safer for users and surfaces. The versatility extends from custom wheels to delicate jewelry, offering controlled cut and polish action that’s genuinely detailer-approved.
Value for Money: At $19.99 for 16 ounces ($1.25 per ounce), this premium pricing reflects professional-grade ingredients and research. While significantly more expensive than consumer brands, it delivers results comparable to commercial shop products, making it cost-effective for serious enthusiasts who would otherwise pay for professional services.
Strengths and Weaknesses: Strengths include advanced non-abrasive chemistry, professional results, multi-metal versatility, pleasant user experience, and American manufacturing. It achieves show-car shine without compromising metal surfaces. Weaknesses center on the premium price point that may exceed casual users’ budgets, and the sophisticated chemistry might be unnecessary for light maintenance tasks.
Bottom Line: The ultimate choice for perfectionists and professionals who demand maximum results with minimal surface compromise. Worth every penny for those who prioritize quality over cost.
4. 3M Chrome and Metal Polish, 39527, 10 oz, Used on Wheels, Trim and Bumpers, for Automotive
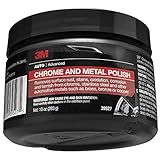
Overview: 3M Chrome and Metal Polish leverages the company’s industrial expertise in a 10-ounce tube designed for restorative applications. This formulation targets wheels, trim, and bumpers across chrome, stainless steel, brass, bronze, and copper, emphasizing its ability to return metals to “like-new” condition through effective cleaning and polishing action.
What Makes It Stand Out: 3M’s reputation for industrial-grade solutions translates into a product specifically formulated to minimize pitting and spotting—common issues with aging chrome. The polish focuses on restorative power rather than just cosmetic enhancement, making it ideal for reviving neglected or vintage vehicle components that require more aggressive yet safe treatment.
Value for Money: At $16.54 for 10 ounces ($1.65 per ounce), this commands the highest per-ounce price in the comparison. The premium reflects 3M’s research-backed formulation and professional reliability. While expensive for routine maintenance, its restorative capabilities can salvage components that might otherwise need replacement, providing value in preservation scenarios.
Strengths and Weaknesses: Strengths include trusted 3M engineering, effective pitting minimization, professional-grade results, and safe multi-metal application. The formula excels at deep restoration. Weaknesses involve the highest cost per ounce, smaller volume limiting large-project work, and less emphasis on long-term protective features compared to polymer-enhanced alternatives.
Bottom Line: Ideal for restoration specialists and owners of vintage vehicles needing industrial-strength revival capabilities. The premium price is justified when preserving irreplaceable chrome components.
5. Mothers California Gold All-Chrome, 12 oz. – Cleans & Polishes Chrome, PVD & Chromed Plastics, Removes Fingerprints, Bugs, Water Spots & Smudges, Leaves a Brilliant Shine & Protective Barrier (05222)

Overview: Mothers California Gold All-Chrome revolutionizes convenience with a 12-ounce spray polish designed for modern chrome applications. This formula addresses contemporary finishes including traditional chrome, PVD chrome, and chromed plastics—surfaces often damaged by conventional polishes. The spray-and-wipe approach eliminates traditional rubbing and buffing cycles.
What Makes It Stand Out: The unique spray delivery system makes this the fastest application available, perfect for quick touch-ups and regular maintenance. Its compatibility with chromed plastics fills a critical market gap, as many traditional polishes contain abrasives that damage these surfaces. The formula effortlessly removes fingerprints, bugs, water spots, and smudges while depositing a protective barrier.
Value for Money: At $6.54 for 12 ounces ($0.54 per fluid ounce), this offers the lowest entry cost and best per-ounce value in the lineup. The spray mechanism reduces product waste through precise application, and the time savings translate to tangible value for users prioritizing efficiency over heavy restoration.
Strengths and Weaknesses: Strengths include unbeatable price, revolutionary spray convenience, safe modern finish compatibility, and quick application. It’s ideal for maintaining newer vehicles. Weaknesses involve limited effectiveness on severe oxidation or pitting, requiring more frequent reapplication than cream polishes, and the spray format may not satisfy enthusiasts who prefer traditional detailing methods.
Bottom Line: The perfect maintenance solution for daily drivers and modern vehicles. Choose this for convenience, affordability, and safe use on today’s diverse chrome finishes.
6. Unicaravan Aluminum Wheel Polishing Kit for Drill Buffing Wheel for Car Motorcycle Wheel Rim Manifold Polishing for Stainless Steel Chrome Wood Plastic Ceramic Glass Woods Machine Jewelry etc 6PCS

Overview: The Unicaravan Aluminum Wheel Polishing Kit is a 6-piece drill-mounted buffing set designed for restoring shine to metal surfaces. Featuring both yellow and white cotton polishing wheels in mushroom, T-shape, and conical forms, this kit tackles everything from car wheels and motorcycle rims to household items like jewelry and ceramics. The dual-stage approach addresses heavy oxidation and fine polishing separately.
What Makes It Stand Out: This kit’s two-step system sets it apart—yellow wheels remove stubborn stains and oxidation, while white wheels deliver a mirror-like finish. The variety of shapes reaches tight spots on wheels, manifolds, and intricate surfaces. Made from layered cotton, the washable, reusable wheels offer durability without scratching surfaces. The universal shaft fits most drills, making professional-grade results accessible to DIYers.
Value for Money: At $9.99 for six pieces, this kit delivers exceptional value. Comparable drill-mounted sets typically cost $15-25, making this a budget-friendly entry point for occasional users. The reusable nature extends its lifespan, though heavy users may need replacements sooner. For hobbyists and detailers starting out, it’s hard to beat this price-to-performance ratio.
Strengths and Weaknesses: Strengths include the versatile shape selection, two-stage polishing system, scratch-free cotton construction, and broad material compatibility. The drill-mounted design saves time versus hand polishing. Weaknesses: Cotton wheels may wear faster than flannelette on heavy jobs, and the kit lacks a cleaning brush or polishing compound. Instructions could be clearer for beginners.
Bottom Line: For under $10, the Unicaravan kit is an excellent starter set for DIY enthusiasts seeking to restore metal luster. While not professional-grade, its versatility and two-step approach make it ideal for periodic maintenance on vehicles and household metals. Pair with quality polish for best results.
7. Chrome Polish Buffing Wheels for Drill, Include Cloth Polish Pads and Wheel Buffer Brush with 1/4’’ Shaft for Aluminum Car Motorcycle Wheel Rim Manifold Polishing, 9PCS

Overview: The Chrome Polish Buffing Wheels kit is a comprehensive 9-piece drill-mounted system for metal restoration. It includes flannelette buffing wheels in multiple shapes and sizes, plus two drill brushes for pre-cleaning. Designed for wheels, manifolds, and various surfaces, this kit emphasizes preparation and polishing quality with premium materials.
What Makes It Stand Out: Unlike basic kits, this includes both cleaning brushes and buffing wheels, ensuring surfaces are properly prepped before polishing. The flannelette material reportedly outperforms sponges, delivering superior shine. With nine varied pieces—mushroom, cylindrical, conical, and T-shape—it handles any contour. The 1/4" shafts fit standard drills, and everything is reusable after washing.
Value for Money: At $17.99, this kit sits in the mid-range. You’re paying extra for the inclusion of cleaning brushes and higher-grade flannelette. Similar quality kits without brushes cost $12-15, so the premium is justified if you need the prep tools. For regular detailers, the durability and comprehensive nature offer solid long-term value.
Strengths and Weaknesses: Strengths include the all-in-one design with cleaning brushes, superior flannelette material, wide shape variety, and excellent reusability. It works on diverse surfaces from metal to leather. Weaknesses: No polishing compound included, higher price point than basic kits, and the brushes may be too soft for heavy grime.
Bottom Line: This 9-piece kit is perfect for serious DIY detailers who want a complete solution. The added cleaning brushes and quality flannelette justify the $18 price. While beginners might find the selection overwhelming, experienced users will appreciate the professional approach to surface preparation and finishing.
8. Formula 1 Metal Polish, Wheel Cleaner to Restore Shine to Rims, Grills, Exhaust, and More, Polish for Chrome, Aluminum, and Stainless Steel Surfaces, Car Cleaner for Detailing, 10 Oz

Overview: Formula 1 Metal Polish is a 10-ounce liquid formula designed to clean, polish, and protect automotive metal surfaces. This all-in-one solution tackles oxidation, brake dust, and tarnish on chrome, aluminum, stainless steel, brass, and copper. Packaged with a convenient foam applicator in the lid, it targets rims, grills, exhausts, and household fixtures.
What Makes It Stand Out: The built-in protective coating distinguishes this from basic polishes, helping prevent future dullness. Its versatility across multiple metal types makes it a true multi-surface solution. The integrated foam applicator keeps hands clean and ensures even distribution. As a recognized automotive brand, Formula 1 delivers consistent, reliable results with clear usage instructions.
Value for Money: At $13.49 for 10 ounces, this polish offers good value. Competing all-in-one polishes range from $8-20, placing this in the reasonable mid-tier. The protective feature adds long-term value by reducing reapplication frequency. While not the cheapest option, the brand reputation and included applicator justify the cost for quality-conscious buyers.
Strengths and Weaknesses: Strengths include the three-in-one formula, protective coating, versatile metal compatibility, convenient applicator, and trusted brand name. It works on both vehicles and household items. Weaknesses: Requires separate buffing cloths, may need multiple applications for heavy oxidation, and the liquid formula can be messy. Not ideal for heavy-duty drill polishing.
Bottom Line: Formula 1 Metal Polish is an excellent choice for users wanting a straightforward, effective polish with protective benefits. Best for hand application on moderately tarnished surfaces, it’s perfect for maintaining vehicle trim and household metals. For $13.49, you get a reliable, versatile product from a trusted name.
9. XTryfun Metal Polish Restorer and Protectant, Chrome Cleaner and Polish for Cars, Removes Oxidation and Discoloration from Metal, Aluminum, Stainless Steel, Brass, Chrome and More

Overview: XTryfun Metal Polish Restorer and Protectant is an $8.99 all-in-one solution featuring natural cleaners and micro-abrasives to eliminate oxidation and discoloration. This heavy-duty formula works on chrome, aluminum, stainless steel, brass, copper, and more, promising restoration in just 30 seconds. Suitable for vehicles, boats, instruments, and jewelry, it aims to simplify metal care.
What Makes It Stand Out: The upgraded natural formula appeals to eco-conscious users, while micro-abrasives tackle pitting without harsh chemicals. Its one-step process saves time—no separate cleaners needed. The 30-second application claim is bold, making it ideal for quick touch-ups. The product works on an exceptionally wide range of metals and surfaces, from car wheels to musical instruments.
Value for Money: At $8.99, this is one of the most affordable quality polishes available. Similar performance polishes typically cost $12-18, offering significant savings. The concentrated formula means a little goes far, enhancing value. While cheaper than premium brands, the effectiveness reportedly matches higher-priced competitors, making it a budget champion.
Strengths and Weaknesses: Strengths include the low price, natural formulation, quick application, versatile surface compatibility, and effective oxidation removal. The one-step process is convenient. Weaknesses: No applicator included, requires separate buffing cloths, and the 30-second claim may not hold for heavily tarnished surfaces. Brand recognition is lower than established competitors.
Bottom Line: XTryfun delivers remarkable value at $8.99. Perfect for budget-minded users needing a versatile, effective metal polish. While it lacks accessories and brand prestige, its performance and eco-friendly formula make it a smart choice for routine maintenance across multiple applications. Ideal for DIYers who already have application cloths.
10. Rolite Chrome Cleaner, 4.5oz, Instant Tarnish Removal & Polishing for Chrome-Plated Surfaces, Motorcycles, Automobiles, Boats, RVs, Bumpers, and Much More

Overview: Rolite Chrome Cleaner is a professional-grade, made-in-USA polish designed for instant tarnish removal on chrome-plated surfaces. This 4.5-ounce cream formula cleans, shines, and protects in one quick step. Trusted by professionals for over 40 years, it targets motorcycles, automobiles, boats, RVs, and bumpers, leaving a protective coating against future damage.
What Makes It Stand Out: The instant action formula delivers immediate results without extensive buffing. As a professional-preferred product with four decades of heritage, it offers proven reliability. The protective coating guards against pitting, fingerprints, rust, and corrosion—features often missing in consumer-grade polishes. Its concentrated cream formula ensures precise application without waste.
Value for Money: At $10.95 for 4.5 ounces, this is a premium-priced product. You’re paying for professional quality and brand legacy rather than volume. While more expensive per ounce than mass-market options, the concentrated formula and superior protection can reduce long-term usage. For enthusiasts seeking showroom-quality results, the investment is justified.
Strengths and Weaknesses: Strengths include professional-grade performance, instant results, durable protective coating, trusted USA manufacturing, and 40-year brand history. The cream formula minimizes mess. Weaknesses: Higher cost per ounce, limited to chrome-plated surfaces (less versatile), small jar size, and no applicator included. Not ideal for aluminum or raw metal.
Bottom Line: Rolite Chrome Cleaner is for perfectionists demanding professional results. At $10.95, it’s worth the premium for chrome-specific applications on prized vehicles. While less versatile than multi-metal polishes, its instant action and superior protection make it invaluable for maintaining show-quality chrome. Best for serious enthusiasts and collectors.
Why Chrome Wheel Care Matters for Motorcycles
Motorcycle chrome endures a fundamentally different life cycle than automotive chrome. Your bike’s wheels face direct exposure to rain, road salt, brake dust, and chain lube overspray—all while spinning at high speeds that generate heat and centrifugal force. This constant assault accelerates oxidation, pitting, and tarnishing far more aggressively than what most car components experience.
Beyond aesthetics, neglected chrome becomes a structural liability. Corrosion can creep beneath the plating, causing it to lift and bubble. Once that happens, you’re not just losing shine; you’re facing expensive re-chroming or replacement. Regular, proper polishing creates a protective barrier that actively repels contaminants and moisture, essentially giving your wheels a self-defense system against the elements.
The Unique Challenges of Motorcycle Chrome
Motorcycle wheels operate in what detailers call a “high-contamination zone.” The front wheel catches every bug, tar flake, and grit particle, while the rear wheel battles chain fling, gear oil mist, and extreme heat from the brake rotor. This dual-threat environment means your polish needs to do double duty: clean aggressively while leaving behind durable protection.
The proximity to mechanical components also matters. Chrome spokes nip at brake calipers, and wheel polish residue can contaminate brake pads if you’re not careful. Plus, the intricate designs of many motorcycle wheels—think wire spokes, intricate cutouts, and narrow crevices—demand polishes with specific application properties that car wheel products rarely address.
Differences Between Car and Motorcycle Chrome Care
Car detailers can afford to be sloppy. Overspray on tire sidewalls? No big deal. Polish dripping into wheel wells? Wipe it up later. On motorcycles, precision is non-negotiable. Your chrome sits inches from hot exhaust headers, rubber seals, and painted surfaces that react badly to harsh chemicals. The polish formulation must be controllable, with minimal sling during application and clean, predictable buffing characteristics.
Temperature cycles also differ dramatically. A motorcycle wheel can go from ambient temperature to scorching hot during a spirited ride, then cool rapidly at a stoplight. This thermal shock causes microscopic expansion and contraction in the chrome layer, making flexible, heat-resistant protective coatings essential for long-lasting results.
Understanding Chrome Types and Finishes
Before you squeeze a single drop of polish onto your wheels, you need to know what you’re working with. Chrome plating isn’t a monolithic process, and using the wrong polish on the wrong type can cause irreversible damage faster than you can say “swirl marks.”
Hard Chrome vs. Decorative Chrome
Hard chrome—technically called industrial chrome—gets applied in thick layers (often 0.02" to 0.04") for wear resistance on components like fork tubes and shock shafts. It’s porous, dull, and rarely seen on wheels. Decorative chrome, what you’re actually polishing, is a microscopically thin layer (0.00002" to 0.00005") deposited over nickel and copper layers for that mirror finish. This plating is incredibly thin—literally thinner than a human hair—and scratches easily with abrasive compounds meant for hard chrome.
The nickel underlayer is your real concern. Aggressive polishing can cut through the chrome, exposing the nickel, which tarnishes rapidly and looks like a dull yellow stain. Quality chrome polishes use precisely calibrated abrasives that clean the chrome without penetrating it, preserving that critical thickness.
OEM vs. Aftermarket Chrome Plating
Factory OEM chrome from manufacturers like Harley-Davidson or Honda typically undergoes rigorous quality control with proper substrate preparation, multiple plating layers, and protective clear coats on some modern wheels. Aftermarket chrome, especially budget options, might skip the copper layer or apply insufficient nickel, making it more susceptible to peeling and corrosion.
This quality difference directly impacts polish selection. Delicate OEM finishes need gentle, non-abrasive formulations, while tougher aftermarket jobs can handle slightly more aggressive compounds. However, the safest approach assumes the thinnest, most delicate plating possible—because discovering your chrome is weak after you’ve polished through it is a costly lesson.
Clear-Coated vs. Bare Chrome
Here’s where many riders get tripped up. Modern chrome wheels, especially on touring bikes and some metric cruisers, come with a factory clear coat to reduce maintenance. Polishing clear-coated chrome with traditional metal polish is like waxing a clear bra—it won’t bond properly and can create a hazy mess. You need a dedicated clear-coat-safe polish that cleans without abrasives.
Bare chrome, found on most classic bikes and custom wheels, accepts traditional polishes but demands more frequent attention. The test? Dab a small amount of metal polish on a hidden area. If it turns black immediately, you’re dealing with bare chrome. If it smears without darkening, you’ve got clear coat.
Key Features to Look for in Chrome Polish
The ingredient list on chrome polish bottles reads like chemistry homework, but understanding these components separates the professionals from the weekend warriors. When evaluating any polish, you’re essentially judging its ability to clean, polish, and protect in a single application.
Abrasiveness Levels and Scratch Prevention
Chrome polishes fall into three categories: chemical cleaners (zero abrasives), fine polishes (micro-abrasives), and cutting compounds (visible grit). For motorcycle wheels, you want the finest abrasives possible—look for terms like “micro-fine,” “jeweler’s rouge grade,” or “non-scratch formula” on the label. The abrasive particles should be smaller than 1 micron to prevent micro-scratches that show up in direct sunlight.
Avoid anything that feels gritty between your fingers or lists “alumina” or “silicon carbide” as primary ingredients unless you’re correcting severe damage. Even then, professional detailers rarely use compounds coarser than 2000-grit equivalent on chrome, as the risk of cutting through the plating is too high.
Chemical Composition and pH Balance
Quality chrome polishes maintain a neutral to slightly acidic pH (5.5-7.0) to dissolve oxidation without attacking the metal. Highly alkaline cleaners (pH 9+) can etch chrome and dull the finish over time. Look for ammonia-free formulations, as ammonia attacks the nickel underlayer and can cause white, irreversible staining.
The best polishes use a combination of mild acids (like citric or oxalic acid) at low concentrations to chemically dissolve tarnish, suspended in a petroleum or water-based carrier. Petroleum bases offer better lubrication and longer working time, while water-based formulas clean up easier and are more environmentally friendly.
UV Protection and Anti-Corrosion Additives
That black residue you wipe away when polishing? It’s not just dirt—it’s oxidation, and it will return without protection. Premium polishes incorporate UV inhibitors that prevent sun damage and anti-corrosion agents like benzotriazole that bond to the metal surface, creating a molecular barrier against moisture and salts.
These additives extend the interval between polishes from weeks to months. For motorcycles ridden daily or stored outdoors, this protection layer is more important than the initial shine. Check for terms like “anti-tarnish sealant,” “corrosion inhibitor,” or “weather-resistant coating” on the product description.
Ease of Application and Buffing
Motorcycle wheels are three-dimensional sculptures with tight spokes and narrow rims. The ideal polish applies thinly, doesn’t dry to a rock-hard haze in seconds, and buffs off with minimal effort. Cream or liquid consistency works better than pastes, which can cake in crevices and require dental picks to remove.
Look for “haze-free” or “easy-on, easy-off” formulations. The polish should remain workable for 3-5 minutes before hazing, giving you time to work it into complex geometries. Quick-drying polishes might seem convenient, but they often leave streaks and make it impossible to achieve uniform coverage on intricate wheel designs.
Application Methods: Getting Professional Results
The polish is only half the equation. Technique determines whether you end up with a concours-worthy finish or a smeary disappointment. Motorcycle wheels demand precision application methods that account for their unique shapes and contamination risks.
Hand Polishing Techniques
For most riders, hand polishing delivers the safest, most controlled results. Use a two-finger technique: wrap a microfiber applicator pad around your index and middle fingers, applying polish in linear strokes along the wheel’s contours—never circles, which create swirl patterns. Work in 6"×6" sections, applying moderate pressure on tarnished areas and feathering to a light touch for final buffing.
For wire spokes, use a shoeshine motion: grip the spoke between thumb and forefinger with the cloth, pulling back and forth while rotating around the spoke. This ensures 360° coverage without missing the backside where corrosion often starts. Spoke nipples require a cotton swab or detailing brush dipped in polish for precise application.
Power Tool Applications
When time is critical or you’re maintaining multiple bikes, power tools can accelerate the process—but with extreme caution. A variable-speed rotary polisher set to 600-800 RPM with a 3" foam cone attachment works for flat wheel surfaces. Keep the tool moving constantly, never dwelling more than 2-3 seconds in one spot, and maintain light pressure. The goal is to heat the polish slightly to activate its cleaners, not to generate friction that melts the chrome.
Never use a wool pad on chrome; it’s too aggressive. And absolutely avoid high-speed grinders or drill attachments marketed as “chrome polishers”—they generate excessive heat and create an irreversible hologram effect. For spokes, stick to hand polishing; power tools will round off edges and create uneven wear patterns.
The Two-Towel Method Explained
Professional detailers swear by this technique for a streak-free finish. The first towel—an edgeless microfiber—applies and works the polish, using one side for application and flipping to a clean side for initial buffing. The second, plush microfiber towel performs the final wipe, removing any microscopic residue.
This prevents re-depositing oxidized polish back onto the surface. For motorcycle wheels, consider a third towel dedicated to crevices and spokes. Label your towels clearly; using a wheel towel on your gas tank can transfer brake dust and cause scratches.
Common Chrome Problems and Solutions
Every rider encounters these issues eventually. Understanding the root cause helps you select the right polish and technique rather than throwing random products at the problem and hoping something sticks.
Tarnishing and Oxidation
That yellowish-brown haze dulling your chrome is sulfur compounds reacting with moisture and oxygen. It’s accelerated by road salt, acid rain, and even fingerprints. For light tarnish, a chemical-cleaner polish with thiourea or citric acid dissolves the oxidation without abrasives. Heavy tarnish requires a micro-fine abrasive polish applied with a damp cloth to keep the cutting action gentle.
Prevention is key: wipe down your wheels with a quick detailer after every ride, especially in winter. This removes contaminants before they can react with the metal. For storage, apply a heavy coat of anti-corrosion polish and cover the bike with a breathable cover, not plastic, which traps moisture.
Pitting and Micro-Corrosion
Those tiny black dots that won’t buff out? That’s pitting—corrosion eating into the chrome itself. Unfortunately, no polish can fix physical damage. However, you can arrest its spread using a polish with phosphoric acid at very low concentration (under 5%) that converts active rust to iron phosphate, stabilizing the surface.
For severe pitting, professional re-chroming is the only true fix. But regular application of a high-quality polish with benzotriazole can prevent pits from expanding by sealing the edges and preventing undercutting. Always address pitting immediately; it’s a cancer that spreads.
Water Spotting Prevention
Hard water spots occur when mineral-laden droplets evaporate, leaving behind calcium and magnesium deposits that etch into the chrome surface. Prevention beats cure: never let your bike air-dry. Use a leaf blower or compressed air to blow water out of spokes and crevices, then follow with a microfiber towel.
If spots have already formed, a polish containing a mild chelating agent like EDTA can dissolve mineral deposits without scratching. For etched spots, you’ll need a polish with 0.5-micron aluminum oxide to level the surface gently. Work in tiny areas and check your progress frequently.
Blueing and Heat Discoloration
Excessive heat from dragging brakes or aggressive riding causes chrome to develop a rainbow-like blue or gold tint. This is oxidation at the molecular level, and it’s permanent. No polish can remove it because the chrome’s structure has changed. However, you can minimize its appearance with a super-fine polish (0.3-micron cerium oxide) that smooths the surface and reduces light diffraction.
Prevention involves addressing the heat source: check brake caliper alignment, ensure proper wheel bearing freeplay, and avoid riding the brakes downhill. For show bikes, consider ceramic-coated exhaust headers to reduce radiant heat transfer to nearby wheel components.
Preparation: The Foundation of Perfect Chrome
Skipping prep work is like painting over rust—it might look okay for a day, but failure is inevitable. Proper preparation removes the contaminants that would otherwise get ground into the chrome during polishing, creating scratches and preventing the polish from bonding.
Cleaning Before Polishing
Start with a dedicated wheel cleaner safe for chrome—pH-neutral, non-acidic, and ammonia-free. Spray liberally and let it dwell for 2-3 minutes to dissolve brake dust and road grime. Use a soft-bristled brush to agitate spokes, nipples, and lug holes. Rinse thoroughly with low-pressure water; high-pressure washers can force water past seals and into wheel bearings.
Follow with a tar and adhesive remover on any black specks that didn’t dissolve. These are typically tar or rubber particles that wheel cleaners can’t touch. Wipe with a microfiber towel, never scrub. The surface should feel smooth to the touch; if you feel bumps or grit, repeat the cleaning process.
Decontamination Steps
Even after cleaning, microscopic iron particles from brake rotors embed themselves in the chrome. Run your fingers across the surface; if it feels like sandpaper, you need a clay bar treatment. Use a fine-grade clay bar lubricated with detailing spray, working in straight lines with light pressure. You’ll feel the bar grabbing initially, then smoothing out as contaminants lift away.
For severe contamination, an iron fallout remover (the kind that turns purple as it reacts) chemically dissolves embedded particles. This is crucial before polishing because these particles will act like sandpaper under your polish pad, creating scratches that are nearly impossible to remove without professional help.
Surface Assessment
Before touching polish, inspect the chrome under direct sunlight or a bright LED light. Look for peeling, flaking, or cloudy areas that indicate failing plating. Polishing compromised chrome accelerates its demise. Also identify the worst tarnished sections to plan your polishing strategy—heavily oxidized areas need more product and pressure, while good sections just need a maintenance coat.
Take photos of problem areas. This documentation helps you track whether a polish is actually improving the surface over multiple applications or if you’re just moving oxidation around.
The Polishing Process Step-by-Step
With prep complete, it’s time for the main event. This systematic approach ensures you don’t miss spots, don’t create new problems, and achieve a uniform, mirror finish that holds up to scrutiny.
Sectioning Your Work Area
Divide each wheel into quadrants: front face, rear face, outer lip, and spokes. Polish one quadrant completely before moving to the next. This prevents the polish from drying out and gives you manageable sections to focus on. For wire wheels, break down further: polish all spokes in one section, then the rim, then the hub.
Use painter’s tape to mask off brake rotors, tire sidewalls, and any painted surfaces that touch the wheel. Polish residue on brake rotors reduces stopping power and requires brake cleaner to remove. On the tire, it creates a brown stain that’s nearly permanent.
Working in Small Areas
Apply a pea-sized amount of polish to your applicator—more isn’t better, it just creates waste and caking. Spread it thinly over a 4"×4" area, working it until it turns from glossy to a light haze. This indicates the abrasives have broken down and the protective oils are bonding. Immediately buff with your first microfiber towel using straight, overlapping strokes.
For spokes, use a shoelace technique: thread a microfiber cloth through the spoke gap, grip both ends, and saw back and forth. This polishes both sides simultaneously and reaches the nipple base where corrosion loves to hide.
Buffing to a Mirror Finish
The final buff is where amateurs falter. Use a clean, plush microfiber towel and minimal pressure—let the towel do the work. Buff in the direction of light reflection, not random circles. On curved surfaces, follow the contour with the towel wrapped around your fingers, using a light, flicking motion to lift any remaining residue.
Inspect each section with a handheld LED light at a low angle. Any haze, streaks, or swirl patterns will be visible. If you see issues, apply a tiny amount of polish to a clean area of your buffing towel and perform a final wipe. The goal is a surface so reflective you can read text in it.
Protecting Your Polished Chrome
Polishing without protection is like washing your bike before a rainstorm—pointless. The protective layer is what maintains that shine and reduces how often you need to repeat this labor-intensive process.
Sealants vs. Waxes
Traditional carnauba waxes create a warm, deep shine but melt at temperatures above 180°F—easily reached by a wheel sitting in summer sun. Synthetic polymer sealants withstand temperatures up to 400°F and last 3-4 times longer. For motorcycles, sealants are the clear winner.
Look for sealants specifically formulated for metal, not paint. They contain anti-corrosive agents that bond to chrome at a molecular level. Apply them thinly with a foam applicator, wait for the recommended flash time (usually 10-15 minutes), then buff with a clean microfiber. The surface should feel slick, not tacky.
Frequency of Reapplication
Daily riders in harsh climates should apply a protective sealant every 4-6 weeks. Weekend warriors can stretch to 8-12 weeks. The water beading test is your indicator: if water no longer beads and rolls off, it’s time to reapply. Don’t wait for tarnish to reappear—by then, you’re starting the polishing process over.
After each ride, use a spray sealant or quick detailer as a booster. These products contain the same protective agents in a diluted form, topping up your main sealant layer without requiring a full re-polish.
Storage Considerations
How you store your bike matters more than what you polish it with. Indoor storage with consistent humidity below 50% is ideal. For outdoor storage, invest in a breathable, waterproof cover with a soft inner lining. Before covering, always apply a fresh coat of anti-corrosion polish, even if the bike looks clean.
During winter storage, go heavy on protection. Apply two coats of sealant, then a final coat of corrosion inhibitor spray designed for marine applications. These products are designed for saltwater environments and provide unmatched protection against moisture. Place desiccant packs inside the wheel spokes to absorb trapped humidity.
Mistakes to Avoid When Polishing Motorcycle Chrome
Even seasoned riders make these errors, turning a simple maintenance task into a restoration nightmare. Learn from others’ mistakes to keep your chrome pristine and your wallet intact.
Over-Polishing Risks
Chrome plating is finite. Every polishing session removes an infinitesimal amount of metal. Polish a wheel 50 times with even the gentlest compound, and you’ll eventually wear through to the nickel layer. The solution? Polish only when necessary, not on a schedule. If your wheels still bead water and show no tarnish, skip the polish and just apply a sealant.
Also avoid “chasing perfection.” That microscopic scratch you can only see with a flashlight? Leave it alone. Repeated polishing to remove invisible flaws is how you prematurely age your chrome.
Using Wrong Materials
Steel wool, scouring pads, and even some “chrome-safe” brushes will scratch. Stick to 100% cotton or microfiber. Never use paper towels—they contain wood fibers that act like sandpaper under pressure. And absolutely never use household cleaners like Ajax or Comet; they’re far too alkaline and contain abrasives designed for porcelain, not precious metal plating.
Another common mistake is using the same applicator pad for multiple products. A pad that applied polish yesterday still contains oxidized residue that will scratch today. Use fresh pads for each session, or wash them in hot water with dish soap, rinsing until the water runs clear.
Environmental Factors
Polishing in direct sunlight causes the product to flash-dry, creating a rock-hard haze that’s miserable to remove. The heat also expands the metal, causing the polish to cure unevenly. Always work in shade with the wheel cool to the touch. Ideal temperature is 60-75°F with humidity below 60%.
Wind is another enemy. It blows dust onto your wet polish, creating grit that scratches. If you must work outdoors, use a portable canopy and position your bike with your body blocking the wind. Better yet, wait for a calm day. Your patience will be rewarded with a flawless finish.
Frequently Asked Questions
How often should I polish my motorcycle chrome wheels? Polish only when you see visible tarnish or when water stops beading—typically every 2-3 months for daily riders, or 4-6 months for occasional use. Over-polishing wears down the thin chrome layer prematurely.
Can I use car chrome polish on my motorcycle wheels? While chemically similar, car polishes don’t account for motorcycle-specific issues like chain fling or extreme heat cycles. Look for formulations specifically mentioning motorcycle or “high-temperature” applications for best results.
What’s the difference between chrome polish and aluminum polish? Aluminum polishes contain coarser abrasives designed to cut through aluminum’s tough oxidation layer. Using them on chrome will scratch the surface. Chrome polishes use micro-fine abrasives and gentler chemical cleaners suitable for thin plating.
Will chrome polish remove rust from my spokes? Surface rust will dissolve with chemical-action polishes containing phosphoric acid. However, deep rust that has pitted the chrome cannot be polished away—the physical damage is permanent. Prevention is critical.
Is hand polishing better than using a buffer on motorcycle wheels? For intricate motorcycle wheels with spokes and tight crevices, hand polishing offers better control and prevents damage. Power buffers are suitable only for large, flat wheel surfaces and require expert technique to avoid burning through plating.
How do I know if my chrome has a clear coat? Test an inconspicuous area with a small amount of traditional metal polish. If it turns black, you have bare chrome. If it smears without darkening, it’s clear-coated and requires a dedicated clear-coat-safe product.
Can I polish chrome wheels that are already peeling or flaking? No. Polishing will accelerate the peeling and create a patchy, uneven appearance. Peeling chrome needs professional re-plating. Polishing should only be performed on intact surfaces.
What’s causing the blue discoloration on my chrome exhaust pipes near the wheels? Blueing is heat oxidation from excessive temperatures, often caused by lean fuel mixture or exhaust leaks. No polish can remove it. Address the mechanical issue first, then use a fine polish to minimize the appearance if desired.
Should I remove my wheels to polish them properly? For thorough results, especially on wire wheels, removal is ideal. It allows access to the inner rim and hub areas. However, careful masking and proper tools can achieve excellent results with wheels installed if you’re diligent about cleaning crevices.
How do I prevent water spots after washing? Never air-dry. Use compressed air or a leaf blower to remove water from spokes and crevices, then immediately follow with a microfiber towel. Apply a spray sealant after each wash to create a hydrophobic barrier that repels water before it can evaporate and leave minerals behind.