That pristine, crystal-clear view through your windshield can disappear in what feels like an instant, replaced by a hazy film of stubborn water spots that no amount of regular washing seems to fix. Whether you’re dealing with the aftermath of a surprise rainstorm, overzealous sprinkler systems, or mineral-laden hard water from your home wash, these blemishes are more than just cosmetic—they’re a genuine safety hazard that diffuses light and impairs visibility. The good news? The right glass polish can restore optical clarity without replacing the glass, saving you hundreds of dollars and frustration.
But here’s the thing: not all glass polishes are created equal, and choosing the wrong one can either leave you with lackluster results or, worse yet, permanently etched glass. This comprehensive guide cuts through the marketing hype and armchair advice to give you the expert knowledge you need to select and use the perfect glass polish for your specific water spot situation. We’ll explore the science behind these pesky spots, break down the different types of polishes and their applications, and equip you with professional-grade techniques that deliver showroom results.
Top 10 Car Glass Polish
Detailed Product Reviews
1. Griot’s Garage Fine Glass Polish, Car Window, Windshield Polishing Cleaner for Automotive and Home, Removes Stains and Water Spots, 11017, 16 oz

Overview: Griot’s Garage Fine Glass Polish delivers professional-grade results for both automotive and household glass surfaces. This 16-ounce liquid formula targets mild water spots, stains, and contamination on windshields, sunroofs, side windows, and even shower doors. Designed as a maintenance solution rather than heavy-duty restoration, it restores optical clarity while creating a slick surface that improves wiper performance and longevity.
What Makes It Stand Out: The product’s versatility across automotive and home applications sets it apart from single-purpose cleaners. Its compatibility with dual-action orbital polishers and dedicated glass pads transforms it from a manual cleaner into a machine-aided polish. The formulation actively extends wiper blade life by creating an ultra-smooth glass surface, reducing friction and skipping—a unique benefit most competitors don’t address.
Value for Money: At $27.99 for 16 ounces ($1.75 per ounce), this polish sits in the premium category but offers reasonable value for Griot’s Garage quality. The concentrate goes further than expected, and its dual-purpose nature eliminates need for separate household glass cleaners. Compared to professional detailing services, it pays for itself after one use.
Strengths and Weaknesses: Strengths:
- Effective on mild water spots and surface stains
- Extends wiper blade lifespan significantly
- Works on both automotive and household glass
- Compatible with orbital polishers for faster results
- Gentle enough for regular maintenance
Weaknesses:
- Requires additional polishing pads and potentially a machine
- Not suitable for deep scratches or heavily etched water spots
- Premium price point may deter casual users
Bottom Line: Ideal for enthusiasts who already own polishing equipment, Griot’s Garage Fine Glass Polish excels as a maintenance product that delivers streak-free clarity while protecting your wiper investment. Skip it if you need heavy scratch removal or prefer manual-only application.
2. Invisible Glass 91411 Glass Stripper – Hard Water Spot Remover – Strips Coatings, Waxes, Oils & Road Film – Preps Windshields for Rain Repellent & Ceramic Coating – 4 Fl Oz

Overview: Invisible Glass 91411 Glass Stripper serves a specialized role as a deep-cleaning prep agent rather than a traditional polish. This 4-ounce concentrate strips away waxes, silicones, oils, tar, and road film to create a pristine bonding surface for rain repellents and ceramic coatings. It also tackles stubborn hard water stains and mineral deposits, though it won’t repair etched glass.
What Makes It Stand Out: Its singular focus on surface preparation distinguishes it from general-purpose cleaners. The American-made formula uses aggressive cleaning agents to dissolve contaminants that prevent coatings from adhering properly. Unlike polishes that add fillers or oils, this stripper leaves glass surgically clean, ensuring maximum longevity for subsequent protective treatments.
Value for Money: At $10.99 for just 4 ounces ($2.75 per ounce), it’s actually more expensive per ounce than many polishes, but its concentrated power justifies the cost for its intended purpose. You use it sparingly as a prep step, not regularly. For detailers applying coatings, it’s essential insurance that ensures proper bonding and customer satisfaction.
Strengths and Weaknesses: Strengths:
- Excellent surface preparation for coatings and repellents
- Removes stubborn water spots and mineral deposits
- Strips contaminants that other cleaners miss
- Made in USA with quality ingredients
- Concentrated formula requires minimal product
Weaknesses:
- Very small 4-ounce bottle limits applications
- Will not remove etched-in water spots
- Not a polish—doesn’t improve glass texture
- Requires thorough rinsing and safety precautions
Bottom Line: This is a specialist’s tool, not a daily driver. Purchase Invisible Glass Stripper specifically as a pre-coating treatment to ensure flawless adhesion. For general cleaning or scratch removal, look elsewhere.
3. Glass Polish 5 inch P500 ProMesh Pre-Polish Abrasive disc for Glass Restoration - 20 Pack

Overview: These P500 ProMesh abrasive discs represent a completely different approach to glass restoration—mechanical abrasion rather than chemical polishing. This 20-pack of 5-inch hook-and-loop discs uses silicon carbide grit to refine glass surfaces after scratch removal, creating an ideal foundation for final polishing compounds. Designed for professional glass workers and serious DIY enthusiasts, they’re essential for multi-stage restoration.
What Makes It Stand Out: The P500 grit hits the sweet spot between aggressive material removal and surface refinement. Unlike liquid polishes that work on the surface, these discs physically level the glass, making them uniquely capable of preparing heavily damaged surfaces. The hook-and-loop backing ensures quick changes during multi-step processes, critical for efficiency in professional settings.
Value for Money: At $39.95 for 20 discs, each disc costs roughly $2. For professional use, this is excellent value—one disc can handle multiple windows. For DIYers, the investment only makes sense if you already own a compatible polishing system. Compared to replacing glass, the cost is negligible, but it’s overkill for minor water spots.
Strengths and Weaknesses: Strengths:
- Superior surface refinement for heavily damaged glass
- Durable silicon carbide maintains cutting power
- Hook-and-loop backing enables fast disc changes
- Professional-grade results when used correctly
- Cost-effective alternative to glass replacement
Weaknesses:
- Requires a polishing machine and water feed system
- Steep learning curve for beginners
- Not suitable for light cleaning or maintenance
- Generates glass dust requiring safety equipment
- Overkill for minor water spots or stains
Bottom Line: These discs are indispensable for professional glass restoration but represent serious overkill for the average car owner. Buy them only if you’re tackling deep scratches or performing multi-stage glass correction with proper equipment.
4. SONAX PROFILINE GlassPolish (250 ml) - removes slight scratches, blinding and etching from car windows made from glass. Silicone free | Item No. 02731410

Overview: SONAX PROFILINE GlassPolish brings German engineering to automotive glass correction. This 250-milliliter (8.45-ounce) silicone-free formula targets slight scratches, blinding (microscopic pitting), and chemical etching that degrade visibility. Unlike maintenance cleaners, this is a true corrective polish that physically abrades glass to restore optical clarity. It’s specifically formulated for automotive windows and requires mechanical application.
What Makes It Stand Out: The silicone-free composition ensures no oily residues interfere with subsequent coatings or treatments—a critical detail for professional detailers. Its ability to address etching and blinding goes beyond typical water spot removers, tackling the root causes of visibility issues. The German manufacturing pedigree promises consistent quality and performance.
Value for Money: Priced at $22.95 ($2.71 per ounce), it competes directly with premium brands. The smaller 250ml bottle suits hobbyists better than high-volume shops, but the concentrated formula means a little goes far. For German car enthusiasts or those prioritizing silicone-free products, the slight premium over domestic options is justified.
Strengths and Weaknesses: Strengths:
- Silicone-free formulation prevents contamination
- Effective on light scratches and etching
- German quality and consistency
- Concentrated formula provides multiple applications
- Professional-grade results with proper technique
Weaknesses:
- Requires felt pad and rotary polisher at specific 1000 rpm
- Not effective on deep scratches
- Smaller bottle size limits professional use
- Demands careful technique to avoid glass damage
- Higher price per ounce than some competitors
Bottom Line: SONAX PROFILINE excels for enthusiasts needing corrective glass polishing without silicone contamination. Ensure you have the required rotary polisher and felt pad before purchasing—this isn’t for casual wipe-down applications.
5. Bianca Glass Polishing Liquid D1, Bomini Car Glass Polishing Compound, Car Compound Windshield Oil Film Remover for Anti-Fog Hydrophobic Coating Spray,Removes Swirls,Scratches,Wiper Marks (2PCS)

Overview: The Bianca Glass Polishing Liquid D1 positions itself as an all-in-one solution for budget-conscious consumers. Sold as a two-pack, this compound removes oil films, light scratches, and wiper marks while simultaneously applying anti-fog and hydrophobic coatings. The included sponge applicator enables manual application without expensive equipment, targeting everyday drivers rather than professional detailers.
What Makes It Stand Out: Its dual-action approach—polishing and protecting in one step—delivers immediate convenience and lasting benefits. The added anti-fog and hydrophobic properties create a protective barrier that repels water and reduces future cleaning frequency. At this price point, including an applicator sponge demonstrates remarkable value for casual users wanting professional-like results.
Value for Money: At $9.99 for a two-pack, this is the most budget-friendly option by far. Even if each bottle contains only a few ounces, the cost-per-application remains extremely low. While it may lack the heavy-cutting power of professional compounds, the included protective coating eliminates need for separate treatments, multiplying its value.
Strengths and Weaknesses: Strengths:
- Exceptional affordability with two bottles included
- Built-in anti-fog and hydrophobic protection
- Sponge applicator included—no tools needed
- Easy manual application process
- Effective on oil films and light wiper marks
Weaknesses:
- Undisclosed bottle size raises quantity concerns
- Limited effectiveness on deep scratches or etching
- Protective coating durability is unproven long-term
- Vague “professional” claims may oversell capabilities
- Requires reapplication for maintained protection
Bottom Line: Perfect for budget-minded drivers wanting quick visibility improvement and water repellency without equipment investment. Manage expectations for heavy defect removal, and you’ll find excellent value in this convenient two-pack.
6. Nu Finish Glass Restore & Repel Kit, Two Step Regimen for Car Windshield, Includes Polishing Compound, Ceramic Sealant, Precision Applicator Tool, and 2 Reusable Sponges

Overview: The Nu Finish Glass Restore & Repel Kit offers a comprehensive two-step solution for drivers seeking crystal-clear windshields. This complete kit includes a glass polishing compound, ceramic sealant, precision applicator, and two reusable sponges designed to tackle everything from water spots to road grime in one package.
What Makes It Stand Out: This kit’s dual-action approach sets it apart. Step one uses a powerful polishing compound to strip away layers of buildup, while step two applies a durable ceramic sealant promising up to two years of protection. The precision applicator tool ensures even distribution, and the inclusion of reusable sponges demonstrates thoughtful value. The formula specifically targets rainy night visibility, claiming 100% improvement—a bold promise for safety-conscious drivers.
Value for Money: At $23.99, this kit costs less than a single professional detailing session while delivering comparable results. The two-year protection claim significantly extends value compared to monthly treatments. With four ounces of polish and two ounces of sealant, there’s sufficient product for multiple applications across your vehicle’s glass surfaces.
Strengths and Weaknesses: The complete kit nature eliminates guesswork, and clear instructions make it accessible for beginners. The long-lasting ceramic coating provides excellent water repellency. However, the 90-minute cure time requires planning, and the cloudy haze during drying might concern impatient users. The two-ounce sealant bottle feels small relative to the polish quantity.
Bottom Line: Ideal for DIY enthusiasts wanting professional-grade results without recurring costs. The Nu Finish kit delivers lasting protection and improved visibility, making it a smart investment for regular vehicle maintenance.
7. Cerium Oxide Glass Polishing Kit - Remove Scratches, Water Spots & Restore Clarity | Windshield Scratch Remover with Polish & Sealant | Complete DIY Kit
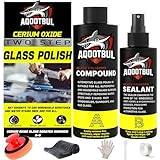
Overview: The Cerium Oxide Glass Polishing Kit positions itself as a professional-grade DIY solution for removing stubborn scratches and water spots from automotive glass. This all-in-one package includes cerium oxide polish, protective sealant, manual polishing tool, microfiber cloth, gloves, scraper, and protective tape—everything needed for a complete restoration.
What Makes It Stand Out: The high-concentration cerium oxide formula delivers pro-level cutting power without glass damage. Unlike competitors requiring rotary tools, this kit includes a manual polisher for precise control, making it genuinely beginner-friendly. The comprehensive accessory package—particularly the safety gloves and protective tape—shows attention to detail rarely seen in DIY kits.
Value for Money: At $25.99, this kit undercuts professional glass restoration services by hundreds of dollars. The all-inclusive nature means zero additional purchases, and the manual tool eliminates expensive equipment needs. While the six-month sealant protection is shorter than some alternatives, the initial restoration quality justifies the price.
Strengths and Weaknesses: The complete kit eliminates guesswork, and the manual polisher provides excellent control for delicate work. Professional-grade results are achievable with minimal experience. However, hand-polishing large windshields can be physically demanding, and the six-month protection period requires more frequent reapplication than ceramic alternatives. The sealant quantity may limit multiple vehicle applications.
Bottom Line: Perfect for dedicated DIYers tackling moderate glass damage. This kit bridges the gap between consumer products and professional services, delivering impressive clarity improvements with thoughtful included accessories.
8. 3D Glass Polish – Cerium Oxide Glass Scratch Remover for Car Windows – Restores Clarity & Removes Wiper Marks, Swirls, Water Spots - 16oz

Overview: 3D Glass Polish is a professional-grade cerium oxide formula designed for serious enthusiasts and detailers. This substantial 16-ounce bottle targets wiper marks, water spots, and fine scratches on automotive glass, emphasizing minimal effort with maximum results through its extended workability formula.
What Makes It Stand Out: The large volume and pro-oriented formulation distinguish this product. Designed specifically for rotary polishers with felt pads, it offers serious correction power with minimal waste. The extended open time allows for precise work without rushing, crucial for achieving flawless results on large surfaces. It also serves as an ideal prep step for ceramic coatings, enhancing their bonding and durability.
Value for Money: At $32.99 ($2.06 per ounce), this represents strong value for professionals who use glass polish regularly. The 16-ounce quantity handles multiple vehicles or repeated applications. However, the requirement for a rotary polisher and felt pad adds hidden costs for casual users, making it less economical for one-time DIY projects.
Strengths and Weaknesses: The professional-grade formula delivers exceptional clarity restoration with less product waste. Extended workability prevents premature drying and streaking. The large bottle size suits frequent users. Conversely, it’s not beginner-friendly—requiring equipment and experience. The lack of included sealant means additional purchases for complete protection, and the price point intimidates occasional users.
Bottom Line: Best suited for professional detailers or committed enthusiasts already equipped with rotary tools. For those users, 3D Glass Polish offers unmatched efficiency and results, but novices should consider more complete kits.
9. Rain-X 5080217 X-treme Clean Glass Cleaner - 12 fl oz.
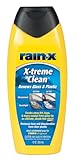
Overview: Rain-X X-treme Clean Glass Cleaner is a budget-friendly, heavy-duty solution for stripping stubborn residues from automotive glass. This 12-ounce bottle focuses on deep cleaning rather than polishing, serving as both a standalone cleaner and optimal prep for Rain-X Original Treatment application.
What Makes It Stand Out: The dual-purpose formulation works effectively on both glass and headlights, removing haze, discoloration, bug residue, and road grime. Its specific design as a Rain-X prep product ensures compatibility and enhanced performance with subsequent treatments. The gentle yet effective stripping action improves wiper blade performance without harsh abrasives.
Value for Money: At $5.68 ($0.47 per ounce), this is exceptionally affordable. It provides professional-level cleaning at a fraction of kit prices. For drivers already using Rain-X products, it eliminates compatibility concerns while extending the life of treatments. However, as a cleaner-only product, it doesn’t replace complete restoration kits for scratched or etched glass.
Strengths and Weaknesses: The low price point makes regular maintenance economical, and the versatile formula works on multiple surfaces. It effectively preps glass for coatings and improves visibility. The Rain-X brand reputation ensures reliability. On the downside, it doesn’t remove deep scratches or water spots, contains no polishing compound, and offers no protective sealant. Users seeking complete restoration must purchase additional products.
Bottom Line: An excellent maintenance product for Rain-X users and budget-conscious drivers. While not a full restoration solution, it delivers outstanding cleaning value and serves as an essential prep step for protective treatments.
10. E.J. Wheaton Glass Wax, Polishes and Protects Windows, Mirrors and Metal Surfaces, Dries Chalk White, Easy to Apply and to Remove, Made in USA
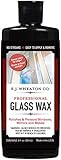
Overview: E.J. Wheaton Glass Wax represents a traditional approach to glass care, offering a multi-surface polish and protectant for windows, mirrors, and metal surfaces. This American-made product applies dark pink and dries to a chalk white finish, providing an old-school alternative to modern ceramic coatings.
What Makes It Stand Out: The versatile formula works across glass, mirrors, and metal, making it a true multi-surface product. Its unique application method—applying by hand and buffing to a chalky finish—harkens back to classic car care techniques. The made-in-USA heritage appeals to traditionalists, and the easy removal even after extended drying adds practical flexibility.
Value for Money: At $14.99 ($1.87 per ounce), it occupies a middle ground between budget cleaners and premium restoration kits. The multi-surface capability stretches value across household and automotive applications. However, modern ceramic coatings offer longer-lasting protection, making this more of a specialty or nostalgic purchase than a cutting-edge solution.
Strengths and Weaknesses: The product excels in versatility and ease of manual application. It keeps surfaces cleaner longer and removes effortlessly, even in sunlight. The traditional formula is time-tested. Conversely, it won’t remove scratches or etching, the chalk residue requires thorough buffing, and protection duration falls short of modern alternatives. The pink-to-white transition may confuse first-time users.
Bottom Line: A niche product perfect for classic car enthusiasts and those valuing multi-surface convenience. While outperformed by modern ceramics for pure automotive glass protection, its charm and versatility make it worthwhile for specific users seeking traditional care methods.
Understanding Water Spots: The Science Behind the Stains
The Mineral Menace: How Hard Water Leaves Its Mark
Water spots aren’t just dried water—they’re geological deposits on your glass. When water evaporates, it leaves behind concentrated minerals like calcium, magnesium, and various salts that bond to the microscopic pores in your glass surface. Think of it like scale buildup in your shower, but on a surface where optical clarity is critical. These minerals don’t just sit on top; they form a chemical bond with the glass, which is why your standard car shampoo is about as effective as washing a chalkboard with water.
The severity of these spots depends entirely on your local water hardness. Areas with high mineral content can leave deposits that are visible within hours of drying, while softer water might take repeated exposures to show damage. But regardless of source, once those minerals cure in direct sunlight, they become increasingly difficult to remove with each passing day.
Etching vs. Deposits: Knowing Your Enemy
Here’s a critical distinction that will determine your entire approach: surface deposits versus etched glass. Fresh mineral deposits sit on top of the glass and can often be dissolved with the right chemical treatment. However, if left untreated for weeks or months, these minerals can actually eat into the glass itself, creating microscopic pits and valleys—a process called etching.
Etched water spots are physically part of the glass structure, meaning you can’t simply dissolve them away. They require mechanical abrasion to level the surface back to smooth. Using a chemical polish on etched spots is like trying to sand wood with soap—it won’t work, and you’ll waste time and product. Understanding which type you’re dealing with is step one in choosing the right polish.
Why Regular Car Wash Soap Won’t Cut It
Your favorite pH-balanced car shampoo is engineered to encapsulate dirt and oils so they can be rinsed away, but it’s not designed to break mineral bonds. In fact, many car soaps contain gloss enhancers that can actually seal water spots onto the glass, making them even more stubborn. The surfactants simply don’t have the chemical chops to dissolve calcium carbonate or magnesium deposits.
Moreover, the lubricants in car soap prevent you from applying any meaningful mechanical force. Even if you scrub vigorously with a wash mitt, you’re just moving the minerals around, potentially creating micro-scratches while leaving the spots firmly intact. This is why a dedicated glass polish—formulated specifically for mineral removal and glass correction—is non-negotiable for real results.
Glass Polish vs. Glass Cleaner: Clearing the Confusion
Let’s settle this common point of confusion: glass cleaners remove oils, fingerprints, and light dust. Glass polishes remove physical imperfections like water spots, light scratches, and etching. Using a glass polish when you only need a cleaner is overkill and wastes product. Conversely, using glass cleaner on water spots is like bringing a squirt gun to a structure fire.
Many modern glass polishes do contain cleaning agents, but their primary function is correction through either chemical dissolution or mechanical abrasion. Think of it this way: cleaner = maintenance; polish = restoration. You should only reach for a polish when your glass has visible defects that cleaning can’t address.
Types of Car Glass Polishes for Water Spot Removal
Abrasive Polishes: When You Need Serious Correction
Abrasive polishes contain fine particles that physically grind away a microscopic layer of glass to create a smooth, level surface. These are your go-to for etched water spots, light scratches, and heavy mineral buildup. The abrasives—typically aluminum oxide or cerium oxide—are measured in microns and work similarly to sandpaper, but at a scale invisible to the naked eye.
The key with abrasive polishes is using the least aggressive approach that gets the job done. Starting with a heavy-cut compound on lightly spotted glass is like using a sledgehammer to hang a picture—you’ll get results, but you might remove more material than necessary. Professional detailers work in graduated steps, starting with a fine polish and only moving to more aggressive compounds if needed.
Chemical Polishes: Dissolving Minerals Without Scrubbing
Chemical polishes rely on acids or chelating agents to break down mineral deposits without any abrasive action. These are ideal for fresh water spots that haven’t etched into the glass. The active ingredients—often mild acids like sulfamic acid or powerful chelates—target the calcium and magnesium bonds, literally dissolving the spot from the surface.
The beauty of chemical polishes is their zero-risk factor for adding scratches. Since there’s no abrasion, you can’t create new defects. However, they’re completely ineffective on etched spots, and overuse can potentially affect surrounding paint or trim if you’re not careful with application. They’re a specialized tool for a specific problem.
Hybrid Formulations: Best of Both Worlds
The latest generation of glass polishes combines mild abrasives with chemical cleaners, offering a two-pronged attack. These hybrids first dissolve what they can chemically, then use micro-abrasives to polish away any remaining residue and minor etching. For enthusiasts who don’t want to keep multiple products on hand, these offer excellent versatility.
The trade-off is that hybrids are rarely the absolute best at either function. They might not be aggressive enough for heavy etching or strong enough for severe mineral deposits. But for moderate, mixed-condition water spots, they strike an outstanding balance between effectiveness and simplicity.
DIY Natural Remedies: Do They Really Work?
The internet is awash with home remedies—vinegar, lemon juice, baking soda paste. Here’s the honest truth: white vinegar (acetic acid) can work on very fresh, light mineral deposits because it’s a mild acid. But it’s slow, requires significant dwell time, and smells terrible. More importantly, it does nothing for etching and can damage surrounding paint if it drips and dries.
Baking soda is alkaline, not acidic, so it doesn’t dissolve minerals—it just provides a gentle abrasive that can micro-scratch your glass while barely touching the spots. Lemon juice is citric acid, which is stronger than vinegar but still weak compared to professional formulations, and the sugars can leave a sticky residue. For the cost of a proper polish and the risk to your glass, DIY solutions simply aren’t worth it for anything beyond the most minor spots.
Key Ingredients That Make Glass Polishes Effective
Cerium Oxide: The Professional’s Secret Weapon
Cerium oxide is the gold standard for glass polishing, used by optical manufacturers and professional detailers alike. This rare-earth compound has a unique chemical structure that both chemically reacts with glass and provides gentle mechanical polishing action. It’s exceptionally effective at removing etching while leaving a flawless, optically clear finish.
What makes cerium oxide special is its self-breaking-down property. As you polish, the particles fracture into smaller pieces, automatically transitioning from cutting to finishing. This means a single product can correct and refine in one step. However, quality varies dramatically—low-grade cerium oxide can contain impurities that scratch, while pharmaceutical-grade material delivers professional results.
Mild Abrasives: Balancing Power and Safety
Beyond cerium oxide, glass polishes may contain aluminum oxide, silicon carbide, or diamond powder at various micron sizes. The key is that these abrasives must be harder than glass (which has a Mohs hardness of about 5.5) but not so aggressive that they create deep scratches. Quality polishes use precisely graded particles with uniform size—cheap polishes have irregular particles that can leave unpredictable results.
The concentration matters too. A polish with 5% abrasives will work slowly and safely, while one with 30% will cut faster but requires more skill to avoid overheating the glass. For DIY users, a medium concentration with fine particles offers the best safety-to-performance ratio.
Chelating Agents: Breaking Mineral Bonds
Chelates like EDTA (ethylenediaminetetraacetic acid) or citric acid derivatives are the unsung heroes of chemical polishes. These molecules wrap around calcium and magnesium ions, literally pulling them away from the glass surface. Think of them as molecular claws that grab minerals and hold them in solution so they can be wiped away.
The effectiveness depends on concentration and pH. Too weak, and they can’t overcome the mineral-glass bond. Too strong, and they might affect other surfaces. Professional formulations balance these factors and often include indicators that change color when the chelate is saturated, telling you when to wipe and reapply.
Lubricants: Preventing Further Damage
Whether abrasive or chemical, all quality glass polishes contain lubricants that allow the pad to glide smoothly. These prevent the “grab” that can cause chatter marks or uneven polishing. Water-based lubricants are common and easy to clean up, while oil-based lubricants provide longer working time but require more cleanup.
The lubricant system also helps suspend removed minerals and spent abrasives so they don’t re-deposit on the glass. This is why you should never let a polish dry completely on glass—once the lubricant evaporates, you’re just rubbing dry abrasives across the surface, which can cause scratching.
Features to Consider When Choosing a Glass Polish
Abrasion Levels: Matching Polish to Damage Severity
Glass polishes typically fall into three categories: light polish (1-3 microns), medium-cut (3-8 microns), and heavy correction (8+ microns). Light polishes are for maintenance and very fresh spots. Medium-cut handles most etched spots and moderate buildup. Heavy correction is for severe etching and should be used sparingly.
The mistake most people make is reaching for the heavy stuff first. Always start with the finest polish that might work—you can always step up aggressiveness, but you can’t put glass back once it’s removed. Many manufacturers now use a “cut rating” system from 1-10, making it easier to select the right product for your situation.
Applicator Compatibility: Pads, Cloths, and Machines
Your polish choice must match your application method. Hand-application polishes are typically creamier with longer working times. Machine polishes are often thinner to prevent clogging foam pads. Some polishes work exclusively with microfiber pads, while others require foam or felt.
If you plan to use a dual-action polisher, ensure the polish is specifically labeled as machine-safe. Using a hand polish in a machine can sling product everywhere and create uneven results. Conversely, machine polishes often dry too quickly for effective hand application. Check the manufacturer’s recommendations before buying.
Cure Time and Workability: Efficiency Matters
Workability refers to how long the polish stays wet and effective before drying out. In hot, sunny conditions, a polish with short workability will dry before you can properly work it, leading to frustration and poor results. In cooler climates, overly long workability means you’re waiting around for the product to be ready to remove.
Professional-grade polishes often have “temperature-tuned” formulations that work across a wide range. For DIYers who polish occasionally, a polish with moderate workability (5-10 minutes) offers the best flexibility. Avoid anything that dries in under 3 minutes or stays wet for more than 15 minutes unless you have specific climate needs.
Residue and Cleanup: The Aftermath
Some polishes wipe off cleanly with a microfiber cloth, while others leave an oily residue that requires a dedicated glass cleaner to remove. Water-based residues are easiest to clean but may evaporate too quickly in heat. Oil-based residues provide excellent lubrication but can smear if not completely removed.
Consider where you’ll be working. If you’re polishing in your garage and can follow up with a thorough cleaning, residue is less of an issue. If you’re working outdoors with limited supplies, a polish that leaves minimal residue will save you headaches. Read reviews specifically about cleanup before making your choice.
Scent and VOCs: User Experience Considerations
Glass polishes range from odorless to strongly scented. While scent doesn’t affect performance, it impacts your polishing experience—especially in enclosed spaces. VOCs (volatile organic compounds) are a health consideration; low-VOC formulas are better for indoor use and environmental impact.
Some states, particularly California, have strict VOC regulations that limit available products. If you live in such an area, ensure any polish you order online complies with local laws. For those sensitive to chemicals, water-based, low-VOC polishes with natural scents are increasingly available, though they may sacrifice some performance.
Manual vs. Machine Application: Pros and Cons
Hand Polishing: Precision and Control
Hand polishing with a microfiber applicator pad gives you ultimate control, especially on curved windshields and tight corners. You can feel the resistance change as spots break down, and you’re less likely to over-polish a specific area. It’s also quieter, requires no power source, and has virtually no learning curve.
The downside is fatigue. Polishing an entire windshield by hand can take 30-45 minutes of constant pressure and motion, and results depend heavily on your consistency. Uneven pressure leads to uneven correction. Hand polishing is best for spot treatments or small windows rather than full vehicle glass correction.
Machine Polishing: Power and Consistency
A rotary or dual-action polisher covers large areas quickly with perfectly consistent pressure and motion. What takes 45 minutes by hand can be done in 10 minutes with a machine, with more uniform results. Machines also generate heat through friction, which can help chemical polishes work more effectively.
The trade-off is risk. A rotary polisher can generate enough heat to crack glass if left in one spot too long. Dual-action polishers are safer but still require practice to avoid sling and maintain proper pad contact. Machines also can’t easily reach the corners of most windshields, requiring hand work for those areas anyway.
Dual-Action Polishers: The Sweet Spot for Beginners
For most car enthusiasts, a dual-action (DA) polisher represents the perfect compromise. The random orbital motion prevents heat buildup while still providing mechanical correction power. Modern DA polishers designed for glass use lower speeds (1,000-2,500 OPM) and feature smaller throw patterns for better control on vertical surfaces.
When choosing a DA polisher for glass, look for models with adjustable speed triggers, ergonomic handles for vertical work, and vibration dampening. You’ll also need a glass-specific backing plate (usually 3-4 inches) and compatible pads. The initial investment pays for itself after one use compared to professional detailing costs.
Step-by-Step Guide to Polishing Car Glass
Preparation: Setting the Stage for Success
Start with a thorough wash using a dedicated glass cleaner to remove surface dirt, oils, and wax residue. Any contamination trapped under your polishing pad will act like sandpaper, creating scratches. Clay barring the glass after washing is non-negotiable for professional results—it pulls out embedded contaminants that washing misses.
Next, mask off all surrounding paint, trim, and rubber seals with painter’s tape. Polishing residue can stain porous trim, and accidental contact with your polisher can mar paintwork. Cover your dashboard and seats with an old sheet to catch any sling. Finally, work in the shade on cool glass—hot glass causes polish to dry instantly and can lead to thermal shock cracks.
The Polishing Process: Technique Matters
Apply a nickel-sized amount of polish to your pad and spread it across a 2x2 foot section at low speed to prevent sling. Increase speed to the manufacturer’s recommendation (usually 3-4 on a DA polisher) and work in overlapping passes using moderate pressure. The key is keeping the pad flat—tilting concentrates pressure and can create uneven wear.
Work the polish until it becomes nearly transparent or begins to dry, typically 3-5 minutes per section. For hand polishing, use tight, overlapping circular motions with firm, even pressure. The polish will break down and become smoother as you work—this is normal. Never let the polish dry completely on the glass; if it does, mist with water and continue briefly before wiping off.
Inspection: Knowing When You’re Done
After wiping away residue with a clean microfiber, inspect the glass from multiple angles. Use a bright LED flashlight held at a low angle to highlight any remaining spots—the light will catch edges of imperfections. If spots remain, repeat the process. If they’re gone but the glass looks hazy, you’ve either used too aggressive a polish or haven’t refined the finish enough.
For final inspection, run your bare hand across the glass. It should feel perfectly smooth, like ice. Any roughness indicates remaining contamination or incomplete polishing. Don’t skip this tactile check—your fingers can detect imperfections your eyes might miss, especially on tinted windows where visual inspection is harder.
Safety Considerations: Protecting Yourself and Your Vehicle
Paint and Trim Protection: Avoiding Collateral Damage
Glass polish on automotive paint is a disaster waiting to happen. Even the finest glass abrasives are too aggressive for clear coat and will leave visible scratches. Always tape off edges with 3/4-inch painter’s tape, extending at least an inch onto the glass and onto the paint. For textured plastic trim, consider using a liquid trim mask that peels off after polishing.
Pay special attention to windshield wipers—remove them if possible, or cover them completely with tape and plastic bags. Polish residue can destroy the rubber compound, leading to streaking and chatter. If polish does contact paint or trim, immediately wipe it off with a damp microfiber and follow up with a quick detailer spray to neutralize any remaining chemicals.
Respiratory Protection: Breathing Easy
Even “low-VOC” polishes generate fine particulate dust as abrasives break down. This dust can irritate lungs and contains trace amounts of the minerals you’re removing. Always wear a N95 or better respirator, not just a dust mask. If your polish contains acids or strong chelates, ensure your respirator is rated for chemical vapors as well.
Work in a well-ventilated area, even when outdoors. If using a machine polisher, the spinning action aerosolizes the polish, creating a fine mist you can easily inhale. Take regular breaks in fresh air, and if you experience any throat irritation or coughing, stop immediately and ventilate the area better before continuing.
Eye Safety: Don’t Take Chances
A spinning pad can fling polish directly into your eyes at surprising velocity. Polishing compounds contain chemicals and abrasives that can cause serious eye damage. Safety glasses are the minimum; a full face shield is better, especially when machine polishing overhead glass like windshields.
Keep a bottle of sterile eye wash nearby, not just tap water. If polish contacts your eyes, flush them for a full 15 minutes and seek medical attention. Don’t rub your eyes while polishing—abrasive dust on your fingers can cause corneal scratches. It’s a simple precaution that can prevent a life-altering injury.
Preventing Future Water Spots: Proactive Measures
Drying Techniques: The First Line of Defense
The best water spot remover is prevention. After every wash, dry your glass immediately using a dedicated waffle-weave microfiber towel or a car dryer blower. The goal is zero air-drying time, especially in hard water areas. If you must air dry, a rinseless wash with deionized water as a final rinse can prevent mineral deposition.
For daily drivers, keep a quick detailer spray and microfiber in your car. When you notice water spots forming—like after a surprise rain shower—wipe them off before they have a chance to bake in the sun. This 30-second intervention can save hours of polishing later.
Protective Coatings: Sealing the Surface
After polishing, apply a glass coating or sealant to create a hydrophobic barrier. These products cause water to bead and roll off before it can evaporate and leave minerals behind. Silica-based coatings last 6-12 months and provide excellent protection, while simpler polymer sealants need reapplication every 1-2 months.
The key is applying these to perfectly clean, polished glass. Any remaining spots or oils will be sealed under the coating, making them permanent until the coating wears off. Some modern coatings even contain mild UV inhibitors that slow the etching process if spots do form.
Parking Strategies: Location, Location, Location
Where you park matters more than any product. Avoid parking near sprinklers, even if you think they’re not hitting your car—wind carries fine mist surprisingly far. Covered parking is ideal, but if you must park outdoors, consider a car cover for extended periods. For daily parking, position your car so morning dew evaporates evenly, preventing concentrated spotting.
In areas with acid rain or industrial fallout, rinse your glass weekly with distilled water, even if the car doesn’t appear dirty. This prevents the combination of mineral and chemical etching, which is exponentially harder to remove than simple water spots.
Common Mistakes That Make Water Spots Worse
Polishing in direct sunlight is the cardinal sin of glass correction. The heat causes polish to dry instantly, reducing working time and increasing the risk of baking residue onto the glass. Even worse, the thermal shock from applying cool polish to hot glass can cause stress cracks, especially on older windshields with existing chips.
Using too much pressure is another frequent error. With abrasive polishes, excessive pressure generates too much heat and can actually embed minerals deeper into the glass surface. It also causes pad deformation, leading to uneven polishing. Let the polish and pad do the work—moderate, consistent pressure yields better results than brute force.
Finally, skipping the clay bar step is a mistake that guarantees disappointment. That rough, gritty feeling on your glass is embedded contamination that will be dragged across the surface by your polishing pad, creating a spiderweb of fine scratches that are more noticeable than the original water spots. Always clay before you polish, no exceptions.
Professional vs. DIY: When to Call in the Experts
DIY glass polishing is absolutely achievable for moderate water spots, but there are clear lines where professional intervention makes sense. If your glass has severe etching that you can feel with your fingernail, or if you’ve already attempted polishing with poor results, a professional with optical grade equipment can save the glass. The same applies to tinted windows—improper polishing can destroy window film, while pros know how to work around it.
Cost is a factor too. A quality DA polisher, pads, polish, and accessories will run $200-300. If you only have one vehicle with minor spots, paying a detailer $100-150 to handle it might be more economical. However, if you maintain multiple vehicles or plan to polish regularly, the DIY investment pays for itself quickly. Consider your situation honestly—there’s no shame in admitting a job is beyond your equipment or skill level.
Cost Considerations: Budgeting for Clear Glass
Entry-level glass polish kits with hand applicators start around $20-30 and are sufficient for mild spots on a single vehicle. Mid-range options with enough product for multiple uses and basic machine compatibility run $40-70. Professional-grade polishes with cerium oxide and advanced formulations can cost $80-120 for a single bottle, but a little goes a long way.
Don’t forget the hidden costs: quality microfiber towels ($5-10 each), painter’s tape ($10), clay bar kits ($20), and potentially a polisher ($100-300). Factor in replacement pads ($10-15 each) that wear out after 3-5 uses. The total investment for a complete DIY setup approaches $300, but it’s reusable for years. Compare this to $150-400 per professional treatment, and the math favors DIY if you have more than one vehicle or need regular treatments.
Environmental Factors: Climate and Water Spot Severity
Your local climate dramatically affects both water spot formation and polishing strategy. In arid, hard-water regions like the Southwest, spots form quickly and etch deeply due to intense sun and high mineral content. You’ll need more aggressive polishes and should consider polishing twice a year as preventative maintenance.
Coastal areas present a unique challenge: salt spray combines with hard water to create spots that are both mineral and corrosive. These require polishes with corrosion inhibitors and may need a two-step chemical-then-abrasive approach. In humid climates, spots form more slowly but can be harder to remove because the constant moisture prevents complete curing of the mineral bond.
Cold climates bring their own issues. Water spots that freeze and thaw undergo expansion and contraction that accelerates etching. If you live where road salt is used, spots can contain salt crystals that are highly abrasive during removal. Always adjust your polish choice and technique to your regional challenges.
Maintaining Your Results: Long-Term Glass Care
After investing time and money in polishing, maintaining that clarity is crucial. Establish a weekly glass maintenance routine: spray with a 50/50 mix of distilled water and isopropyl alcohol, wipe with a clean microfiber. This removes fresh spots before they etch and eliminates oils that reduce visibility.
Every three months, apply a booster sealant to maintain hydrophobic properties. These spray-on products take minutes to apply and recharge your protective coating. Inspect your glass monthly using the angled flashlight technique to catch new spots early. The sooner you address them, the easier they are to remove.
Finally, keep your windshield washer reservoir filled with a quality fluid that contains water softeners, not just cheap blue stuff. When you spray your wipers, you want the water to clean without adding new spots. Some premium fluids even leave a light hydrophobic coating with each use, providing constant protection.
Frequently Asked Questions
How do I know if my water spots are etched or just surface deposits?
Run your fingernail across the spot. If you feel a noticeable bump, it’s a surface deposit. If it feels smooth or you feel a slight indentation, it’s etched. You can also spray the glass with water—surface deposits will disappear when wet and return when dry, while etched spots remain visible regardless of moisture.
Can I use the same polish on my windshield and side windows?
Yes, but with caveats. Windshields are laminated safety glass and can handle more aggressive polishing. Side and rear windows are tempered glass, which is under internal tension and more prone to thermal shock. Use less pressure and lower speeds on tempered glass, and avoid heavy-cut compounds unless absolutely necessary.
Will polishing remove my window tint?
If the tint is on the interior (standard for most vehicles), exterior polishing won’t affect it. However, if you’re polishing interior glass or have aftermarket tint on the exterior, any mechanical polishing will destroy the film. Always verify tint location and type before polishing, and use only chemical polishes on tinted surfaces.
How often should I polish my car’s glass?
Polish only when necessary, not on a schedule. Over-polishing thins the glass and can eventually cause distortion. With proper preventative care, you should only need to polish every 1-2 years. If you’re polishing more frequently, improve your drying and protection methods instead of repeatedly correcting the same issues.
Can glass polish fix wiper blade streaks and scratches?
Light wiper scratches and rubber deposits, yes. Deep scratches that catch your fingernail, no. Glass polish can remove the haze and minor etching from worn wiper blades, but if the metal blade holder has gouged the glass, you’re looking at replacement, not restoration. Prevention through regular wiper replacement is key.
Is it safe to polish glass in cold weather?
Polishing below 50°F (10°C) is problematic. Polishes don’t break down properly, and condensation can interfere with the process. If you must polish in cool weather, work in a heated garage and warm the glass with a hair dryer (not a heat gun) before starting. Never polish frozen or frost-covered glass—the thermal shock can cause immediate cracking.
What’s the difference between glass polish and headlight restoration polish?
Headlight polish is formulated for polycarbonate plastic, not glass. Using headlight polish on glass is ineffective—it lacks the hardness to cut glass minerals. Conversely, glass polish on headlights will destroy the plastic with deep scratches. They’re not interchangeable, despite similar packaging and marketing.
Can I apply a ceramic coating immediately after polishing?
Yes, and you should. Polishing leaves the glass surface in its most pure, contaminant-free state—the perfect bonding surface for coatings. However, you must first remove all polishing oils using an isopropyl alcohol wipe-down. Any residue will interfere with coating adhesion. Apply the coating within a few hours of polishing before airborne contaminants settle on the glass.
Why do my water spots keep coming back in the same pattern?
This indicates etching that wasn’t fully removed. You’re polishing away the mineral deposits but not the microscopic pits in the glass. When new water lands in these pits, it evaporates faster in the depressed areas, leaving spots that appear in the exact same location. You need a more aggressive polish or more working time to level the surface completely.
Are expensive glass polishes really worth the cost?
For severe etching or professional results, absolutely. Premium polishes contain purer abrasives, more effective chelating agents, and better lubrication systems that produce superior results with less effort and risk. For mild, occasional spots, a budget polish may suffice. Consider it a cost-per-use equation—a $100 polish that lasts five years is cheaper than replacing a $400 windshield.