Your trailer works as hard as you do, hauling everything from weekend toys to essential equipment through rain, snow, salt, and gravel. While you’re focused on what you’re towing, your trailer’s undercarriage is engaged in a silent battle against corrosion, moisture intrusion, and road debris damage. This hidden war zone is where asphalt-based undercoating transforms from a “nice-to-have” into critical armor. Unlike passenger vehicles, trailers face unique vulnerabilities—longer exposure times between uses, less frequent washing, and direct contact with splash and spray that can linger for days. Choosing the right asphalt-based undercoating isn’t just about rust prevention; it’s about extending your investment’s lifespan by decades while maintaining structural integrity that keeps your cargo safe.
But here’s the challenge: not all asphalt undercoatings are created equal, and the wrong choice or improper application can trap moisture instead of repelling it, creating a corrosion accelerator rather than a barrier. This comprehensive guide cuts through marketing hype and focuses on the technical specifications, application methodologies, and critical decision factors that separate professional-grade protection from disappointing failures. Whether you’re protecting a brand-new aluminum utility trailer or salvaging a vintage steel boat trailer, understanding these core principles will ensure your undercoating investment delivers maximum ROI.
Top 10 Asphalt-based Undercoating
Detailed Product Reviews
1. Bondo 737 Heavy Duty Rubberized Undercoating Spray – 18 oz Aerosol, 5-Pack, Textured Finish, Chip and Abrasion Resistant, Non-Paintable, Asphalt-Based
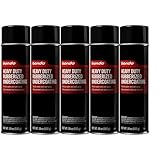
Overview: Bondo 737 delivers professional-grade undercarriage protection in a convenient aerosol format, offered as a five-pack for comprehensive coverage. This asphalt-based formula creates a durable, rubberized barrier that shields vulnerable vehicle areas from rust, chips, and weather damage. The textured finish provides both aesthetic appeal and enhanced protective qualities, making it suitable for wheel wells, undercarriages, and various non-automotive applications like gutters and posts.
What Makes It Stand Out: The single-coat application sets this product apart, delivering robust coverage without dripping or sagging—critical for DIY users lacking professional spray equipment. Its versatility extends beyond automotive use to tree wound sealing and roofing applications. The five-pack configuration ensures you have adequate material for complete vehicle treatment, while the sound-deadening properties add functional value by reducing road noise and vibration in cabin areas.
Value for Money: At $89.99 for five 18-ounce cans (approximately $18 per can), this package offers substantial savings compared to professional undercoating services that can cost $150-300 per vehicle. The asphalt-based formula provides heavy-duty protection rivaling more expensive polyurethane alternatives, though the non-paintable nature limits customization. For DIY enthusiasts treating multiple vehicles or needing large-area coverage, the bulk packaging delivers excellent cost efficiency.
Strengths and Weaknesses: Strengths include exceptional chip resistance, true single-coat coverage, impressive versatility across applications, and effective sound dampening. The textured finish adheres tenaciously to properly prepared surfaces. Weaknesses involve the non-paintable formula restricting color matching, strong asphalt odor requiring ventilation, limited flexibility once cured, and potential compatibility issues with certain plastics or rubber components.
Bottom Line: Ideal for DIY mechanics seeking professional-level undercarriage protection without equipment investment. Best suited for daily drivers, work trucks, and restoration projects where function trumps aesthetics. Prepare surfaces meticulously and apply in well-ventilated areas for optimal results.
2. Henry Black Asphalt Rubber-Based Driveway Crack Repair 1 gal.

Overview: Henry’s Black Asphalt Crack Repair offers a straightforward solution for maintaining asphalt driveways, delivering a gallon of ready-to-use, rubberized filler designed for cracks up to half an inch wide. This direct-from-container formula eliminates mixing hassles, providing homeowners with professional-grade materials for preventative maintenance. The asphalt-based composition ensures compatibility with existing pavement while creating a weather-resistant seal.
What Makes It Stand Out: The material’s exceptional temperature resistance prevents softening in summer heat and cracking in winter cold, addressing a common failure point in cheaper fillers. Its direct-application design means no specialized tools beyond a pour pot or squeegee are required. The tight, flexible seal expands and contracts with pavement movement, significantly extending repair longevity compared to rigid compounds that quickly fail.
Value for Money: Priced at $74.49 per gallon ($18.62 per quart-equivalent), this professional-grade formula costs more than entry-level latex options but delivers superior durability that reduces reapplication frequency. A single gallon covers approximately 200-300 linear feet of half-inch cracks, making it economical for moderate driveway maintenance. Compared to hiring contractors at $1-3 per linear foot, DIY application yields substantial savings for property owners willing to invest minimal labor.
Strengths and Weaknesses: Strengths include immediate readiness, superior weather resistance, excellent adhesion to clean asphalt, and genuine flexibility that prevents re-cracking. The material self-levels reasonably well and cures to a natural black finish. Weaknesses involve the half-inch crack width limitation (requiring separate patching for larger damage), messy application that stains skin and clothing, extended curing times in cool weather, and strong solvent odors during application.
Bottom Line: Perfect for proactive homeowners maintaining asphalt surfaces before damage escalates. Most effective when applied during warm, dry weather to properly prepared cracks. For extensive alligator cracking or potholes, supplement with patch material. Delivers professional results without professional pricing.
3. KBS UnderCoat Aerosol Solvent-Based Asphalt

Overview: KBS UnderCoat provides targeted automotive protection through a solvent-based asphalt formula delivered in a convenient aerosol can. Designed for precision application on wheel wells, frames, quarter panels, and undercarriages, this product creates a tough yet flexible matte black film that actively prevents salt corrosion. The formulation balances durability with paintability, offering versatility that many asphalt-based undercoatings lack.
What Makes It Stand Out: Unlike competing non-paintable undercoatings, KBS UnderCoat allows topcoating with automotive paints after proper curing, enabling color-matched or enhanced finishing. Its exceptional adhesion to both bare metal and painted surfaces eliminates compatibility concerns. The product’s sound-deadening properties effectively reduce road noise and vibration, while the solvent-based carrier penetrates seams and crevices more effectively than water-based alternatives, providing superior hidden corrosion protection.
Value for Money: At $37.57 for a single aerosol can, KBS positions itself as a premium product in the spray-undercoating category, costing more than basic rubberized sprays but less than two-part professional systems. Coverage varies by application thickness, but one can typically treats a single vehicle’s wheel wells and partial undercarriage. For restoration projects requiring paintable protection, the ability to avoid purchasing separate primer and topcoat systems justifies the higher price point.
Strengths and Weaknesses: Strengths include paintable formulation, excellent penetration into tight spaces, strong corrosion resistance against road salts, flexible film that resists cracking, and professional matte finish. The aerosol format enables precise application without equipment. Weaknesses involve significant solvent fumes requiring respirator use and excellent ventilation, longer curing times than water-based alternatives, potential incompatibility with some undercoating guns if decanted, and thinner build per coat requiring multiple applications for maximum protection.
Bottom Line: Excellent choice for restoration enthusiasts and DIY detailers requiring a paintable undercoating solution. Best applied in controlled environments with proper safety equipment. Ideal for spot repairs, partial restorations, or as a base coat before final painting. Not the most economical for full vehicle treatment but unmatched for paintable flexibility.
Why Your Trailer Needs Asphalt-Based Undercoating Protection
Trailers operate in what corrosion engineers call “severe exposure conditions”—a classification that demands aggressive protection strategies. Unlike daily-driven vehicles that benefit from regular undercarriage flushing from rain and car washes, trailers often sit for extended periods with road grime, de-icing chemicals, and moisture clinging to every surface. This stagnant, corrosive soup is particularly devastating to weld points, seams, and areas where components bolt to the frame. Asphalt-based undercoating creates a self-healing, flexible barrier that actively displaces water while absorbing impact from stones and debris, making it uniquely suited for the trailer environment.
Understanding the Unique Challenges Trailer Undercarriages Face
The structural design of trailers creates protection challenges passenger vehicles rarely encounter. Cross-members, outriggers, and mounting brackets create countless crevices where moisture becomes trapped. The lack of heat from a running engine means these areas never dry out naturally. Additionally, trailer frames experience significantly more flex and vibration during transport, causing rigid coatings to crack and delaminate. Asphalt’s inherent flexibility and adhesive properties allow it to move with the metal rather than against it, maintaining continuous coverage even under dynamic load conditions.
What Is Asphalt-Based Undercoating and How Does It Work?
At its core, asphalt-based undercoating is a suspension of refined bitumen, corrosion inhibitors, and adhesion promoters in a solvent or water-based carrier. When applied, the carrier evaporates, leaving behind a thick, tar-like film that physically isolates metal from environmental threats. Modern formulations have evolved far beyond simple roofing tar, incorporating sophisticated additives that actively neutralize road salts and provide UV resistance to prevent brittleness. The key differentiator from rubberized or wax-based alternatives lies in asphalt’s density and permanent flexibility—it’s heavy enough to resist wash-off yet remains pliable enough to bridge small cracks and surface imperfections.
The Science Behind Asphalt’s Protective Properties
Asphalt’s molecular structure creates a hydrophobic (water-repelling) matrix that works through both physical barrier action and capillary break principles. When water contacts a properly applied asphalt coating, surface tension causes it to bead and roll off rather than penetrate. More importantly, the coating’s thickness—typically 15-30 mils when cured—creates a thermal barrier that reduces condensation formation on the metal surface underneath. Advanced formulations include sulfonate-based rust inhibitors that chemically bond to ferrous metals, creating a secondary protection layer that remains active even if the asphalt film is mechanically compromised.
Key Benefits of Choosing Asphalt-Based Formulations for Trailers
The decision to use asphalt over other undercoating types hinges on several trailer-specific advantages. First, asphalt provides superior stone-chip resistance due to its density and energy-absorbing properties—a critical factor when you’re towing at highway speeds over gravel roads. Second, its excellent adhesion to poorly prepared surfaces (while not recommended) offers forgiveness that polymer coatings don’t. Third, asphalt-based products typically provide 5-7 years of protection before reapplication, compared to 2-3 years for wax-based alternatives. Finally, the material cost per square foot is generally 40-60% lower than synthetic rubberized coatings, making it economical for large trailer undercarriages.
Essential Features to Evaluate Before Purchasing
When evaluating asphalt undercoatings, focus on specifications rather than marketing claims. Look for products with a minimum solids content of 60%—this indicates less solvent and more protective material. The presence of aluminum flake additives boosts UV reflectivity and extends service life by 30-40%. Check for ASTM B117 salt spray resistance ratings; quality formulations should exceed 500 hours without failure. VOC compliance is non-negotiable; ensure the product meets EPA standards for your region. Finally, consider the recoat window—premium products allow reapplication within 24-48 hours without lifting, crucial for achieving proper thickness in multiple coats.
Viscosity and Coverage Rates: Getting the Most Value
Viscosity directly impacts both application ease and final protection. Products measuring 80-120 KU (Krebs Units) offer the sweet spot—thick enough to build proper film thickness in one coat yet fluid enough to spray without excessive thinning. Coverage rates typically range from 25-40 square feet per gallon depending on surface roughness and application method. However, beware of products claiming excessive coverage; this usually indicates low solids content that will require multiple coats to achieve adequate protection. For a standard 20-foot tandem axle trailer, budget 2-3 gallons for complete coverage, including inside frame rails and cross-members.
Dry Time and Curing Process: Planning Your Application
Understanding cure mechanics prevents costly mistakes. Most asphalt undercoatings dry to the touch within 2-6 hours, but full cure takes 7-14 days depending on ambient temperature and humidity. During this curing period, the coating remains vulnerable to solvent wash-off from rain or dew. Plan applications during dry weather with temperatures between 60-85°F and relative humidity below 70%. Some advanced formulations incorporate quick-dry technology using fast-evaporating solvents, reducing tack-free time to under an hour—these are ideal for professional shops where turnaround time is critical.
Temperature Resistance: Performance in Extreme Conditions
Trailer undercarriages experience temperature extremes from -40°F in winter storage to over 200°F near brake assemblies. Quality asphalt undercoating maintains flexibility across this range without cracking or flowing. Look for products with a softening point above 180°F (measured via ASTM D36) and cold crack resistance below -20°F. This ensures the coating won’t sag or drip when parked on hot asphalt in summer or shatter when encountering road spray in freezing conditions. Premium formulations include polymer modifiers that improve low-temperature flexibility by up to 50% compared to standard asphalt products.
Preparation Steps That Make or Break Your Application
The finest undercoating cannot overcome poor surface preparation—a fact that accounts for 90% of premature failures. The process begins with a systematic evaluation of the trailer’s current condition. New trailers require removal of factory cosmoline or shipping wax, while used trailers demand aggressive rust and scale removal. The goal is bare, clean metal free of contaminants that could interfere with adhesion. This isn’t negotiable: asphalt undercoating applied over rust, grease, or loose paint will delaminate within months, often trapping moisture and accelerating corrosion hidden beneath the failed coating.
Surface Cleaning: Why Spotless Metal Is Non-Negotiable
Start with pressure washing at 2,500-3,000 PSI to remove loose debris and surface grime. Follow with a degreasing step using a petroleum-based solvent or heavy-duty degreaser applied with a scrub brush—pay special attention to areas near axles and suspension where grease accumulates. For new trailers, wipe down all surfaces with wax and grease remover using a two-towel method (one to apply, one to dry). The final step involves wiping with a clean, lint-free cloth dampened with denatured alcohol. Perform a water-break test: if water beads on the surface, contamination remains and you must repeat cleaning. Only proceed when water sheets evenly across the metal.
Rust Treatment Protocols for Existing Corrosion
For trailers with existing rust, mechanical removal is mandatory. Use a needle scaler or wire wheel to remove all loose scale, then treat remaining surface rust with a phosphoric acid-based rust converter that chemically transforms iron oxide into a stable, paintable iron phosphate layer. Never apply asphalt undercoating over active, flaking rust—it will fail catastrophically. After rust conversion, rinse thoroughly and allow 48 hours of dry time. For severe pitting, consider applying an epoxy primer before undercoating; while this adds cost, it provides a stable base that prevents rust from continuing underneath the asphalt barrier.
Application Techniques for Professional-Grade Results
Professional results require more than pointing a spray gun and pulling the trigger. The application environment matters immensely: work in a well-ventilated area with minimal dust, away from direct sunlight that causes skinning. Warm the product to 70-75°F before application—this reduces viscosity and improves atomization. For best results, remove wheels and fenders to access hidden areas. Apply in multiple light passes rather than one heavy coat; this prevents runs and ensures proper film build. Always start at the front and work rearward, coating the top of frame rails first, then vertical surfaces, finally the bottom.
Spray vs. Brush vs. Roll-On: Pros and Cons
Spray application using an undercoating gun with a 2.0-2.5mm tip delivers the most uniform coverage and reaches inaccessible areas. It requires an air compressor delivering 6-8 CFM at 90 PSI. Brush application offers superior control for complex areas and ensures better penetration into seams but is labor-intensive and difficult to achieve consistent thickness. Roll-on methods work for flat surfaces but cannot adequately coat the complex geometry of trailer frames. A hybrid approach often yields best results: spray the main frame and cross-members, then brush-coat critical welds, seams, and brackets where extra thickness is beneficial.
Achieving Proper Thickness Without Over-application
Film thickness is critical—too thin and protection fails; too thick and the coating remains soft, attracting dirt and debris. Use a wet-film thickness gauge during application to verify 20-30 mils wet, which cures to 15-25 mils dry. Apply two coats of 15-20 mils each rather than one heavy coat. The first coat should be a “tack coat” that penetrates seams and covers all surfaces. Allow 30-60 minutes of flash time, then apply the second “build coat” to achieve final thickness. Inspect with a flashlight after application to identify thin spots or holidays—areas missed by the coating that will become corrosion initiation points.
Common Mistakes That Void Protection and Waste Money
The most expensive undercoating is the one that fails prematurely due to preventable errors. Applying over wet surfaces is the cardinal sin—even morning dew can cause delamination. Another critical error is coating over factory undercoating without testing compatibility; some OEM coatings contain silicone that repels asphalt-based products. Underestimating drying time accounts for countless failures; driving before full cure allows road spray to wash away uncured material. Perhaps most damaging is the “more is better” mentality—excessive thickness prevents proper curing, leaving a tacky surface that traps dirt and holds moisture against the metal, creating the exact problem you’re trying to prevent.
Maintenance and Reapplication Schedules for Longevity
Even the best asphalt undercoating isn’t permanent. Establish an annual inspection protocol, preferably in spring after winter exposure. Look for cracking, peeling, or thinning in high-impact areas near wheels. Pay attention to color changes—greying indicates UV degradation, while whitening suggests salt contamination. Touch up damaged areas immediately using the same product; spot repairs blend invisibly if done within the product’s recoat window. For trailers used in coastal or heavy de-icing salt regions, plan a full reapplication every 3-4 years. Inland trailers with moderate use can extend to 5-7 years. Never wait for visible rust to appear—that indicates the coating has already failed.
Inspecting Your Undercoating: What to Look For
Effective inspection requires more than a casual glance. Use a bright LED light and inspection mirror to view hidden areas. Tap the coating with a small hammer—solid adhesion produces a sharp tap sound while delaminated areas sound dull. Probe suspicious areas with a blunt awl; if it penetrates easily, the coating has lost flexibility and requires replacement. Check thickness annually using an ultrasonic coating thickness gauge; readings below 10 mils indicate it’s time for reapplication. Document your findings with photos to track degradation over time, helping you optimize reapplication intervals for your specific usage patterns.
Environmental and Safety Considerations
Modern asphalt undercoatings have evolved significantly in environmental responsibility, but safety remains paramount during application. Always work in areas with active ventilation—outdoors is ideal, but if using a garage, employ exhaust fans to maintain air changes. Wear appropriate PPE: chemical-resistant gloves, eye protection, and a respirator with organic vapor cartridges (not just a dust mask). Protect surrounding surfaces with heavy-duty plastic sheeting; overspray is nearly impossible to remove from concrete and vehicles. Consider the environmental impact of solvents; water-based formulations reduce VOC emissions by 70% but may sacrifice some durability and require longer cure times.
VOC Regulations and Compliance
Volatile Organic Compound (VOC) regulations vary dramatically by state and are tightening nationwide. Most quality asphalt undercoatings now comply with the EPA’s National AIM rule limiting VOCs to 450 g/L, but California’s CARB standards are stricter at 250 g/L. Using non-compliant products can result in hefty fines, especially for commercial operators. Check the product’s Technical Data Sheet for VOC content and ensure it matches your location’s requirements. Water-based formulations offer the lowest VOCs but demand impeccable surface preparation and longer cure times—often 30 days for full chemical resistance. For most trailer owners, a compliant solvent-based product offers the best balance of performance and practicality.
Cost Analysis: Budgeting for Quality Protection
Total project cost extends far beyond the product price tag. A gallon of premium asphalt undercoating typically runs $25-45, covering approximately 30 square feet at proper thickness. For DIY application, factor in $50-100 for prep materials (degreaser, rust converter, PPE) and $75-150 for equipment if you don’t own a compressor and spray gun. Professional application ranges from $400-800 for a standard trailer, including labor and materials. While DIY saves money, the learning curve is steep—budget an extra gallon for practice and mistakes. The real cost consideration is failure: re-doing a botched job costs double, while replacing a rusted frame runs into thousands. Spending 20% more on premium product and proper prep yields 300% better longevity.
Professional Application vs. DIY: Making the Right Choice
The DIY approach appeals to hands-on trailer owners, but success demands specific conditions: climate-controlled workspace, quality equipment, and meticulous attention to detail. If you cannot guarantee 48 hours of dry, moderate weather and have limited experience with spray equipment, professional application offers better value. Shops specializing in undercoating possess heated booths, lift equipment for complete access, and experience with proper film thickness control. They also warranty their work, providing recourse if premature failure occurs. Consider your trailer’s value: a $10,000+ trailer justifies professional application cost, while a $1,500 utility trailer might be perfect for a careful DIY project. Hybrid options exist—prep the trailer yourself and pay a shop for application only, cutting costs by 40% while ensuring professional results.
How Undercoating Affects Trailer Warranties and Insurance
Before applying any undercoating, review your trailer’s warranty documentation. Some manufacturers void corrosion warranties if aftermarket coatings are applied, arguing that improper application can trap moisture. However, most warranties only cover perforation from the inside out, not external rust, making undercoating a wise investment regardless. Document the application process with photos and receipts—this demonstrates due diligence if rust issues arise. From an insurance perspective, undercoating doesn’t typically affect premiums but can be presented as evidence of proper maintenance in total-loss valuations. For commercial trailers, undercoating may reduce inspection failures and extend DOT certification intervals, providing operational cost benefits beyond rust prevention.
Troubleshooting Common Application Issues
Even experienced applicators encounter problems. Orange peel texture indicates the product was too cold or applied from too great a distance—warm the material and maintain 6-8 inches from the surface. Runs and sags result from excessive application speed or too-heavy coats—apply lighter passes and allow proper flash time between coats. Fish-eyeing (coating pulling away in spots) signals surface contamination—stop immediately and re-clean with wax and grease remover. If the coating remains tacky after 48 hours, humidity is too high or the coat is too thick—move to a drier environment and consider applying a light mist of fast-evaporating solvent to accelerate cure. Always test the product on a small, inconspicuous area first to identify compatibility issues before committing to the entire trailer.
Frequently Asked Questions
1. How long does asphalt-based undercoating last on a trailer?
With proper application and annual maintenance, quality asphalt undercoating provides 5-7 years of protection for trailers used in moderate climates. Coastal areas or regions with heavy road salt reduce lifespan to 3-4 years. The key is annual inspection and immediate touch-up of damaged areas.
2. Can I apply asphalt undercoating over existing rust?
Never apply over active, flaking rust. Remove loose scale mechanically, then treat remaining surface rust with a phosphoric acid-based rust converter. The undercoating will seal in converted rust but cannot stop active corrosion. Severe rust requires professional evaluation and possible structural repair first.
3. What’s the best time of year to undercoat my trailer?
Late spring or early fall offers ideal conditions: temperatures between 60-85°F, low humidity, and minimal precipitation. Avoid summer heat that causes rapid solvent evaporation and winter cold that prevents proper curing. Check extended forecasts for 3-4 days of dry weather.
4. Will asphalt undercoating add significant weight to my trailer?
A properly applied coating adds approximately 15-25 pounds to a standard 20-foot trailer. The protection far outweighs the minimal weight penalty. Excessive application can add 50+ pounds and causes curing problems, so stick to recommended thickness.
5. Can I paint over asphalt-based undercoating?
Standard paints won’t adhere to asphalt. If you need a color change or topcoat, use a specialized asphalt-compatible paint or wait 30 days for full cure, then apply a barrier coat of epoxy primer before painting. Most trailer owners leave it black.
6. How does asphalt undercoating compare to rubberized or wax-based alternatives?
Asphalt offers superior durability and stone-chip resistance but remains permanently soft. Rubberized coatings dry harder and provide better UV resistance but can crack under flex. Wax-based is easiest to apply but requires reapplication every 2-3 years. For trailers, asphalt’s flexibility and longevity make it the preferred choice.
7. Is pressure washing safe after undercoating application?
Wait a minimum of 7 days before any pressure washing. After full cure, use moderate pressure (under 2,000 PSI) and keep the nozzle at least 12 inches from coated surfaces. Annual pressure washing is actually beneficial to remove salt buildup that can degrade the coating over time.
8. Can I undercoat a galvanized trailer frame?
Yes, but surface preparation is critical. Galvanizing develops a zinc oxide layer that repels asphalt. Etch the surface with a phosphoric acid solution, then rinse thoroughly and apply while still slightly damp to promote adhesion. Test adhesion on a small area first, as some galvanized coatings contain silicon that prevents bonding.
9. What should I do if I get undercoating on my trailer’s brake components?
Immediately wipe brake rotors, drums, and pads with brake cleaner—any residue compromises braking performance. For accidental overspray on rubber brake lines or seals, use mineral spirits sparingly; prolonged contact can degrade rubber. Masking these components before application is far easier than cleaning afterward.
10. Does undercoating affect trailer resale value?
A well-maintained undercoating job significantly enhances resale value, demonstrating proactive maintenance. Document application dates and product used. Conversely, a poorly applied, flaking coating detracts value and signals neglect. Professional application with warranty paperwork adds more value than DIY jobs, particularly for premium trailers.